Oh my goodness, you’re about to discover my absolute favorite party trick – these no-bake Oreo cheesecake cups! I’ve been making these little bites of heaven for years, ever since my best friend Sarah begged me to bring something “easy but showstopping” to her baby shower. That was five years and probably 100 batches ago – now they’re my most requested dessert! The best part? You get all the creamy, dreamy cheesecake flavor with the perfect crunchy Oreo base without ever turning on your oven. Trust me, I’ve made every cheesecake variation under the sun, but there’s something magical about how simple yet impressive these individual cups turn out every single time.
Why You’ll Love These Oreo Cheesecake Cups
Let me count the ways these Oreo cheesecake cups will become your new dessert obsession! First off, they’re ridiculously easy – we’re talking 20 minutes of active time, tops. No oven, no fuss, just pure deliciousness. Here’s why they’ve stolen my heart (and probably will steal yours too):
- No-bake magic: Perfect for when it’s too hot to turn on the oven or when you’re just feeling lazy (no judgment here!).
- Creamy meets crunchy: That velvety cheesecake filling against the crisp Oreo crust? Absolute perfection.
- Party superstar: Individual servings mean no messy slicing – just pop them out and watch them disappear.
- Kid-approved: My nieces and nephews go nuts for these (and let’s be honest, so do the adults).
- Make-ahead dream: They actually taste better after chilling overnight – less stress for you!
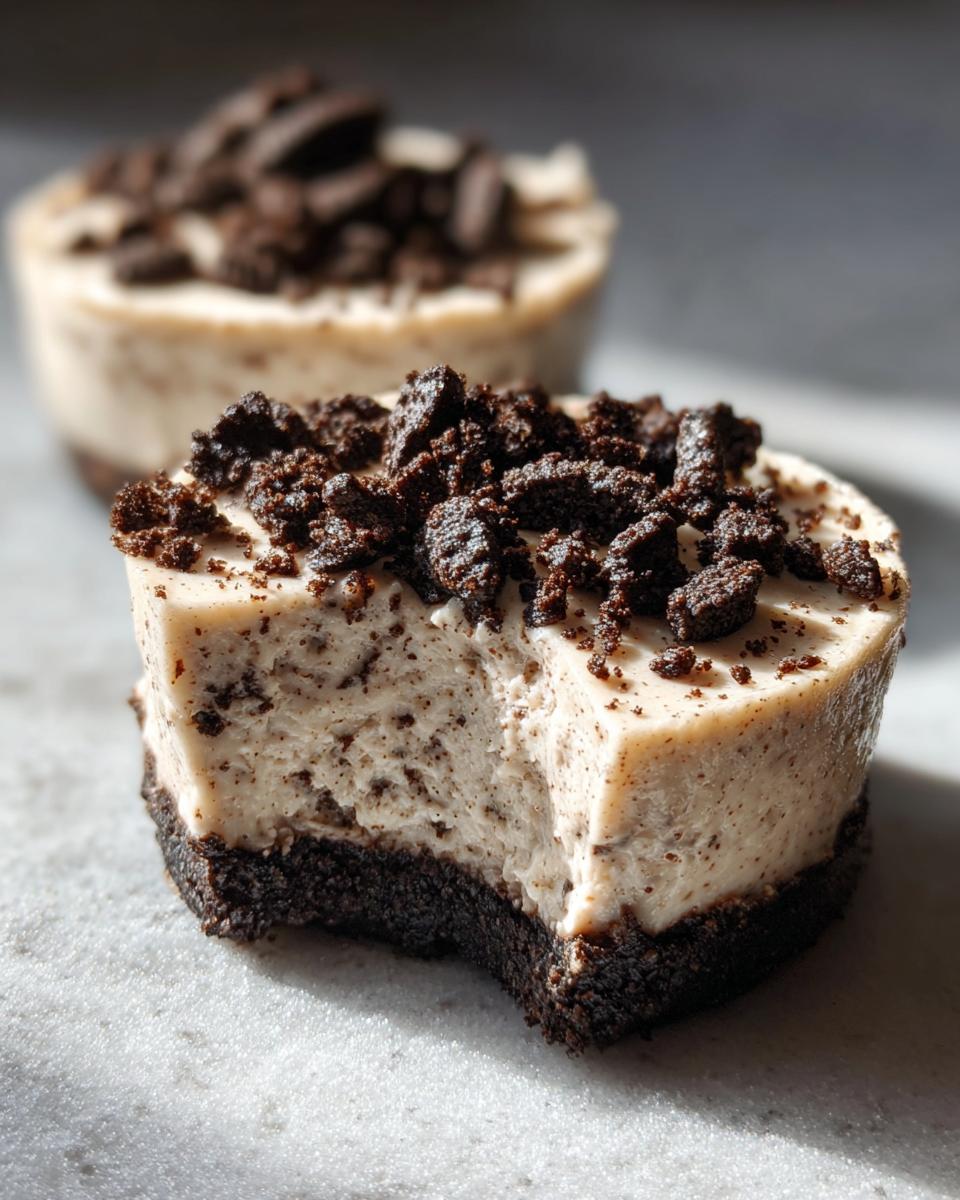
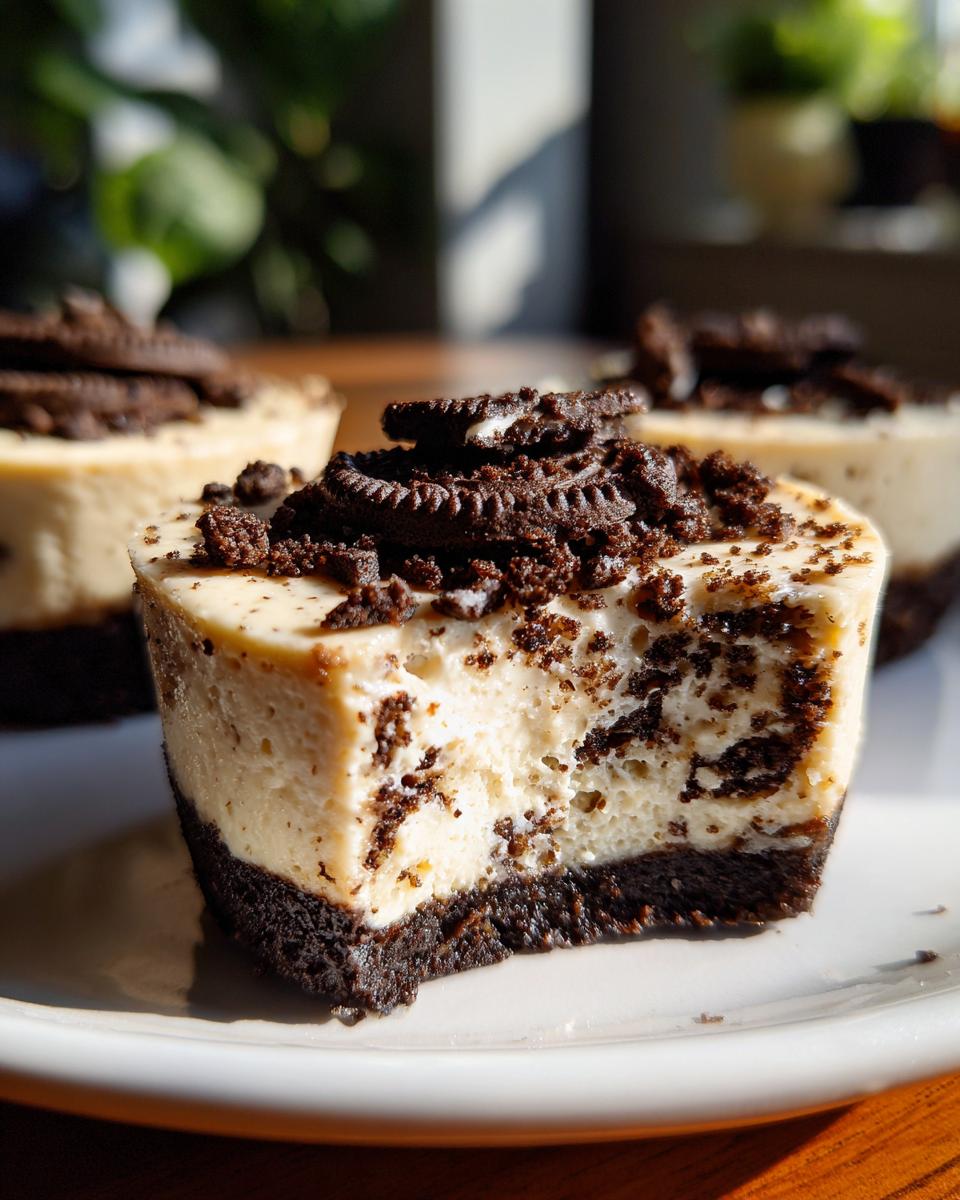
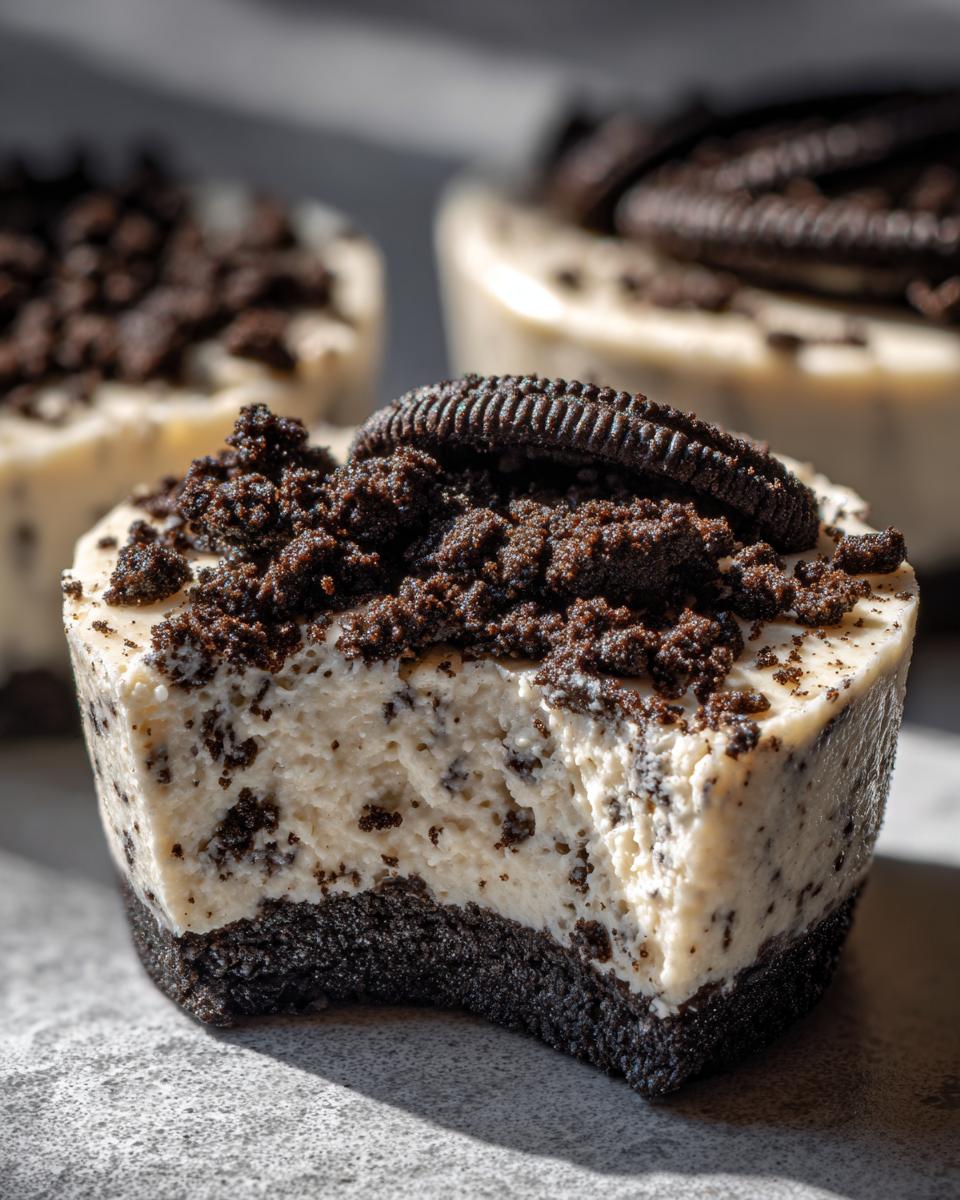
The best part? That gorgeous layered look makes people think you spent hours when really, this Oreo cheesecake cup recipe is almost too easy to be legal!
Ingredients for Oreo Cheesecake Cups
Here’s everything you’ll need to make these irresistible Oreo cheesecake cups – and trust me, don’t skimp on quality here! I’ve learned the hard way that using the right ingredients makes all the difference between “good” and “oh-my-goodness-I-need-another-one” amazing. Here’s your shopping list:
- 24 Oreo cookies (crushed into fine crumbs – I just toss them in a ziplock bag and go to town with a rolling pin)
- 2 tbsp melted butter (salted or unsalted both work – I usually use what’s in my fridge)
- 1 cup heavy cream (chilled – this is KEY for getting those perfect stiff peaks)
- 8 oz full-fat cream cheese (softened – and yes, it MUST be full-fat for that creamy texture we’re after)
- 1/4 cup powdered sugar (sifted if yours is lumpy)
- 1 tsp vanilla extract (the real stuff, not imitation)
- 6 Oreos (crushed, for topping – I like leaving some bigger chunks for texture)
Pro tip from my many trials: that full-fat cream cheese isn’t just a suggestion. The first time I tried making these with low-fat, the filling came out runny and sad. Learn from my mistake!
Equipment You’ll Need for Oreo Cheesecake Cups
Okay, let’s talk tools – and don’t worry, you probably have most of this stuff already! Here’s what you’ll need to whip up these Oreo cheesecake cups:
- Mixing bowls (at least two – I like to chill mine in the freezer beforehand)
- Electric mixer (a hand mixer works perfectly fine)
- Cupcake liners (the pretty foil ones make these extra festive)
- Muffin tin (to hold your liners steady while filling)
- Spatula (for scraping every last bit of that delicious filling)
- Measuring cups (because eyeballing powdered sugar never ends well)
See? Nothing fancy – just basic kitchen essentials you likely already own!
How to Make Oreo Cheesecake Cups
Alright, let’s get to the fun part – making these irresistible Oreo cheesecake cups! I promise, it’s easier than you think, and the results are always worth it. Follow these steps, and you’ll have a crowd-pleasing dessert in no time. Don’t forget to chill your bowls beforehand – it makes a world of difference!
Step 1: Prepare the Oreo Crust
First things first, let’s make that crunchy Oreo crust. Grab your 24 Oreos and crush them into fine crumbs – I use a ziplock bag and a rolling pin, but a food processor works too. Mix the crumbs with 2 tablespoons of melted butter until it looks like wet sand. Then, press the mixture firmly into your cupcake liners. I use the back of a spoon to really pack it down – this keeps the crust from crumbling when you bite into it later.
Step 2: Whip the Cream
Next up, let’s whip that heavy cream into dreamy peaks. Pour your chilled heavy cream into a cold mixing bowl (seriously, chilling the bowl is a game-changer). Use your electric mixer on medium-high speed until stiff peaks form. You’ll know it’s ready when the cream holds its shape when you lift the beaters. Set this aside – we’ll use it in just a minute!
Step 3: Make the Cream Cheese Filling
Now for the star of the show – the cream cheese filling. Beat your softened cream cheese, powdered sugar, and vanilla extract together until smooth and creamy. Then, gently fold in your whipped cream. I like to do this in two batches to keep the mixture light and airy. Be careful not to overmix – we want that fluffy texture!
Step 4: Assemble and Chill
Time to bring it all together! Spoon the cream cheese filling over your Oreo crusts, filling each cup almost to the top. Sprinkle the remaining crushed Oreos on top for that extra crunch. Pop them in the fridge to chill for at least 2 hours – though overnight is even better. Trust me, the wait is worth it!
And there you have it – perfect Oreo cheesecake cups that’ll have everyone asking for the recipe!
Tips for Perfect Oreo Cheesecake Cups
If there’s one thing I’ve learned after making countless batches of these Oreo cheesecake cups, it’s that a few simple tricks can take them from good to absolutely irresistible. First, always use full-fat cream cheese – it makes the filling creamy and stable, not runny. Second, chill your mixing bowls before whipping the cream. Cold bowls = stiff peaks every time. And here’s my secret weapon: make these Oreo cheesecake cups the day before you need them. They set up perfectly overnight, and the flavors meld together beautifully. Oh, and don’t skip pressing the crust firmly into the liners – it keeps everything intact when you bite in. Pro tip: if you’re feeling fancy, drizzle some melted chocolate on top before serving. Trust me, these little touches make all the difference!
Variations for Oreo Cheesecake Cups
Once you’ve mastered the classic Oreo cheesecake cups (which, let’s be honest, are pretty perfect as-is), it’s so fun to play around with variations! My niece Lily loves when I drizzle melted chocolate over the top – just microwave some chocolate chips with a splash of cream and zigzag it over the cups before chilling. For summer parties, I sometimes swap the Oreos for Golden Oreos and add fresh raspberries on top. Peanut butter lovers? Mix 2 tablespoons into the cream cheese filling. The possibilities are endless with these Oreo cheesecake cups – that’s why I make them so often! My latest experiment? Crushing up mint Oreos for a refreshing twist. Whatever variation you try, just remember to keep that creamy-to-crunchy ratio we all love.
Serving and Storing Oreo Cheesecake Cups
Here’s the best part about these Oreo cheesecake cups – they’re practically made for entertaining! I always serve them straight from the fridge – that chill makes the creamy filling extra dreamy against the crisp cookie base. They’ll keep beautifully in the refrigerator for up to 3 days (though let’s be real, they never last that long in my house!). For parties, I actually prefer making my Oreo cheesecake cups the night before – the flavors meld together perfectly with that extra chilling time. Just cover them with plastic wrap or pop them in an airtight container. No reheating needed – just pull them out when guests arrive and watch them disappear!
Nutritional Information for Oreo Cheesecake Cups
Just a heads up – while these Oreo cheesecake cups are undeniably delicious, they’re definitely a treat to enjoy in moderation! Nutritional values can vary depending on the specific ingredients and brands you use, so I don’t provide exact numbers. If you’re watching your intake, feel free to adjust portion sizes or ingredients to suit your needs. Remember, it’s all about balance and enjoying every bite!
FAQs About Oreo Cheesecake Cups
Got questions about these Oreo cheesecake cups? I’ve got answers! After years of making these (and fielding texts from friends who are mid-recipe), here are the most common questions that pop up:
Can I use low-fat cream cheese?
Oh honey, I’ve tried – and trust me, it’s not worth it! Low-fat cream cheese makes the filling too runny. The full-fat version gives that perfect rich, creamy texture that makes these Oreo cheesecake cups so special.
How long do they last in the fridge?
They’ll stay perfect for about 3 days when properly stored in an airtight container. Though in my house, they rarely make it past day one!
Can I freeze Oreo cheesecake cups?
You bet! Freeze them without toppings for up to a month. Just thaw in the fridge overnight and add fresh Oreo crumbs before serving.
Can I make these without a mixer?
While a mixer makes whipping the cream easier, you can absolutely do it by hand – just be prepared for an arm workout! Use a whisk and some elbow grease.
What if my filling seems too soft?
No panic! Just pop the assembled cups in the freezer for 30 minutes before transferring to the fridge. They’ll set up beautifully.
20-Minute Oreo Cheesecake Cups That Wow Every Time
Delicious no-bake Oreo cheesecake cups with a creamy filling and crunchy cookie base.
- Prep Time: 20 minutes
- Cook Time: 0 minutes
- Total Time: 2 hours 20 minutes
- Yield: 12 servings 1x
- Category: Dessert
- Method: No-Bake
- Cuisine: American
- Diet: Vegetarian
Ingredients
- 24 Oreo cookies
- 2 tbsp melted butter
- 1 cup heavy cream
- 8 oz cream cheese (softened)
- 1/4 cup powdered sugar
- 1 tsp vanilla extract
- 6 Oreos (crushed, for topping)
Instructions
- Crush 24 Oreos into fine crumbs.
- Mix crumbs with melted butter.
- Press mixture into cupcake liners.
- Whip heavy cream until stiff peaks form.
- Beat cream cheese, sugar, and vanilla until smooth.
- Fold whipped cream into cream cheese mixture.
- Spoon filling over crusts.
- Top with crushed Oreos.
- Chill for 2 hours before serving.
Notes
- Use full-fat cream cheese for best texture.
- Chill bowls before whipping cream.
- Can be made 1 day ahead.
Nutrition
- Serving Size: 1 cup
- Calories: 280
- Sugar: 18g
- Sodium: 210mg
- Fat: 19g
- Saturated Fat: 10g
- Unsaturated Fat: 7g
- Trans Fat: 0g
- Carbohydrates: 25g
- Fiber: 1g
- Protein: 3g
- Cholesterol: 45mg