My summers growing up were marked by two things: sticky fingers from melting popsicles and the joyful jingle of the ice cream truck. Nothing beat those orange creamsicle bars – that perfect balance of creamy vanilla and bright citrus. Years later, I still chase that nostalgic flavor, and after dozens of test batches (some too tart, some too sweet), I finally nailed it with this no-bake orange creamsicle cheesecake. It’s everything I loved about those childhood treats – refreshing, creamy, and bursting with sunny orange flavor – but in an elegant dessert that comes together shockingly fast. No oven required, just a mixer and a little patience while it chills. Trust me, one bite will transport you right back to those carefree summer days.
Why You’ll Love This No-Bake Orange Creamsicle Cheesecake
Oh, where do I even start? This cheesecake is pure magic. First off—no oven means no sweating over a hot kitchen (perfect for summer!). The texture? Silky smooth, thanks to whipped cream folded into that luscious cream cheese base. And that orange flavor? Bright, sunny, and just sweet enough to remind you of those childhood creamsicles. It’s cool, refreshing, and ridiculously easy—exactly what dessert should be. Plus, it’s a total showstopper without any fuss. Win-win!
Ingredients for No-Bake Orange Creamsicle Cheesecake
Let’s talk ingredients—because quality matters here! You’ll need:
- 2 cups graham cracker crumbs (pack them lightly when measuring—I use the bottom of a measuring cup to press them down)
- 1/2 cup melted butter (salted or unsalted both work, but I prefer salted for that sweet-salty crust)
- 16 oz cream cheese, softened (leave it out for 1-2 hours—no shortcuts here or you’ll get lumps!)
- 1 cup powdered sugar (sifted if yours is clumpy)
- 1 tsp vanilla extract (the real stuff, please)
- 1 cup heavy whipping cream, cold (this is KEY for getting those stiff peaks)
- 1/2 cup orange juice concentrate (thawed—don’t use fresh juice, it’s not concentrated enough)
- 1 tbsp freshly grated orange zest (yes, fresh—that jarred stuff tastes like dust)
See? Simple ingredients, but each one plays a starring role in creating that perfect creamsicle magic.
How to Make No-Bake Orange Creamsicle Cheesecake
Alright, let’s get mixing! This no-bake beauty comes together in just a few simple steps—I promise it’s easier than you think. The secret is taking your time with each layer and letting that fridge work its magic. Grab your springform pan, and let’s do this!
Preparing the Crust
First things first—that buttery graham cracker crust! Mix your crumbs and melted butter until it looks like wet sand (you should be able to pinch it together). Dump it into your pan and press firmly using the bottom of a glass—this keeps it from crumbling later. Get it nice and even across the bottom and about halfway up the sides. Pop this in the fridge while you make the filling—just 10 minutes helps it set.
Making the Filling
Now for the creamy dreamy part! Beat your softened cream cheese until it’s completely smooth—no lumps allowed! Gradually add the powdered sugar and vanilla, scraping the bowl often. In another bowl, whip that cold heavy cream to stiff peaks (when you lift the beaters, peaks should stand straight up). Gently fold the whipped cream into the cream cheese mixture—don’t stir, fold! This keeps it fluffy. Now stir in the orange juice concentrate and zest until just combined. Taste? Yep, that’s creamsicle heaven right there.

Chilling and Serving
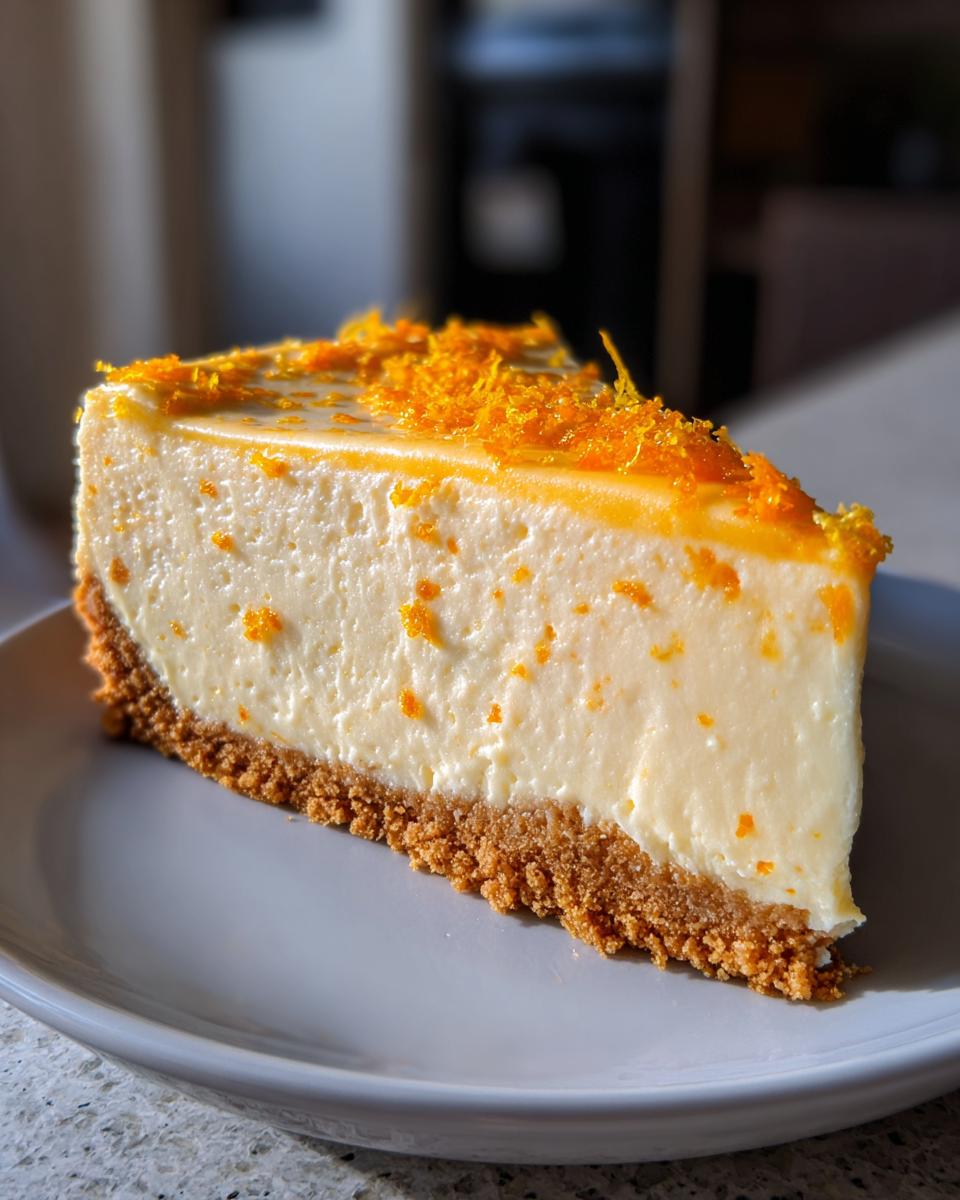
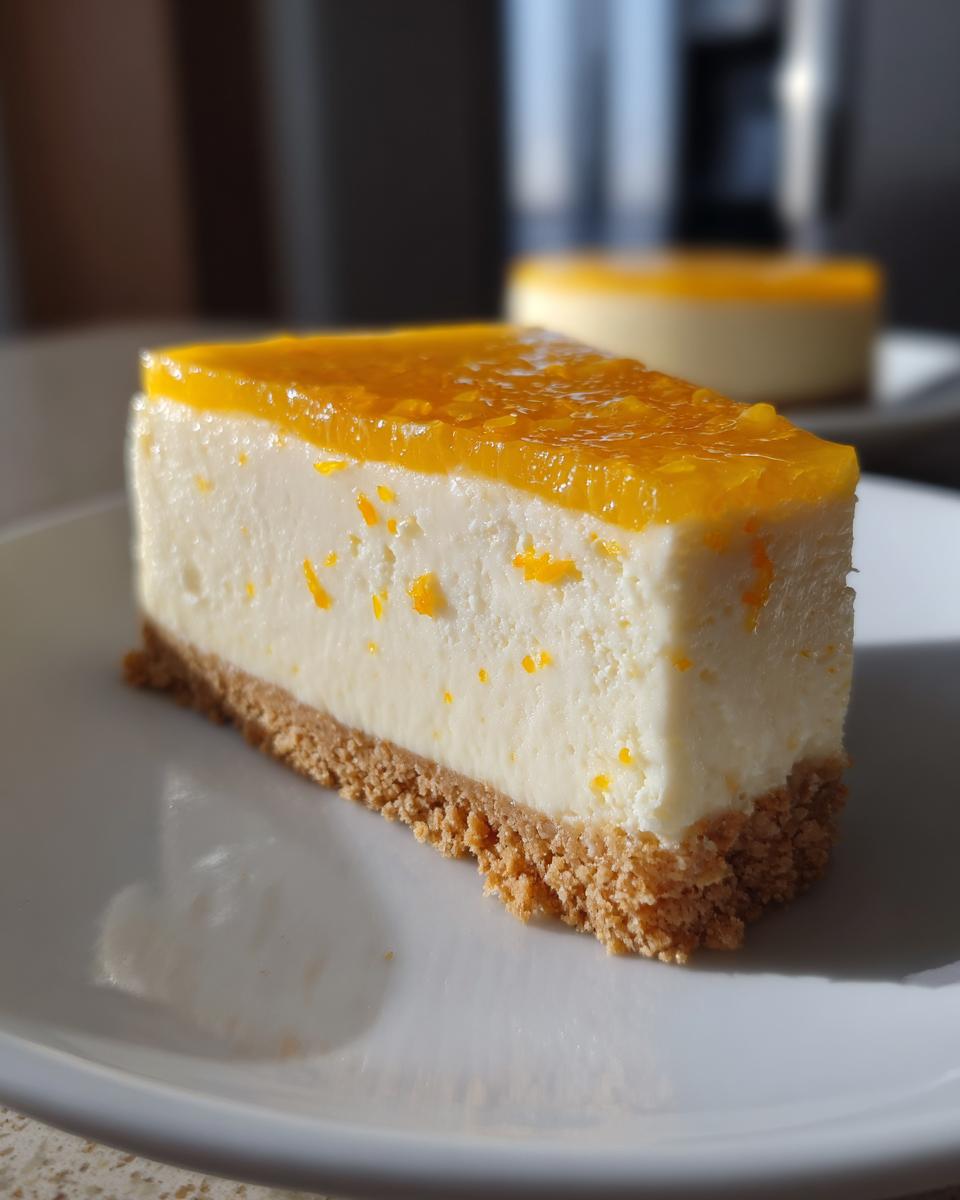
Pour your filling over the chilled crust and smooth the top. Here’s the hardest part—walk away! Let it chill for at least 4 hours (overnight is even better). When you’re ready to serve, run a knife around the edge before releasing the pan. Garnish with extra orange zest for that fresh pop of color and flavor. Slice, serve, and watch those happy creamsicle memories come flooding back!
Tips for the Perfect No-Bake Orange Creamsicle Cheesecake
After making this cheesecake more times than I can count, I’ve learned a few tricks! Always start with cold cream cheese—it whips up smoother. Chill your mixing bowl and beaters before whipping the cream (trust me, it makes all the difference). And whatever you do, don’t overmix once you add the orange—gentle folds keep that dreamy texture. Oh, and resist the urge to peek—that full chill time is non-negotiable for perfect slices!
Variations and Substitutions
Want to mix things up? Swap graham crackers for gluten-free ones or crushed vanilla wafers. For a tropical twist, try lime zest instead of orange (hello, key lime vibes!). Feeling fancy? Fold in melted white chocolate for extra creaminess. This recipe’s a dream to customize—just keep the ratios the same and get creative!
Storing Your No-Bake Orange Creamsicle Cheesecake
Here’s the great news – this cheesecake actually gets better as it sits! Keep it covered in the fridge for up to 3 days (if it lasts that long). Want to freeze it? Wrap individual slices tightly in plastic wrap then foil – they’ll keep beautifully for 2 months. Just thaw overnight in the fridge before serving. Pro tip: Add fresh zest garnish after thawing for that bright, just-made look!
Frequently Asked Questions
Q1: Can I use bottled orange juice instead of concentrate?
Oh honey, I don’t recommend it! The concentrate gives that intense orange flavor without watering down your cheesecake. Bottled juice just doesn’t pack the same punch. In a pinch? Try reducing fresh juice by half on the stove to concentrate it.
Q2: Why did my cheesecake crack?
Don’t panic – cracks happen! Usually it’s from overmixing after adding the orange juice. Gentle folding is key. Also, make sure your cream cheese is truly softened (no microwave shortcuts!) and give it that full chill time – patience makes perfect slices.
Q3: Can I make this ahead for a party?
Absolutely! This cheesecake is actually better the next day. I often make it the night before – the flavors meld beautifully. Just hold off garnishing with fresh zest until right before serving for that bright pop of color.
Q4: Can I freeze leftovers?
You bet! Freeze individual slices wrapped tight in plastic then foil. They’ll keep for 2 months. Thaw overnight in the fridge – though I won’t judge if you sneak a bite straight from the freezer (it’s like creamsicle ice cream!).
Nutritional Information
Here’s the scoop on nutrition for one slice (and let’s be honest, you might have two!): Approximately 420 calories, 32g fat, and 28g sugar. Remember—these are estimates based on my ingredient choices, so your mileage may vary depending on brands used. Always check your specific products if you’re tracking closely!
PrintNo-Bake Orange Creamsicle Cheesecake – 2-Ingredient Nostalgia Magic

A creamy and refreshing no-bake cheesecake with orange creamsicle flavor.
- Prep Time: 20 minutes
- Cook Time: 0 minutes
- Total Time: 4 hours 20 minutes
- Yield: 8 servings 1x
- Category: Dessert
- Method: No-Bake
- Cuisine: American
- Diet: Vegetarian
Ingredients
- 2 cups graham cracker crumbs
- 1/2 cup melted butter
- 16 oz cream cheese (softened)
- 1 cup powdered sugar
- 1 tsp vanilla extract
- 1 cup heavy whipping cream
- 1/2 cup orange juice concentrate
- 1 tbsp orange zest
Instructions
- Mix graham cracker crumbs and melted butter. Press into a 9-inch springform pan.
- Beat cream cheese, powdered sugar, and vanilla until smooth.
- Whip heavy cream until stiff peaks form. Fold into cream cheese mixture.
- Add orange juice concentrate and zest. Mix well.
- Pour filling over crust. Smooth the top.
- Chill for at least 4 hours before serving.
Notes
- Use fresh orange zest for best flavor
- Let cheesecake set properly before slicing
- Store leftovers in refrigerator
Nutrition
- Serving Size: 1 slice
- Calories: 420
- Sugar: 28g
- Sodium: 320mg
- Fat: 32g
- Saturated Fat: 18g
- Unsaturated Fat: 10g
- Trans Fat: 0g
- Carbohydrates: 32g
- Fiber: 1g
- Protein: 5g
- Cholesterol: 95mg