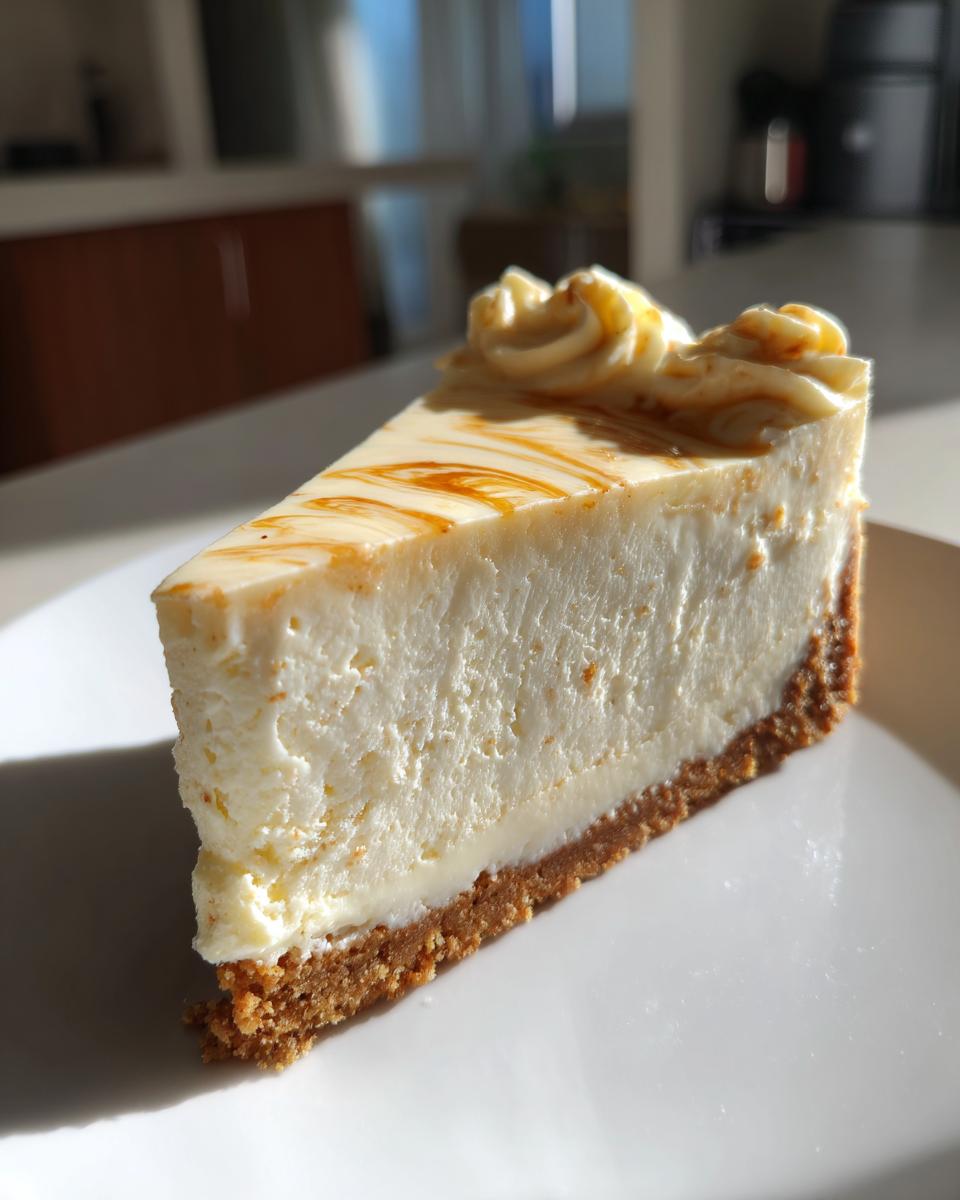
Oh my gosh, you HAVE to try this lotus cheesecake! It’s like regular cheesecake got dressed up in its fanciest floral perfume – delicate, fragrant, and just subtly sweet. I first fell in love with lotus desserts during a trip to Chinatown where I stumbled upon these gorgeous lotus seed mooncakes. The flavor was so unexpectedly beautiful that I raced home determined to recreate that magic in cheesecake form.
After what felt like a million test batches (my neighbors became VERY willing taste testers), I finally nailed it. The secret? Using proper lotus paste – not too much or it overpowers, not too little or you miss that special floral whisper. This recipe gives you that perfect balance where the creamy cheesecake and lotus dance together in each heavenly bite. Trust me, one slice and you’ll be hooked!
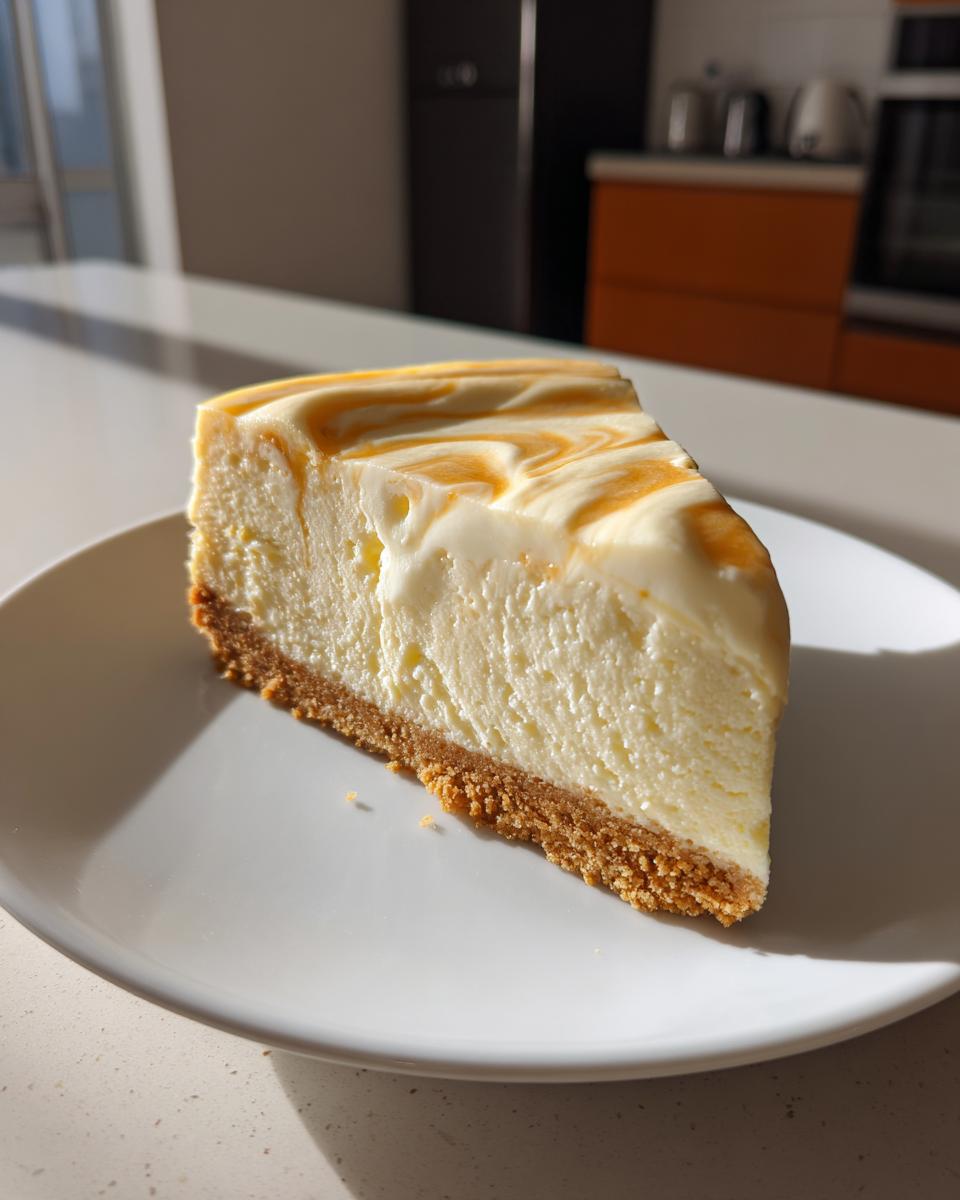
What makes this lotus cheesecake extra special is how the floral notes develop as it chills. That first day it’s delicious, but by day two? Wow – the flavors deepen into something truly magical. It’s become my go-to for birthdays, dinner parties, or honestly… just whenever I need a little floral pick-me-up!
Why You’ll Love This Lotus Cheesecake
Let me tell you why this isn’t just another cheesecake – it’s a total game-changer:
- That dreamy floral aroma – The lotus adds this subtle, almost perfume-like fragrance that makes every bite feel fancy without being overpowering
- Creamier than your average cheesecake – The lotus paste gives it this velvety texture that practically melts on your tongue
- Surprisingly simple to make – No water bath, no complicated techniques, just mix, bake, and wow your guests
- Gets better with time – The flavors deepen beautifully after a day in the fridge (if you can wait that long!)
Honestly? It’s the kind of dessert that makes people think you slaved for hours when really, it comes together with minimal fuss. My secret weapon for impressing guests!
Ingredients for Lotus Cheesecake
Here’s the lineup for this floral beauty – every ingredient matters, so don’t skip the prep notes! I’ve learned the hard way that tiny details make all the difference with cheesecakes.
- 200g lotus paste – Get the good stuff from Asian markets (not too oily), and measure it packed like brown sugar
- 250g cream cheese – MUST be room temp! Cold cream cheese equals lumpy filling – I leave mine out 2 hours
- 2 large eggs – Also at room temp (see the theme here?) to help everything blend smoothly
- 150ml heavy cream – The higher the fat content, the richer your cheesecake will be
- 1 tsp vanilla extract – The real stuff only! It rounds out the floral notes beautifully
- 100g digestive biscuits – Or graham crackers in a pinch, but digestives have that perfect buttery snap
- 50g melted butter – Unsalted so you control the salt level; I use European-style for extra richness
100g sugar – Regular white sugar works best here; it dissolves evenly into the creamy base
See those room temp notes? Not optional! Cold ingredients are the enemy of silky cheesecake filling. I learned that the lumpy way…
Equipment You’ll Need
You won’t need anything fancy, but these basics are non-negotiable for lotus cheesecake success:
- 8-inch springform pan – The removable sides are a lifesaver for perfect slices
- Electric mixer – A hand mixer works great if you don’t have a stand mixer
- Mixing bowls – One for the crust, one for that dreamy filling
- Spatula – For scraping every last bit of that precious lotus filling
- Measuring cups/spoons – Precision matters with cheesecake!
That’s it! No special gadgets required – just good old-fashioned baking essentials.
How to Make Lotus Cheesecake
Alright, let’s get to the fun part – making this floral masterpiece! I’ll walk you through each step with all the little tricks I’ve picked up over countless batches. Trust me, follow these instructions and you’ll have a lotus cheesecake that’s creamy, crack-free, and absolutely divine.
Preparing the Biscuit Base
First things first – that crunchy, buttery foundation that makes every bite heavenly:
- Crush your digestive biscuits until they resemble fine sand (I use a food processor, but a zip-top bag and rolling pin work too – just go to town on them!)
- Mix the crumbs with melted butter until it looks like wet sand – you should be able to press it together and have it hold its shape
- Press firmly into your pan using the bottom of a glass or measuring cup – get it nice and even, especially up the sides about 1 inch
- Pop it in the fridge for 15 minutes to set while you make the filling (no pre-baking needed – the filling bakes right on top!)
Pro tip: If your kitchen’s warm, give the crust 5 minutes in the freezer instead – it’ll hold its shape better when you add the filling.
Mixing the Lotus Cheesecake Filling
Now for the star of the show – that dreamy lotus-infused filling:
- Beat the room temp cream cheese until smooth and creamy – about 2 minutes on medium speed (scrape the bowl well!)
- Gradually add sugar while mixing – go slow to prevent graininess
- Add eggs one at a time, fully incorporating each before adding the next (this prevents overmixing later)
- Now the magic – fold in the lotus paste gently but thoroughly (I like to smush any big lumps against the bowl first)
- Finally, stream in the heavy cream and vanilla with the mixer on low – just until combined (overmixing = cracks!)
Watch for that perfect ribbon texture – when you lift the beater, the batter should flow smoothly but hold its shape briefly before disappearing back into the bowl.
Baking and Cooling
The make-or-break moment! Here’s how to bake it perfectly:
- Pour filling over your chilled crust and smooth the top (give the pan a gentle tap on the counter to release air bubbles)
- Bake at 160°C (320°F) for 40 minutes – it’s done when the edges are set but the center still jiggles slightly
- Turn off the oven, crack the door, and let it cool inside for 30 minutes (this slow cooling prevents shocking the cheesecake)
- Remove from oven and run a knife around the edge to loosen (helps prevent sinking)
- Chill uncovered in the fridge for at least 4 hours – overnight is even better!
Resist the urge to peek while it’s cooling – patience rewards you with that flawless, crack-free top!
Tips for the Perfect Lotus Cheesecake
After making this more times than I can count, here are my hard-won secrets for lotus cheesecake perfection:
- Room temp is non-negotiable – Cold cream cheese will leave you with lumpy sadness. I set mine out 2 hours before baking.
- The jiggle test never lies – When the edges are set but the center wobbles like Jell-O when nudged, it’s done!
- Go easy on the mixer – Overbeating incorporates too much air and leads to cracks. Mix just until combined after adding eggs.
- Want stronger floral flavor? Toast 1 tbsp of lotus seeds (ground to powder) and mix into the crust – wow!
Remember – patience is key. Rushing the cooling process is the number one cause of cheesecake heartbreak!
Serving and Storage Suggestions
Now for the fun part – making your lotus cheesecake look as gorgeous as it tastes! For special occasions, I love decorating with edible dried lotus petals or a drizzle of melted white chocolate. A dusting of matcha powder looks stunning against the pale yellow filling too.
Storage is a breeze – just cover tightly with plastic wrap (press it right against the surface to prevent drying). It keeps beautifully in the fridge for up to 5 days, though let’s be real… mine never lasts that long! For longer storage, slice and freeze portions wrapped in parchment paper for up to 3 months – perfect for sudden cheesecake cravings!
Lotus Cheesecake Variations
Once you’ve mastered the basic recipe, try these fun twists to mix things up – they’re all winners in my book!
- Lotus jelly topping – Simmer 100g lotus paste with 50ml water and 1 tsp agar powder, then pour over chilled cheesecake for a glossy finish
- Matcha marble swirl – Reserve 1/3 cup batter, mix in 1 tsp matcha powder, then swirl through the top before baking
- Black sesame crust – Replace half the digestive biscuits with black sesame powder for an earthy contrast
- Lotus seed brittle – Sprinkle crushed candied lotus seeds on top for irresistible crunch
My personal favorite? The matcha swirl – that earthy green against the pale yellow filling looks almost too pretty to eat! (Almost…)
Nutritional Information
Here’s the scoop on what’s in each heavenly slice! Keep in mind these are estimates – your exact numbers may vary slightly based on specific brands and ingredient sizes. One slice (1/8 of the cake) packs about:
- 320 calories
- 18g fat (10g saturated)
- 30g carbs
- 22g sugar
- 5g protein
Not too shabby for something that tastes this indulgent! Remember – floral cheesecake calories don’t count when shared with friends, right?
Frequently Asked Questions
Over the years, I’ve gotten so many questions about this lotus cheesecake – here are the ones that pop up most often with all my tried-and-true answers!
Can I use fresh lotus roots instead of paste?
Oh gosh, I wish it were that simple! Fresh lotus roots have a totally different texture and flavor profile – they’re crisp and starchy rather than sweet and floral. The paste is actually made from lotus seeds, not roots, and that’s where that magical fragrance comes from. In a pinch, you might find canned sweetened lotus seed paste at some Asian grocers, but the vacuum-packed kind gives the best results.
How do I prevent cracks in my cheesecake?
The heartbreak of cheesecake cracks! After many sad cracked tops myself, here’s what works: Don’t overmix after adding eggs, cool it slowly in the turned-off oven, and resist opening the oven door during baking. If cracks still happen (hey, we’re human!), just cover them with pretty garnishes – I like crushed pistachios or a drizzle of honey!
Can I freeze lotus cheesecake?
Absolutely! I actually keep slices wrapped in parchment paper in my freezer for emergencies (because cheesecake emergencies are totally a thing). Just freeze uncovered for 1 hour first to set the surface, then wrap tightly in plastic. Thaw overnight in the fridge – the texture stays miraculously creamy! Frozen slices keep their magic for about 3 months – not that they’ve ever lasted that long in my house…
Share Your Creation!
I’d LOVE to see your lotus cheesecake masterpiece! Tag me @CheesecakeQueen on Instagram so I can gush over your creation and maybe even feature it!
PrintHeavenly Lotus Cheesecake Recipe – Creamy Floral Bliss in 40 Min

A creamy and delicate cheesecake infused with the subtle floral notes of lotus, perfect for special occasions.
- Prep Time: 20 minutes
- Cook Time: 40 minutes
- Total Time: 5 hours 30 minutes
- Yield: 8 servings 1x
- Category: Dessert
- Method: Baking
- Cuisine: Fusion
- Diet: Vegetarian
Ingredients
- 200g lotus paste
- 250g cream cheese
- 100g sugar
- 2 eggs
- 150ml heavy cream
- 1 tsp vanilla extract
- 100g digestive biscuits
- 50g melted butter
Instructions
- Preheat oven to 160°C (320°F).
- Crush digestive biscuits and mix with melted butter. Press into a cake tin to form the base.
- Beat cream cheese and sugar until smooth. Add eggs one at a time.
- Stir in lotus paste, heavy cream, and vanilla extract until well combined.
- Pour mixture onto the biscuit base and bake for 40 minutes.
- Turn off the oven and leave the cheesecake inside for another 30 minutes.
- Chill in the refrigerator for at least 4 hours before serving.
Notes
- Use room temperature cream cheese for smoother texture.
- For a stronger lotus flavor, increase lotus paste to 250g.
- Cover with foil if the top browns too quickly.
Nutrition
- Serving Size: 1 slice
- Calories: 320
- Sugar: 22g
- Sodium: 180mg
- Fat: 18g
- Saturated Fat: 10g
- Unsaturated Fat: 6g
- Trans Fat: 0g
- Carbohydrates: 30g
- Fiber: 1g
- Protein: 5g
- Cholesterol: 90mg