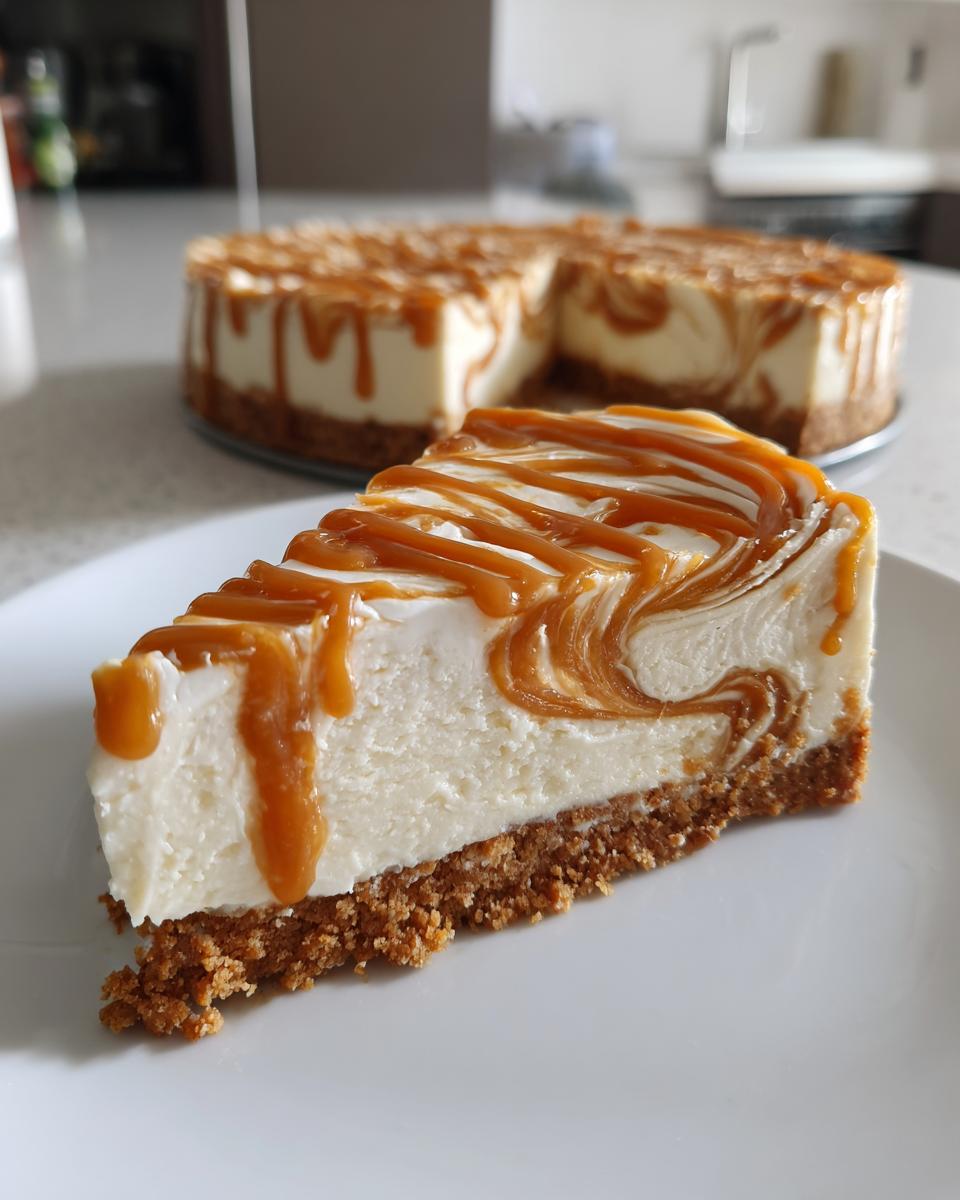
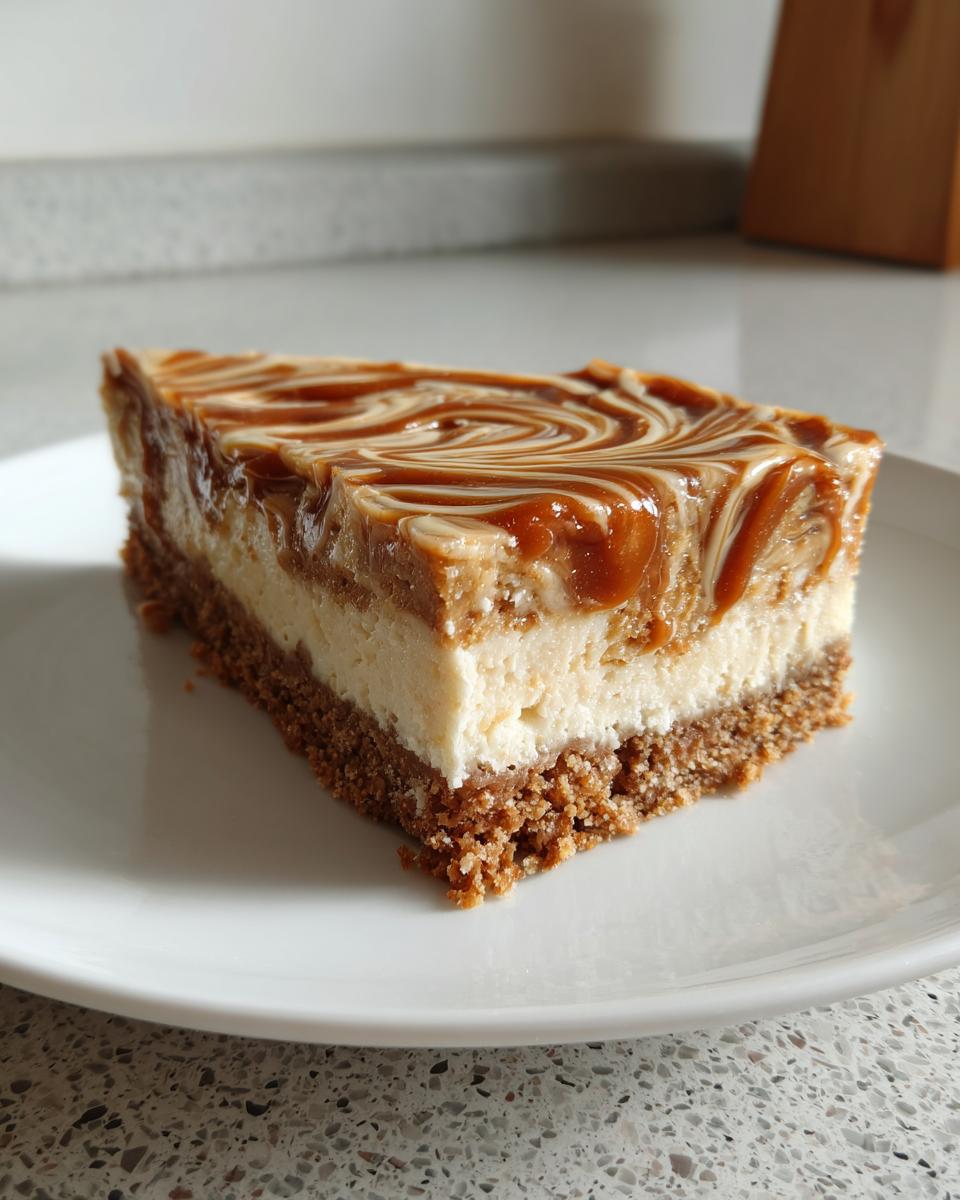
Oh my gosh, you HAVE to try this lotus cheesecake ohne backen rezept – it’s my absolute go-to when I need something impressively delicious but don’t want to turn on the oven! That creamy lotus filling just melts in your mouth, and the crunchy biscuit base? Perfection. I first made this for a last-minute dinner party (because, let’s be honest, I procrastinated), and everyone thought I’d spent hours baking. The magic is in the simplicity – just mix, chill, and devour. Trust me, once you taste that caramelized lotus flavor combined with velvety cream cheese, you’ll be making this no-bake cheesecake on repeat!
Ingredients for Lotus Cheesecake ohne Backen Rezept
Here’s everything you’ll need to whip up this dreamy no-bake cheesecake. I always double-check my ingredients before starting – nothing worse than realizing you’re short on lotus spread mid-recipe!
- 200g Lotus biscuits – crushed into fine crumbs (I use a rolling pin or food processor)
- 100g butter – melted and slightly cooled (salted gives the base extra punch!)
- 500g cream cheese – full-fat and at room temperature (this is KEY for smooth texture)
- 200g Lotus spread – measure this first so you don’t “accidentally” eat half the jar
- 200ml heavy whipping cream – chilled (cold cream whips up fluffier)
- 50g powdered sugar – sifted to avoid lumps
- 1 tsp vanilla extract – the good stuff makes all the difference
That’s it! Just seven simple ingredients standing between you and cheesecake heaven. I like to measure everything out before starting – makes the whole process feel like a relaxing kitchen ritual rather than a mad dash to the fridge.
Equipment You’ll Need
Don’t worry – you won’t need any fancy gadgets for this no-bake beauty! Here’s what I always grab from my kitchen:
- 20cm springform pan – the removable sides make serving so much easier
- Mixing bowls – one large for filling, one medium for the base
- Spatula – for scraping every last bit of that delicious filling
- Measuring cups/spoons – because eyeballing measurements leads to dessert disasters
- Food processor or rolling pin – for crushing those biscuits to perfection
Electric hand mixer – or stand mixer if you’re fancy (but a whisk and strong arms work too!)
That’s seriously all you need! I’ve made this in tiny apartments with barely any equipment – it’s that forgiving. Just make sure your bowl and beaters are clean and dry when whipping the cream, or you’ll be waiting forever for those soft peaks to form.
How to Make Lotus Cheesecake ohne Backen Rezept
Alright, let’s get to the fun part! This no-bake lotus cheesecake comes together in just a few simple steps. The key is taking your time with each layer – trust me, the patience pays off when you slice into that perfect creamy-crunchy masterpiece.
Preparing the Biscuit Base
First things first – let’s make that irresistible crunchy base. I like to put my lotus biscuits in a ziplock bag and go to town with a rolling pin (great stress reliever!). You want fine crumbs with just a few small chunks for texture. Pour them into a bowl and drizzle in the melted butter, mixing until it looks like wet sand.
Now, press this heavenly mixture firmly into your springform pan. I use the bottom of a glass to really pack it down – this prevents crumbling later. Pop it in the fridge for at least 15 minutes. This chilling step is crucial – it helps the base set so it won’t fall apart when you add the filling.
Making the Lotus Filling
While the base chills, let’s make that dreamy lotus filling. In a large bowl, beat the cream cheese until it’s completely smooth – no lumps allowed! Then add the lotus spread, powdered sugar, and vanilla. Keep beating until everything is beautifully combined and silky.
Now for the whipped cream – make sure it’s cold and whip it to soft peaks. Gently fold it into the lotus mixture in two batches. This is where you need a light touch – overmixing will deflate all that air we worked so hard to incorporate. The filling should be thick but still fluffy, like a cloud of caramelized biscuit goodness.
Assembling and Chilling
Time to bring it all together! Take your chilled base from the fridge and spoon the filling over it. Smooth the top with a spatula – don’t worry about perfection, those little swirls look charming. Now comes the hardest part… waiting!
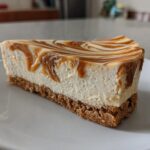
Chill the cheesecake for at least 4 hours, but overnight is even better. This setting time is non-negotiable – it allows all the flavors to meld and the texture to firm up properly. When you can’t stand the anticipation any longer, run a knife around the edge before releasing the springform. Sprinkle with extra lotus crumbs for that bakery-worthy finish!
Tips for the Perfect Lotus Cheesecake ohne Backen Rezept
After making this no-bake lotus cheesecake more times than I can count (okay fine, maybe I have a problem), I’ve learned all the little tricks that take it from good to mind-blowing. Here are my hard-earned secrets:
Full-fat cream cheese is non-negotiable. I know, I know – we’re all trying to be healthy. But trust me, the lower-fat versions will leave your filling grainy and sad. Room temperature is key too – cold cream cheese will give you lumps that even vigorous mixing can’t fix.
Taste as you go with the lotus spread! Some jars are sweeter than others. I usually start with 150g and add more until it’s just right. Remember, you can always add but you can’t take away. If you overdo it, a pinch of salt can balance things out beautifully.
Chill your mixing bowl and beaters before whipping the cream. I pop mine in the freezer for 10 minutes – cold tools make the cream whip up faster and hold its shape better. Watch for soft peaks that just barely hold their shape when you lift the beater.
Patience with chilling time is everything. I’ve made the mistake of trying to slice it after just 2 hours (I was desperate, okay?). The result? A delicious but messy puddle. Four hours minimum, but overnight is truly magical. The flavors develop and the texture becomes perfectly sliceable.
For clean slices, dip your knife in hot water and wipe it clean between cuts. This little trick gives you those picture-perfect wedges that would make any bakery proud. And if the first slice is messy? Well, that’s just the chef’s treat!
Variations of Lotus Cheesecake ohne Backen Rezept
Oh, the fun doesn’t stop with the basic recipe! Once you’ve mastered the classic version, try these delicious twists that’ll make your lotus cheesecake even more special. I love experimenting with different flavors – sometimes just for fun, other times because I’ve “accidentally” eaten half the lotus spread before starting (oops!).
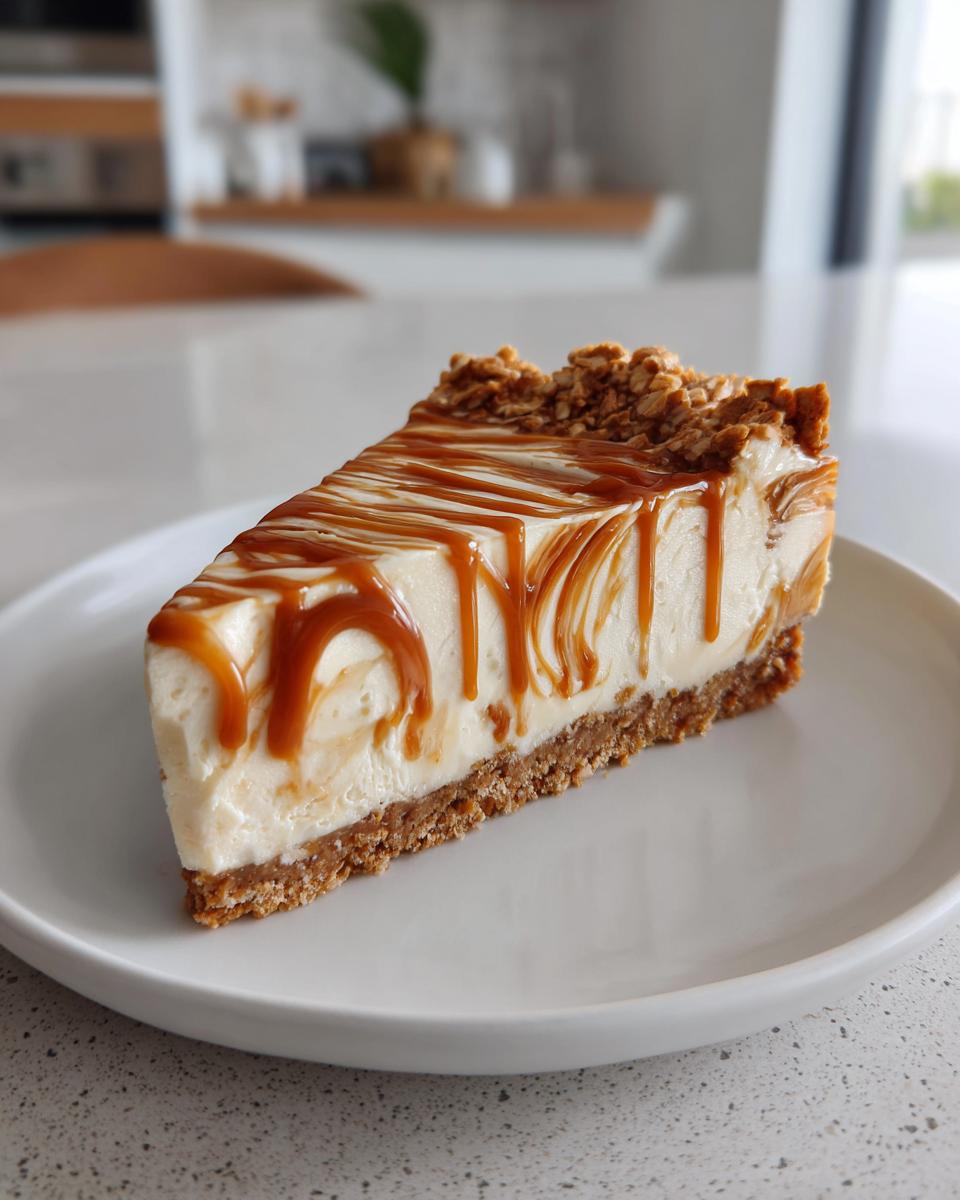
Caramel Drizzle: Take it over the top by warming some extra lotus spread and drizzling it over the chilled cheesecake. The contrast between the cool filling and warm caramel is heavenly. For extra crunch, sprinkle some sea salt flakes on top – sweet and salty perfection!
Chocolate Lovers’ Dream: Melt dark chocolate and swirl it into the filling before chilling. Or for a simpler version, just sprinkle chocolate shavings over the top. My personal favorite? Crushed lotus biscuits mixed with cocoa powder in the base for a double-chocolatey crunch.
Fruit Swirl: When summer berries are in season, I’ll often puree some raspberries or strawberries and gently swirl them through the filling. The tart fruit cuts through the richness beautifully. Just don’t add too much or it’ll make the cheesecake too soft.
Espresso Kick: Dissolve 2 teaspoons of instant espresso powder in 1 tablespoon of hot water, let it cool, then mix it into the filling. The coffee enhances the caramel notes of the lotus spread without overpowering it. Perfect for serving at brunch!
Biscoff Base Alternative: If you can’t find lotus biscuits, don’t panic! Biscoff cookies make an excellent substitute for the base. The flavor’s slightly different but equally delicious. Just keep the same 200g biscuit to 100g butter ratio.
The best part? You can mix and match these ideas! Last Christmas I did a chocolate base with espresso filling and caramel drizzle – let’s just say it disappeared embarrassingly fast. Whatever variation you choose, remember the golden rule: always do a taste test before serving… you know, for quality control!
Serving Suggestions
Now for my favorite part – making this no-bake lotus cheesecake look as incredible as it tastes! I love dressing it up differently depending on the occasion. Here are my go-to serving ideas that always impress:
The Classic: A simple dusting of crushed lotus biscuits on top never fails. For extra crunch, I’ll sprinkle some around the plate too. It’s elegant yet effortless – perfect for when you want that “I totally didn’t spend hours on this” look (even though it only took 20 minutes of actual work).
Afternoon Tea Perfection: Slice it thin and serve with strong coffee or chai tea. The spices in the tea complement the caramelized lotus flavor beautifully. I sometimes add a dollop of whipped cream on the side – because why not?
Dinner Party Wow Factor: Drizzle plates with melted lotus spread and place a slice on top. Garnish with fresh berries and a mint leaf. The red against that creamy filling? Stunning. Pro tip: warm your serving knife under hot water for cleaner slices when plating.
Kids’ Version: Cut into small squares and top with a tiny biscuit standing upright in each piece. My niece calls these “cheesecake lollipops” and they’re always the first dessert to disappear at family gatherings.
Honestly? This cheesecake is so good it doesn’t need much dressing up. Sometimes I just grab a fork and eat it straight from the pan (don’t judge me). But when I want to get fancy, these simple touches take it from delicious to “when are you making this again?” territory!
Storage & Reheating
Okay, let’s talk about storing this glorious lotus cheesecake – though let’s be real, leftovers are rare in my house! When you do manage to save some (impressive self-control there), here’s how to keep it tasting fresh:
Fridge is your friend: Cover the cheesecake with plastic wrap or transfer slices to an airtight container. It’ll stay perfect for up to 5 days – the flavors actually get better after a day or two. Just make sure your fridge isn’t too cold or the texture might get overly firm.
The great freezing debate: I don’t recommend freezing the whole cheesecake – the filling changes texture and gets slightly grainy when thawed. But! If you must freeze it (maybe you’re preparing ahead?), wrap individual slices tightly in plastic wrap then foil. Thaw overnight in the fridge when ready to eat.
Room temperature trick: Take your cheesecake out of the fridge about 15 minutes before serving. That slight warming brings out all those amazing lotus flavors and gives you that dreamy creamy texture again. Just don’t leave it out too long – nobody wants melty cheesecake!
Reviving leftovers: If your cheesecake has dried out slightly (how?!), drizzle a little warm milk or cream over your slice. It’ll soak in and bring back that lush texture. Or crumble it over ice cream for instant cheesecake sundaes – my favorite “oops I left it too long” solution!
Remember, no-bake cheesecakes are always best fresh, but with these storage tips, you can enjoy your lotus masterpiece for days. Not that it’ll last that long…
Nutritional Information
Okay, let’s talk numbers – but remember, we’re here for joy, not judgment! This no-bake lotus cheesecake is definitely an indulgence, but life’s too short not to enjoy dessert. Here’s the estimated nutritional breakdown per slice (based on 8 servings):
- Calories: 420 (worth every single one!)
- Fat: 32g (mostly from that glorious cream cheese and lotus spread)
- Saturated Fat: 18g
- Carbohydrates: 38g
- Sugar: 28g (the lotus spread brings most of this)
- Protein: 6g (surprisingly decent for a dessert!)
- Fiber: 1g
A quick disclaimer – these values can vary based on exact ingredients and portion sizes. Using low-fat cream cheese or sugar substitutes will change the numbers (but might sacrifice that perfect texture). I always say – if you’re going to indulge, do it properly with the real deal!
For context, one slice is about equivalent to… well, let’s not think about that. Just enjoy every creamy, caramel-spiced bite guilt-free. Life needs balance, and this cheesecake is absolutely part of mine! Remember – you’re not eating the whole cake (probably), and sharing is caring (though I won’t judge if you don’t).
Frequently Asked Questions
Q1. Can I use something else if I can’t find Lotus spread?
Oh honey, I’ve been there! If you’re in a pinch, Biscoff cookie butter works beautifully as a substitute – the flavor’s slightly different but just as delicious. Some readers have had success with homemade versions (blend lotus biscuits with oil until smooth), but honestly? The real deal is worth tracking down. Check international food aisles or online shops if your local store doesn’t carry it.
Q2. Help! My cheesecake isn’t setting – what went wrong?
First, don’t panic! This usually happens if the cream wasn’t whipped enough or the chilling time got cut short. Pop it back in the fridge for another few hours. Next time, make sure your cream forms soft peaks and your fridge is cold enough (below 4°C). Also – no cheating on that full-fat cream cheese! The low-fat stuff just won’t set properly.
Q3. Can I make this ahead for a party?
Absolutely! In fact, it tastes even better the next day. I often make it 24 hours before serving – just keep it covered in the fridge. The flavors develop beautifully, and you’ll avoid that last-minute dessert stress. Bonus: more time to lick the bowl clean!
Q4. Is there a way to speed up the chilling process?
I feel your impatience! While overnight chilling is ideal, you can pop it in the freezer for 1-2 hours in a pinch (no longer, or it’ll freeze solid!). Just transfer to the fridge 30 minutes before serving to soften slightly. But trust me – good things come to those who wait!
Q5. My base keeps crumbling – any tips?
Ah, the classic biscuit base struggle! The key is pressing it down FIRMLY with something flat (I use a measuring cup). Also, don’t skip that 15-minute fridge rest before adding filling. If all else fails, add an extra tablespoon of melted butter – it’s the edible glue that holds our dreams together!
Irresistible Lotus Cheesecake ohne Backen Rezept in 7 Simple Steps
A simple no-bake lotus cheesecake recipe with a biscuit base and creamy lotus filling.
- Prep Time: 20 mins
- Cook Time: 0 mins
- Total Time: 4 hrs 20 mins
- Yield: 8 servings 1x
- Category: Dessert
- Method: No-Bake
- Cuisine: International
- Diet: Vegetarian
Ingredients
- 200g lotus biscuits (crushed)
- 100g melted butter
- 500g cream cheese
- 200g lotus spread
- 200ml whipped cream
- 50g powdered sugar
- 1 tsp vanilla extract
Instructions
- Mix crushed lotus biscuits with melted butter.
- Press the mixture into a cake tin to form the base.
- Refrigerate the base for 15 minutes.
- Beat cream cheese, lotus spread, powdered sugar, and vanilla until smooth.
- Fold in whipped cream gently.
- Spread the filling over the biscuit base.
- Chill for at least 4 hours or overnight.
- Decorate with extra lotus crumbs before serving.
Notes
- Use full-fat cream cheese for best texture.
- Chilling time is key for a firm cheesecake.
- Adjust sugar based on your preference.
Nutrition
- Serving Size: 1 slice
- Calories: 420
- Sugar: 28g
- Sodium: 320mg
- Fat: 32g
- Saturated Fat: 18g
- Unsaturated Fat: 10g
- Trans Fat: 0g
- Carbohydrates: 38g
- Fiber: 1g
- Protein: 6g
- Cholesterol: 85mg