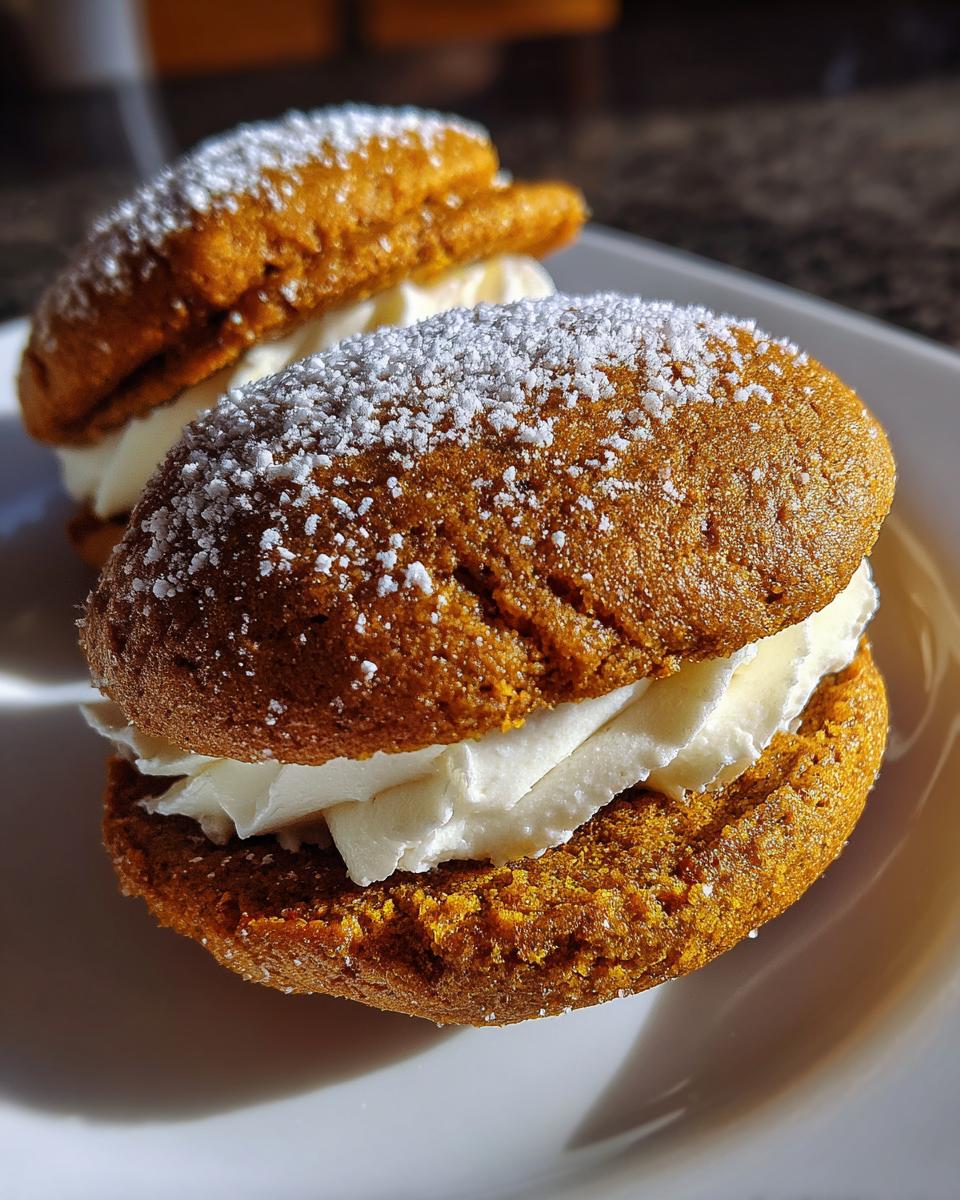
There’s something magical about fall baking—the spices, the cozy aromas, the way everything tastes just a little better when there’s a chill in the air. My gluten-free pumpkin whoopie pies became a happy accident a few years back when my best friend (who can’t eat gluten) came over craving something pumpkin-y. I wanted to make her something special, and after a few messy attempts, we landed on these soft, spiced little clouds of joy. Now they’re our go-to autumn treat—so good, no one even notices they’re gluten-free! The secret? A tender pumpkin cookie with just the right amount of chew, sandwiched with creamy filling that melts in your mouth. Trust me, one bite and you’ll be swapping your regular dessert rotation for these.
Why You’ll Love These Gluten-Free Pumpkin Whoopie Pies
Let me tell you why these whoopie pies are about to become your new fall obsession:
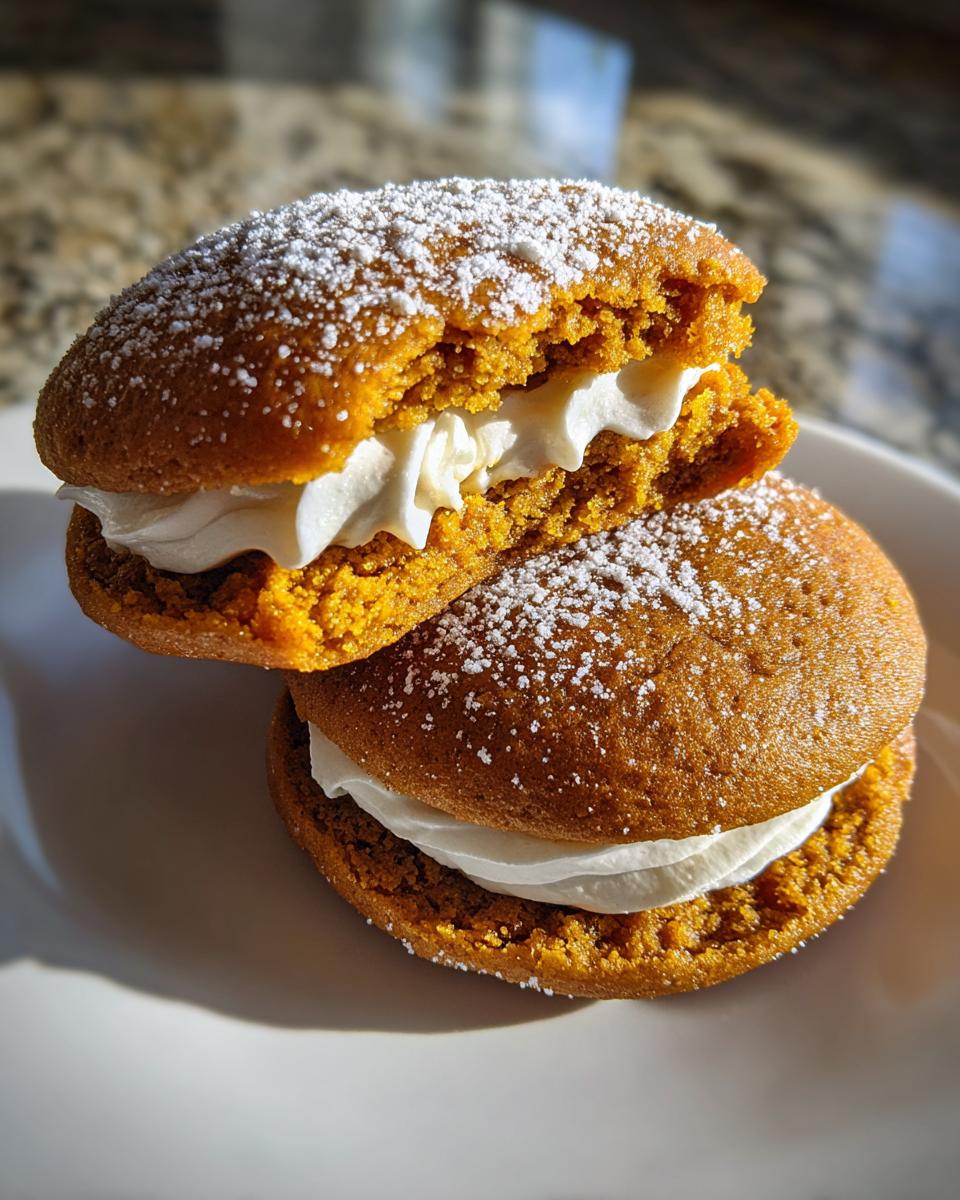
- Cloud-soft texture: That perfect balance between cakey and chewy – they practically melt in your mouth
- Surprisingly simple: Just mix, scoop, and bake – no fancy techniques needed
- Holiday hero: They look festive on any dessert table (and disappear fast at parties)
- Naturally gluten-free: So everyone can enjoy them, no “special diet” apologies needed
I’ve made these for years, and they never fail to get that “Wait, these are gluten-free?!” reaction – the highest compliment!
Ingredients for Gluten-Free Pumpkin Whoopie Pies
Gather these simple ingredients and you’re halfway to pumpkin perfection! I’ve divided everything into two parts because, let’s be honest, the filling is just as important as the cookies themselves. Pro tip: measure everything before you start – it makes the whole process go so much smoother.
For the Pumpkin Pies
Dry Ingredients:
- 1 cup gluten-free flour blend (my favorite is the one with xanthan gum already added)
- 1/2 tsp baking powder (make sure it’s fresh!)
- 1/2 tsp baking soda
- 1 tsp pumpkin pie spice (or make your own blend – I’ll share my secret ratio later)
- 1/4 tsp fine sea salt
Wet Ingredients:
- 1/2 cup pumpkin puree (not pumpkin pie filling – big difference!)
- 1/4 cup packed brown sugar (press it down in your measuring cup)
- 1/4 cup granulated sugar
- 1/4 cup vegetable oil (or melted coconut oil if you’re feeling fancy)
- 1 large egg (room temperature works best)
- 1 tsp pure vanilla extract (the good stuff makes all the difference)
For the Cream Cheese Filling
This filling is what makes people go back for seconds (and thirds). The key is everything at room temperature – I can’t stress this enough unless you want lumpy filling!
- 4 oz cream cheese, softened (leave it out for at least 30 minutes)
- 2 tbsp unsalted butter, softened
- 1 cup powdered sugar (sift it if you’re extra particular)
- 1/2 tsp vanilla extract
Equipment You’ll Need
Don’t worry – you won’t need any fancy gadgets for these whoopie pies! Just gather these kitchen basics (I bet you already have most of them):
- 2 mixing bowls – one for dry ingredients, one for wet (medium size works perfectly)
- Baking sheet – standard half-sheet pan is ideal for 12 cookies at once
- Parchment paper – trust me, this beats greasing the pan (no sticking disasters!)
- Electric mixer – handheld works great for the filling, though a sturdy spoon will do in a pinch
- Measuring cups & spoons – for accurate amounts of all those yummy ingredients
- Cookie scoop (or tablespoon) – helps make uniform cookie shapes (mine’s about 1.5 tbsp size)
That’s it! See? I told you this was simple. Now let’s get baking!
How to Make Gluten-Free Pumpkin Whoopie Pies
Okay, here’s where the magic happens! I’ve made these so many times I could probably do it in my sleep, but I’ll walk you through each step so yours turn out perfect on the first try. Just follow along – you’ll be amazed how easy it is!
Preparing the Dough
First things first – preheat that oven to 350°F and line your baking sheet with parchment paper. No parchment? No problem! Just give the pan a light greasing, though I find the cookies release better with parchment.
Now grab your dry ingredients bowl (the one with flour, baking powder, etc.) and give it a good whisk. You want everything evenly distributed – no clumpy baking soda surprises! In your second bowl, mix all the wet ingredients. Here’s my trick: I like to beat the egg first, then add the sugars and beat until it looks creamy before adding the pumpkin, oil, and vanilla. It makes for a smoother batter.
Time to combine them! Add the dry ingredients to the wet in two batches, mixing just until combined after each addition. Overmixing is the enemy here – we want tender whoopie pies, not tough ones. The dough should be thick but scoopable, like a cross between cookie dough and cake batter.
Baking and Cooling
Now the fun part – scooping! Use your tablespoon or cookie scoop to drop rounds of dough onto the prepared sheet, spacing them about 2 inches apart. They’ll spread a bit as they bake. Pro tip: dip your scoop or spoon in water between scoops – the dough won’t stick as much!
Pop them in the oven for 10-12 minutes. You’ll know they’re done when the edges look set and the tops spring back slightly when gently pressed. Don’t wait for them to brown – that means they’re overbaked! Let them cool on the pan for 5 minutes (they’re too delicate to move right away), then transfer to a rack to cool completely. This is crucial – warm cookies + filling = messy disaster!
Assembling the Whoopie Pies
While those beauties cool, make your filling. Beat the softened cream cheese and butter together first until smooth – this prevents lumps. Gradually add the powdered sugar and vanilla, beating until light and fluffy. If it seems too soft, pop it in the fridge for 15 minutes.
Now for the best part! Turn half your cooled cookies upside down. Spread or pipe about 1 tablespoon of filling on each (I use a small cookie scoop for this too). Gently press a second cookie on top, making a little sandwich. Give it a slight twist to help the filling spread evenly to the edges. Voila! You’ve made whoopie pies!
Resist the urge to eat them immediately – letting them sit for about 30 minutes lets the flavors meld beautifully. Though if you sneak one warm, I won’t tell!
Tips for Perfect Gluten-Free Pumpkin Whoopie Pies
After making dozens (okay, maybe hundreds) of these whoopie pies, I’ve learned all the little tricks that make them absolutely foolproof. Here are my top tips to ensure yours turn out bakery-perfect every single time:
- Chill that filling! If your cream cheese mixture seems too soft after mixing, just pop it in the fridge for 15-20 minutes. It’ll firm right up and be so much easier to handle when assembling. I’ve definitely learned this the messy way!
- Flour measuring matters. With gluten-free baking, precision is key. Spoon your flour blend into the measuring cup and level it off – no scooping directly from the bag! Too much flour makes dry, crumbly cookies, and nobody wants that.
- Room temp eggs are your friends. Cold eggs can make your batter separate and look curdled. Just take your egg out when you set out the cream cheese and butter – about 30 minutes before baking does the trick.
- Let them cool completely. I know it’s tempting, but resist assembling warm cookies! The filling will melt and make a gooey mess (trust me, been there). Wait until you can comfortably handle the cookies – about 30 minutes should do it.
One extra little secret? These actually taste even better the next day! The flavors have time to mingle, and the texture gets even more perfect. But I won’t blame you if you can’t wait that long – they’re pretty irresistible fresh too!
Variations and Substitutions
One of the best things about these gluten-free pumpkin whoopie pies is how adaptable they are! Whether you’re dealing with food allergies or just want to switch things up, here are my favorite ways to tweak the recipe without sacrificing that delicious flavor and texture:
- Oil options: I often use melted coconut oil instead of vegetable oil for a subtle tropical twist. Just make sure it’s cooled slightly before mixing in so it doesn’t cook the egg! For a richer flavor, try half melted butter (though the cookies will spread a bit more).
- Dairy-free delight: Easily make these vegan by using dairy-free cream cheese and butter alternatives (I like the soy-based ones). For the egg, a flax egg (1 tbsp ground flax + 3 tbsp water) works surprisingly well – just let it gel for 5 minutes first.
- Spice it up: Out of pumpkin pie spice? No worries! Mix up your own with 1/2 tsp cinnamon, 1/4 tsp ginger, 1/8 tsp nutmeg, and 1/8 tsp allspice. Feeling adventurous? Add a pinch of cardamom for a warm, exotic note.
Just remember – gluten-free baking can be a bit finicky, so I recommend only changing one ingredient at a time until you get the hang of how substitutions affect the texture. But half the fun is experimenting to make these whoopie pies your own signature treat!
Storing and Serving Suggestions
Now that you’ve made these gorgeous gluten-free pumpkin whoopie pies, let’s talk about keeping them fresh and serving them at their absolute best. I learned the hard way that whoopie pies can go from perfect to soggy if stored wrong – but don’t worry, I’ve got you covered with all my trial-and-error wisdom!
Storage Secrets: These babies will stay fresh in an airtight container at room temperature for about 3 days (if they last that long!). Layer them between parchment paper so they don’t stick together. In hot weather, I pop the container in the fridge – the filling stays firmer that way. Just let them come to room temp before serving for the best texture.
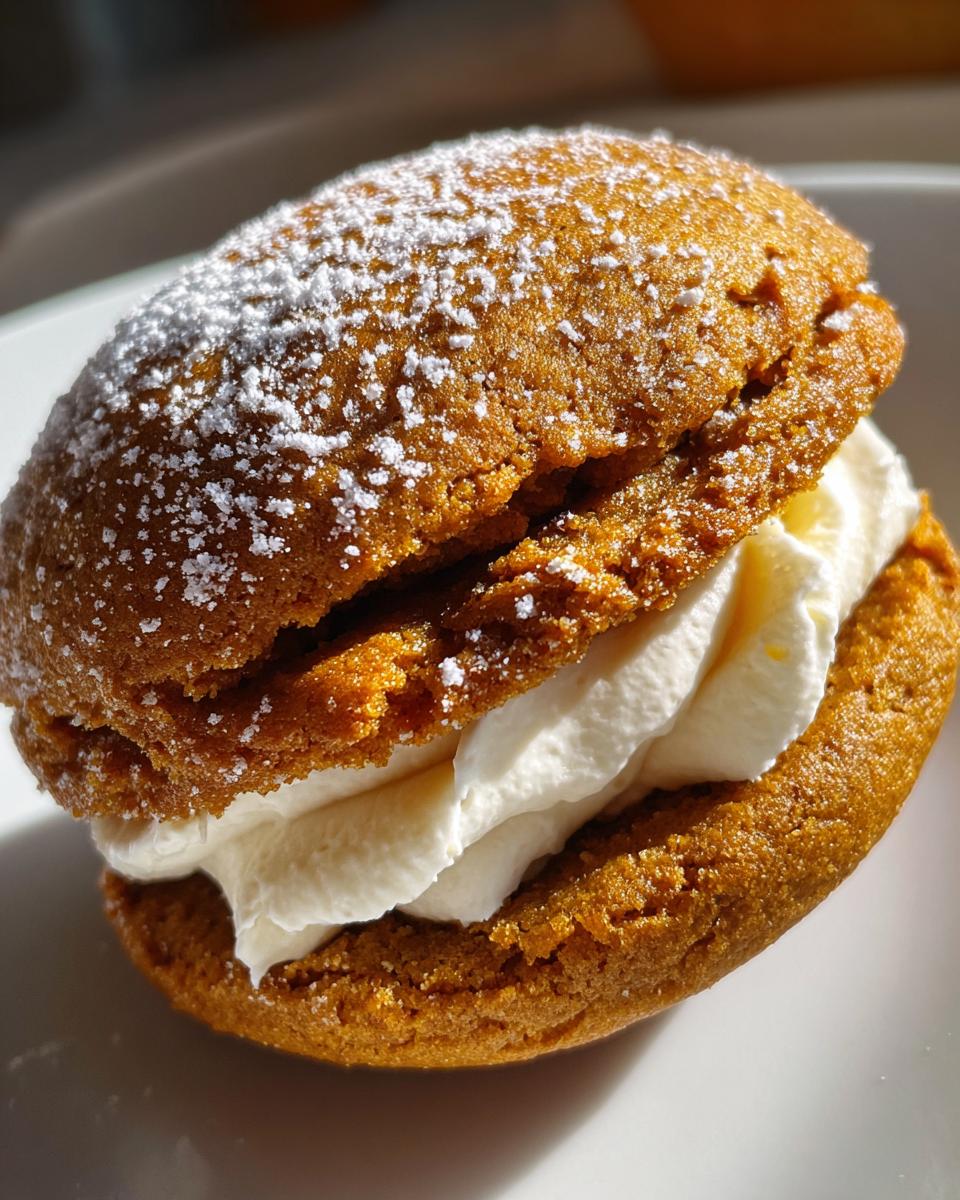
Serving Perfection: These whoopie pies shine brightest at room temperature when all those pumpkin spices can really sing. For a special touch, dust them lightly with cinnamon or pumpkin pie spice right before serving – it makes them look so fancy with zero effort!
Perfect Pairings: Oh my goodness, they’re heavenly with a hot cup of coffee or spiced cider – the warmth really brings out the pumpkin flavor. For a real treat, serve them with a scoop of vanilla ice cream on the side (just sandwich it between the cookies for an over-the-top whoopie pie ice cream sandwich!).
One last pro tip: these actually freeze beautifully! Just wrap each whoopie pie individually in plastic wrap, then store in a freezer bag for up to 2 months. Thaw at room temperature when the craving strikes – it’s like having fall in your pocket whenever you want it!
FAQ About Gluten-Free Pumpkin Whoopie Pies
I get asked about these pumpkin whoopie pies all the time – turns out I’m not the only one obsessed! Here are answers to the questions that pop up most often from friends (and total strangers who’ve tasted them and immediately demanded the recipe!):
Can I freeze these whoopie pies?
Absolutely! They freeze like a dream. Here’s how I do it: let them cool completely after assembling, then wrap each one tightly in plastic wrap (this prevents freezer burn). Pop them in a freezer bag, squeeze out the air, and they’ll keep beautifully for up to 2 months. When the craving hits, just thaw at room temperature for about an hour – good as fresh! Pro tip: freeze them before the 3-day mark for best quality.
What’s the best gluten-free flour blend to use?
After testing so many blends, my gold standard is a measure-for-measure flour that already contains xanthan gum (like King Arthur or Bob’s Red Mill). The xanthan gum mimics gluten’s binding properties – crucial for preventing crumbly cookies! If your blend doesn’t have it, add 1/4 tsp per cup of flour. Avoid straight almond or coconut flour here; they’re too dense. Stick with rice-based blends for that perfect tender-chewy texture.
Can I use fresh pumpkin instead of canned?
You can, but hear me out – canned pumpkin is actually more consistent for baking! Fresh pumpkin tends to be more watery, which throws off the dough’s moisture balance. If you’re set on fresh, roast and puree sugar pumpkin (not carving pumpkin!), then strain it through cheesecloth to remove excess liquid. You’ll need about 1/2 cup of thick puree per batch. Honestly though? Libby’s canned pumpkin has never failed me – and no peeling required!
There you have it – all my hard-won whoopie pie wisdom! Any other questions? Just ask – I could talk about these little pockets of pumpkin joy all day long.
Nutritional Information
Okay, let’s talk numbers – but remember, these are just estimates based on the exact ingredients I use. Your mileage may vary depending on brands and any tweaks you make (not that I’m judging – I tweak recipes all the time!). Here’s the scoop on what’s in these delightful gluten-free pumpkin whoopie pies:
- Calories: About 180 per whoopie pie (but totally worth every one!)
- Sugar: 15g (mostly from the natural pumpkin and that heavenly filling)
- Fat: 8g (the good kind that makes them wonderfully moist)
- Carbs: 25g (because happiness needs fuel, right?)
- Protein: 2g (who knew dessert could be this balanced?)
Now before anyone asks – no, I didn’t forget gluten! That 0g measurement is the whole point, after all. These treats are naturally cholesterol-friendly too at just 25mg per serving. Just keep in mind that nutrition can change if you use different brands of cream cheese or gluten-free flour. The important thing? They taste like pure autumn joy, and that’s nutritional gold in my book!
PrintGluten-Free Pumpkin Whoopie Pies: 6 Easy Steps to Heaven

Soft and fluffy gluten-free pumpkin whoopie pies with a creamy filling. Perfect for fall treats or holiday desserts.
- Prep Time: 15 minutes
- Cook Time: 12 minutes
- Total Time: 27 minutes
- Yield: 12 whoopie pies 1x
- Category: Dessert
- Method: Baking
- Cuisine: American
- Diet: Gluten Free
Ingredients
- 1 cup gluten-free flour blend
- 1/2 tsp baking powder
- 1/2 tsp baking soda
- 1 tsp pumpkin pie spice
- 1/4 tsp salt
- 1/2 cup pumpkin puree
- 1/4 cup brown sugar
- 1/4 cup granulated sugar
- 1/4 cup vegetable oil
- 1 large egg
- 1 tsp vanilla extract
- 4 oz cream cheese, softened
- 2 tbsp butter, softened
- 1 cup powdered sugar
- 1/2 tsp vanilla extract
Instructions
- Preheat oven to 350°F. Line a baking sheet with parchment paper.
- In a bowl, whisk gluten-free flour, baking powder, baking soda, pumpkin pie spice, and salt.
- In another bowl, mix pumpkin puree, brown sugar, granulated sugar, oil, egg, and vanilla extract.
- Combine wet and dry ingredients until smooth.
- Drop tablespoon-sized dough onto the baking sheet, spacing 2 inches apart.
- Bake for 10-12 minutes or until edges are firm. Cool completely.
- Beat cream cheese, butter, powdered sugar, and vanilla extract until smooth.
- Spread filling on half the cookies and top with remaining cookies.
Notes
- Store in an airtight container for up to 3 days.
- For firmer filling, chill before assembling.
- Use canned or homemade pumpkin puree.
Nutrition
- Serving Size: 1 whoopie pie
- Calories: 180
- Sugar: 15g
- Sodium: 120mg
- Fat: 8g
- Saturated Fat: 3g
- Unsaturated Fat: 4g
- Trans Fat: 0g
- Carbohydrates: 25g
- Fiber: 1g
- Protein: 2g
- Cholesterol: 25mg