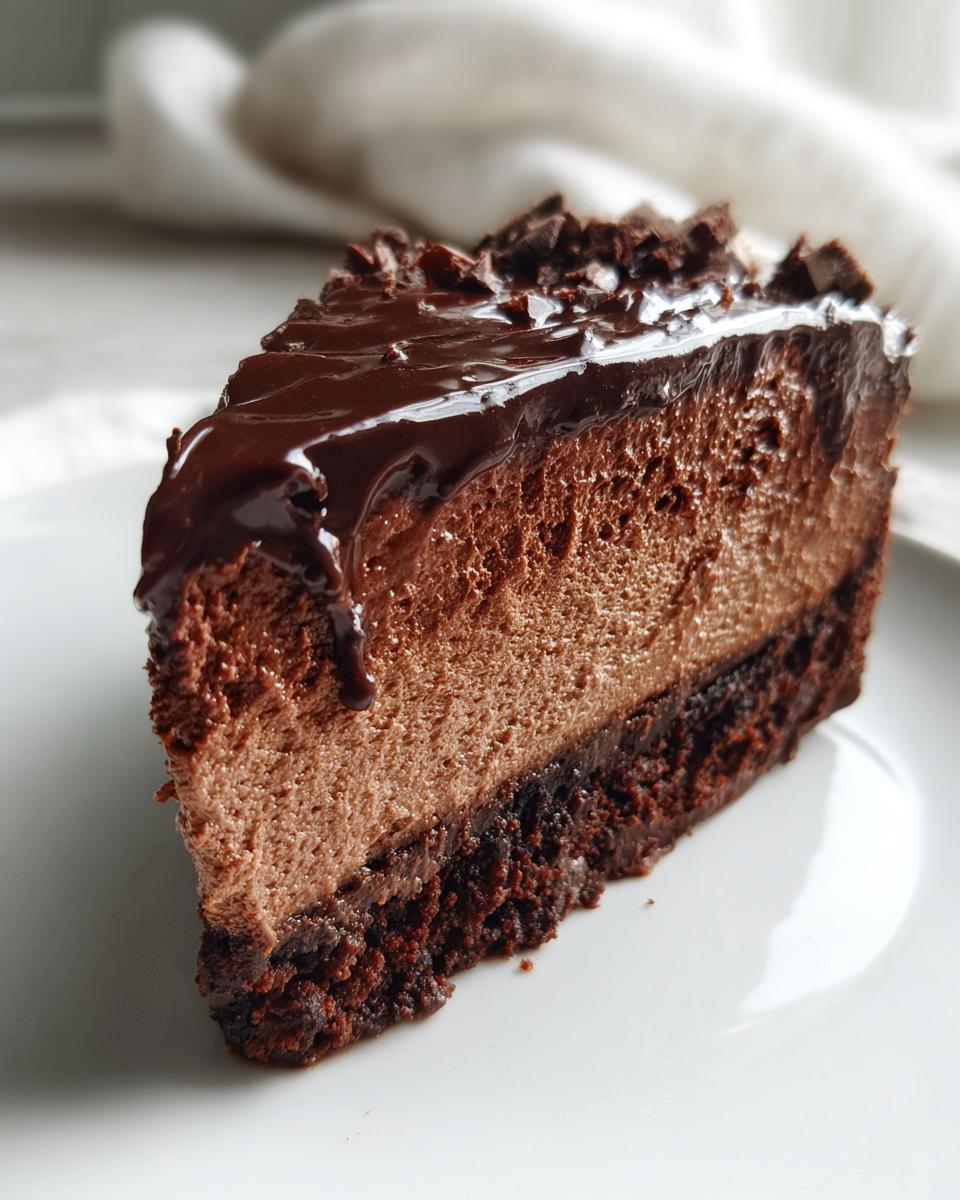
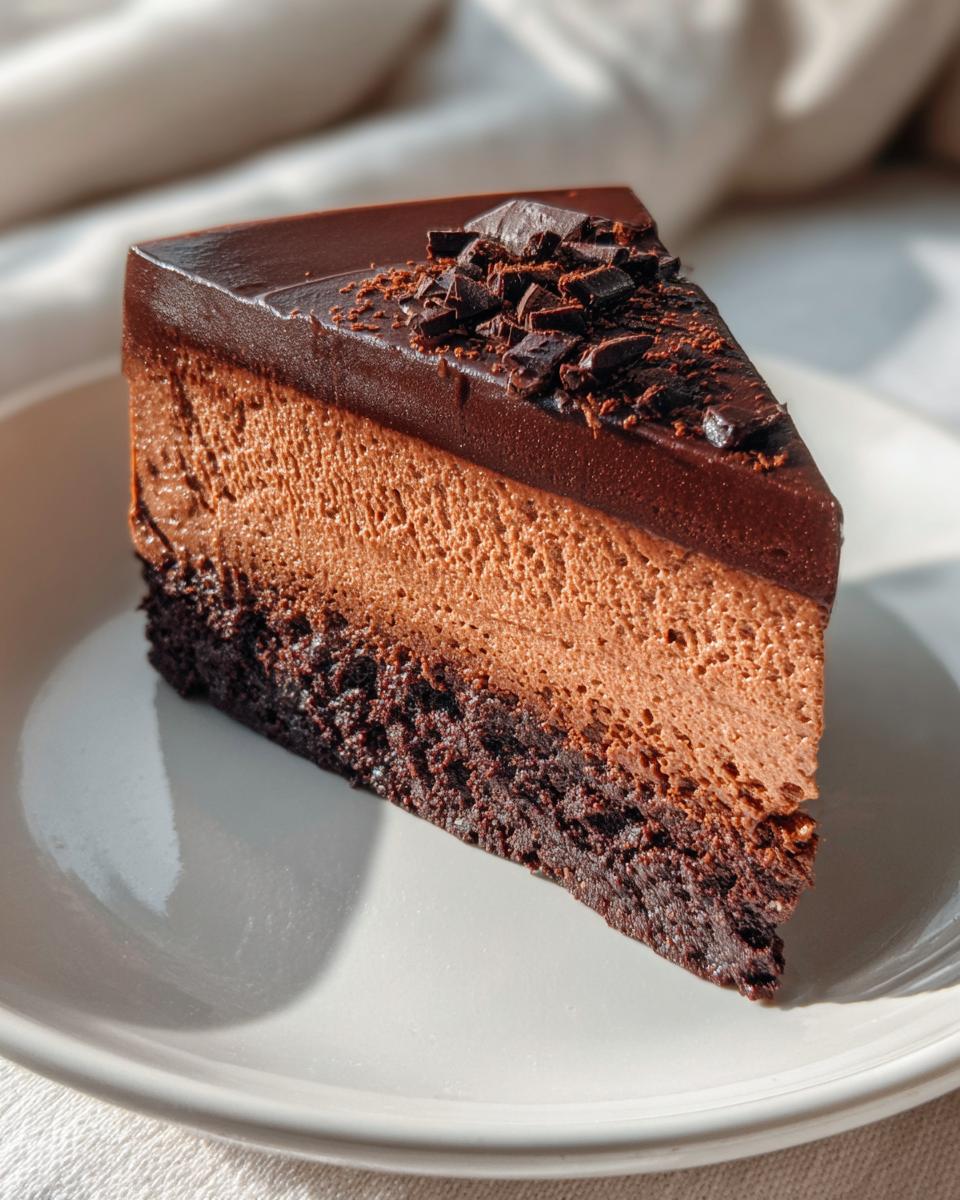
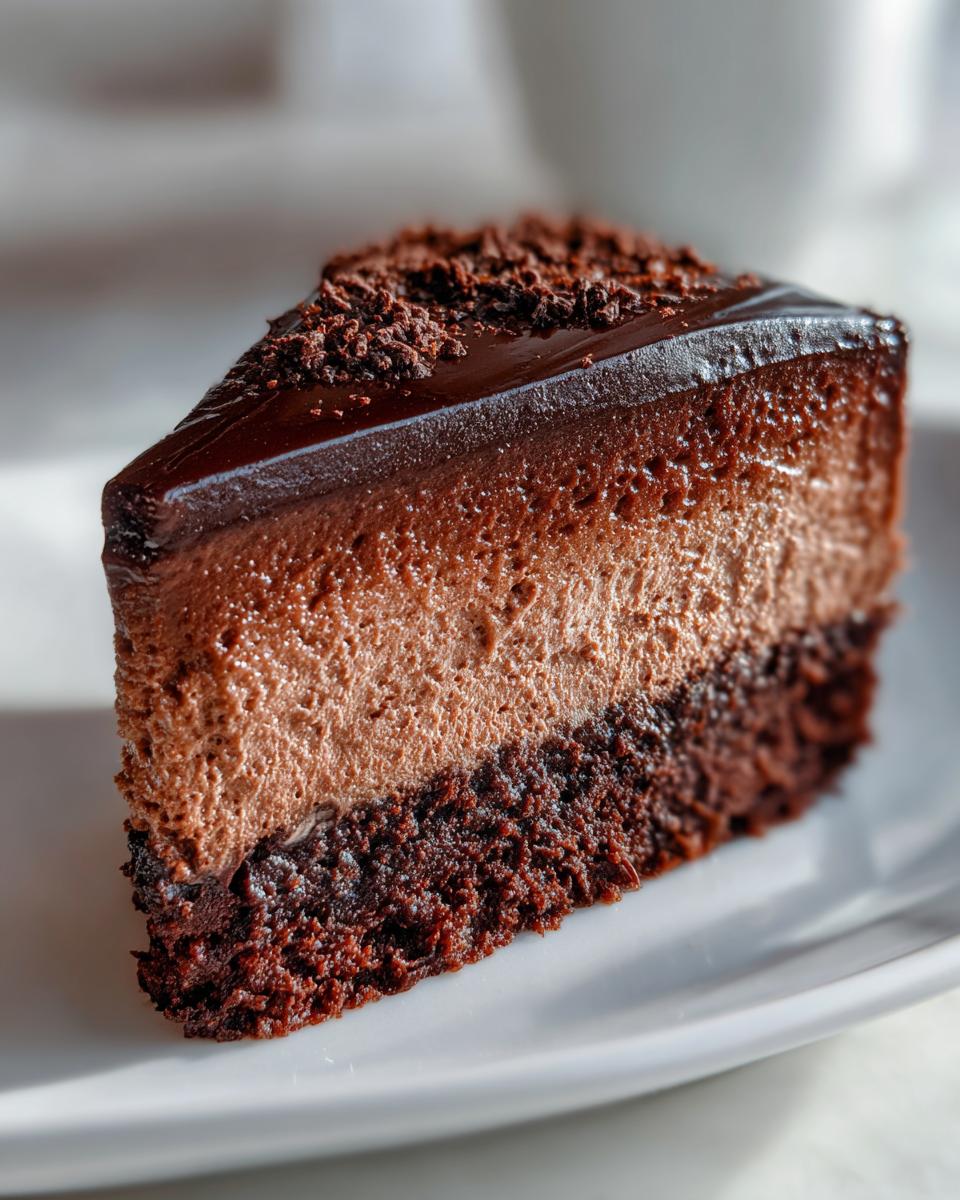
Oh my gosh, you HAVE to try this Gluten-Free Chocolate Mousse Cake – it’s honestly the most decadent, melt-in-your-mouth dessert I’ve ever made! When my best friend was diagnosed with celiac disease years ago, I went on a mission to create gluten-free treats that didn’t taste “gluten-free” at all. After countless tests (and happy taste-testers!), this no-bake beauty became our absolute favorite.
What makes this cake so special? First, it’s ridiculously easy – just melt, whip, fold, and chill. No oven required! The texture is pure magic: silky smooth chocolate mousse floating on a cloud of whipped cream. And trust me, nobody will guess it’s gluten-free. I’ve served this at birthday parties, dinner gatherings, even fancy dinner parties where people begged for the recipe. The secret? Using really good gluten-free chocolate and whipping everything just right so you get that perfect airy-yet-rich consistency. One bite and you’ll be hooked!
Why You’ll Love This Gluten-Free Chocolate Mousse Cake
Listen, this isn’t just any gluten-free dessert—this cake will make you forget regular chocolate cake exists! Here’s why it’s become my go-to for every special occasion (and let’s be honest, sometimes just because it’s Tuesday):
- No-bake magic: No oven, no stress! Just melt, mix, and chill while it turns into pure chocolate heaven.
- Rich like a dream: That deep chocolate flavor? It comes from using really good gluten-free chocolate—none of that waxy stuff.
- Creamy perfection: The texture is what dreams are made of—silky mousse meets cloud-whipped cream in every bite.
- Gluten-free that doesn’t taste gluten-free: I’ve fooled so many people with this one—it’s THAT good.
- Easy as pie (easier actually): If you can whip cream and melt chocolate, you’ve got this.
- Total crowd-pleaser: Served this at 12 parties last year—every single time the plate was licked clean.
The best part? It looks super fancy but takes less effort than most boxed cakes. Win-win!
Ingredients for Gluten-Free Chocolate Mousse Cake
Gathering these simple ingredients is the first step to chocolate heaven! Everything here is easy to find at your local grocery store and gluten-free certified. Here’s what you’ll need:
- 200g gluten-free chocolate, chopped (the better the chocolate, the better the cake!)
- 100g unsalted butter
- 4 large eggs, separated (yolks and whites divided)
- 100g sugar
- 1 tsp vanilla extract
- 200ml heavy cream
- 1 tbsp powdered sugar
- 1 tsp gelatin powder (optional for stability)
Ingredient Notes & Substitutions
A few important things about these ingredients: First, splurge on good-quality gluten-free chocolate—it makes ALL the difference in texture and taste. The gelatin is optional but helpful if your kitchen runs warm (it prevents weeping). You can swap heavy cream for coconut cream if dairy-free, though the texture will be slightly less firm.
One non-negotiable? The eggs! They provide the cake’s structure and airiness, so substitutions like flax eggs won’t work here. And pro tip: if you’re separating eggs yourself (versus buying cartoned), room-temperature eggs whip up much better!
How to Make Gluten-Free Chocolate Mousse Cake
Okay, let’s get to the fun part—making this dreamy dessert! Follow these steps carefully, but don’t stress. It’s easier than it looks, I promise. Just take your time and enjoy the process (and maybe sneak a taste of the chocolate along the way).
Melting the Chocolate and Butter
First things first – let’s melt that gorgeous chocolate! I always use a double boiler because it gently melts everything without burning. Just fill a saucepan with about an inch of water, bring it to a simmer, then place a heatproof bowl on top (make sure the bottom doesn’t touch the water). Add your chopped chocolate and butter, and stir occasionally until it’s completely smooth and glossy.
Here’s my big tip: once melted, take the bowl off the heat and let it cool for about 5 minutes. You want it warm but not hot – too hot and it’ll scramble those precious egg yolks we’re adding next. I test by touching a dab on my wrist – it should feel comfortably warm, not scorching.
Whipping Eggs and Sugar
Now for the magic makers – eggs! Separate your yolks and whites (save both!). In a medium bowl, whisk the yolks with sugar and vanilla until they’re pale yellow and thick enough that when you lift the whisk, the mixture ribbons back into the bowl. This takes about 3 minutes with a hand mixer.
For the whites – spotlessly clean bowl and beaters are CRUCIAL here. Any grease and they won’t whip properly. Beat them until stiff peaks form – when you lift the beaters straight up, the peaks should stand straight up without drooping. This gives our mousse that light-as-air texture!
Folding and Setting
Time to bring it all together! Gently fold the cooled chocolate into the yolk mixture until just combined. Then, carefully fold in the whipped egg whites in three batches – be patient and use a big spatula with wide, sweeping motions to keep all that air in. Finally, whip the cream with powdered sugar to soft peaks and fold that in too.
Pour this heavenly mixture into your prepared pan, smooth the top, and here’s the hard part – walk away! It needs at least 4 hours in the fridge to set properly, though overnight is even better. The wait is torture, but SO worth it when you take that first bite of creamy perfection!
Tips for the Perfect Gluten-Free Chocolate Mousse Cake
After making this cake more times than I can count (and licking the bowl every single time), here are my absolute can’t-live-without tips for mousse cake success:
- Chill your bowls! Pop your mixing bowl and beaters in the freezer for 15 minutes before whipping cream – it helps everything whip up faster and hold peaks better.
- Room temp eggs are key – they whip up so much higher and fluffier than cold ones. Just let them sit out for about 30 minutes before starting.
- Don’t skip lining your pan – parchment paper makes removal a breeze and keeps those beautiful edges intact.
- Fold gently like you’re petting a kitten – rough mixing deflates all that precious air we worked so hard to whip in!
- Patience, grasshopper – I know it’s tempting, but don’t peek before the 4-hour chill time is up! The texture needs time to set properly.
Follow these and you’ll have the silkiest, dreamiest chocolate mousse cake every single time. Promise!
Serving and Storing Gluten-Free Chocolate Mousse Cake
Okay, the hardest part is over – now comes the fun of making this beauty shine! Right before serving, I love dusting the top with cocoa powder or powdered sugar through a fine sieve for that elegant bakery look. Fresh raspberries or strawberries make gorgeous (and tasty!) garnishes too – the tart fruit cuts through the rich chocolate perfectly.
For storage, just pop any leftovers (ha!) in an airtight container in the fridge. It’ll keep beautifully for up to 3 days – though in my house, it never lasts that long! One important note: don’t freeze this cake. The delicate mousse texture turns grainy when thawed, and we’ve worked too hard for that perfect silky smoothness to ruin it now!
Gluten-Free Chocolate Mousse Cake Variations
While I adore the classic version, sometimes I like to mix things up! Here are my favorite ways to play with this recipe:
- Mint chocolate magic: Add 1/2 tsp peppermint extract to the chocolate mixture for a refreshing twist. Top with crushed candy canes during the holidays!
- Dairy-free delight: Use coconut oil instead of butter and coconut cream in place of heavy cream. The texture is slightly softer but just as delicious.
- Crunchy surprise: Press a base of crushed gluten-free cookies or nuts (like almonds or hazelnuts) into the pan before adding the mousse for added texture.
The best part? Once you master the base recipe, the flavor possibilities are endless – orange zest, espresso powder, or even a splash of your favorite liqueur can make it your own signature dessert!
Nutritional Information
Okay, let’s be real—we’re not eating chocolate mousse cake for the health benefits, but I know some folks like to keep track! Here’s the nutritional breakdown per slice (based on 8 servings). Remember, these are estimates—actual values can vary depending on your exact ingredients and brands. Also, these numbers don’t include the optional gelatin if you use it.
- Calories: 320
- Total Fat: 24g
- Saturated Fat: 14g
- Unsaturated Fat: 8g
- Trans Fat: 0g
- Carbohydrates: 26g
- Fiber: 2g
- Sugar: 22g
- Protein: 5g
- Cholesterol: 120mg
- Sodium: 50mg
Now, if you’re sharing with friends who need to track macros more closely, I always recommend calculating with your exact ingredients—especially since chocolate brands can vary so much in sugar and fat content. But honestly? When something tastes this good, sometimes it’s better to just enjoy every creamy, chocolatey bite!
FAQs About Gluten-Free Chocolate Mousse Cake
I get so many questions about this cake (especially from friends who keep begging me to make it for them!), so let me answer the most common ones here. These are the things people always wonder before trying the recipe themselves!
Can I Make This Cake Dairy-Free?
Absolutely! I’ve made it dairy-free plenty of times for friends with allergies. Swap the butter for coconut oil (use refined if you don’t want coconut flavor) and use full-fat coconut cream instead of heavy whipping cream. Just know the texture will be a tad softer – still delicious, but it won’t hold its shape quite as firmly. And of course, make sure your chocolate is dairy-free too!
How Do I Know When the Egg Whites Are Whipped Enough?
This is where most first-timers panic, but don’t worry! You’ll know they’re ready when you lift the beaters straight up and the peaks stand completely stiff without drooping at all. Think “stiff peaks” literally means like mountain peaks standing at attention! Another test – tilt the bowl sideways; if the whites don’t slide at all, you’re golden. Under-whipped whites won’t give you that dreamy light texture, so when in doubt, whip a little longer!
Can I Freeze This Cake?
Oh sweetie, no – trust me on this one! I learned the hard way when I tried freezing leftovers “just in case.” The mousse separates when thawed, becoming grainy and losing that magical silky texture we work so hard to achieve. If you must store it beyond 3 days, your best bet is keeping it refrigerated in the coldest part of your fridge. But honestly? It’s so good, you probably won’t have leftovers to worry about!
Can I Use a Different Sweetener Instead of Sugar?
I’ve experimented with this a lot because my sister’s diabetic. Granulated erythritol works okay, but it doesn’t dissolve as well in the egg yolks, leaving a slightly gritty texture. Powdered erythritol or monk fruit blend works better. The catch? Sugar helps stabilize the egg whites, so if you substitute, your mousse might not hold up as well. If you try it, maybe add that optional gelatin for extra insurance!
Why Did My Cake Turn Out Dense Instead of Fluffy?
Oh no! This usually happens from overmixing when folding in the egg whites or whipped cream. You want to be so gentle it feels like you’re barely mixing – just until no white streaks remain. Also, make sure your egg whites were whipped to proper stiff peaks first! Another culprit could be not letting the chocolate cool enough before adding to yolks – if it’s too hot, it can deflate all that beautiful air you whipped in. But don’t worry – even a dense version still tastes amazing!
Share Your Gluten-Free Chocolate Mousse Cake
I’d LOVE to see your masterpiece! Snap a pic of your gorgeous creation and tag me on Instagram – nothing makes me happier than seeing your chocolatey success stories. Or leave a rating below if you adored it as much as we do. Now go forth and spread the gluten-free chocolate joy!
PrintDecadent Gluten-Free Chocolate Mousse Cake in 4 Hours
A rich and creamy gluten-free chocolate mousse cake that’s easy to make and perfect for any occasion.
- Prep Time: 20 minutes
- Cook Time: 10 minutes
- Total Time: 4 hours 30 minutes
- Yield: 8 servings 1x
- Category: Dessert
- Method: No-bake
- Cuisine: International
- Diet: Gluten Free
Ingredients
- 200g gluten-free chocolate, chopped
- 100g unsalted butter
- 4 large eggs, separated
- 100g sugar
- 1 tsp vanilla extract
- 200ml heavy cream
- 1 tbsp powdered sugar
- 1 tsp gelatin powder (optional for stability)
Instructions
- Melt chocolate and butter together in a heatproof bowl over simmering water. Stir until smooth and set aside to cool slightly.
- Whisk egg yolks and sugar in a bowl until pale and creamy. Add vanilla extract and mix well.
- Fold the melted chocolate mixture into the egg yolk mixture.
- In a separate bowl, whip the egg whites until stiff peaks form. Gently fold into the chocolate mixture.
- In another bowl, whip the heavy cream with powdered sugar until soft peaks form. Fold into the chocolate mixture.
- Pour the mixture into a lined cake tin and refrigerate for at least 4 hours or overnight until set.
- Dust with cocoa powder or decorate as desired before serving.
Notes
- For a firmer texture, add gelatin dissolved in warm water to the chocolate mixture.
- Use high-quality gluten-free chocolate for best results.
- Store leftovers in the refrigerator for up to 3 days.
Nutrition
- Serving Size: 1 slice
- Calories: 320
- Sugar: 22g
- Sodium: 50mg
- Fat: 24g
- Saturated Fat: 14g
- Unsaturated Fat: 8g
- Trans Fat: 0g
- Carbohydrates: 26g
- Fiber: 2g
- Protein: 5g
- Cholesterol: 120mg