Let me tell you a secret – I used to dread making gluten-free pizza crust. Too many sad, cardboard-like attempts left me frustrated until I cracked the code for this recipe. After what felt like a million trials (and some hilarious kitchen disasters), I finally created the best gluten-free pizza crust that actually tastes like the real deal.
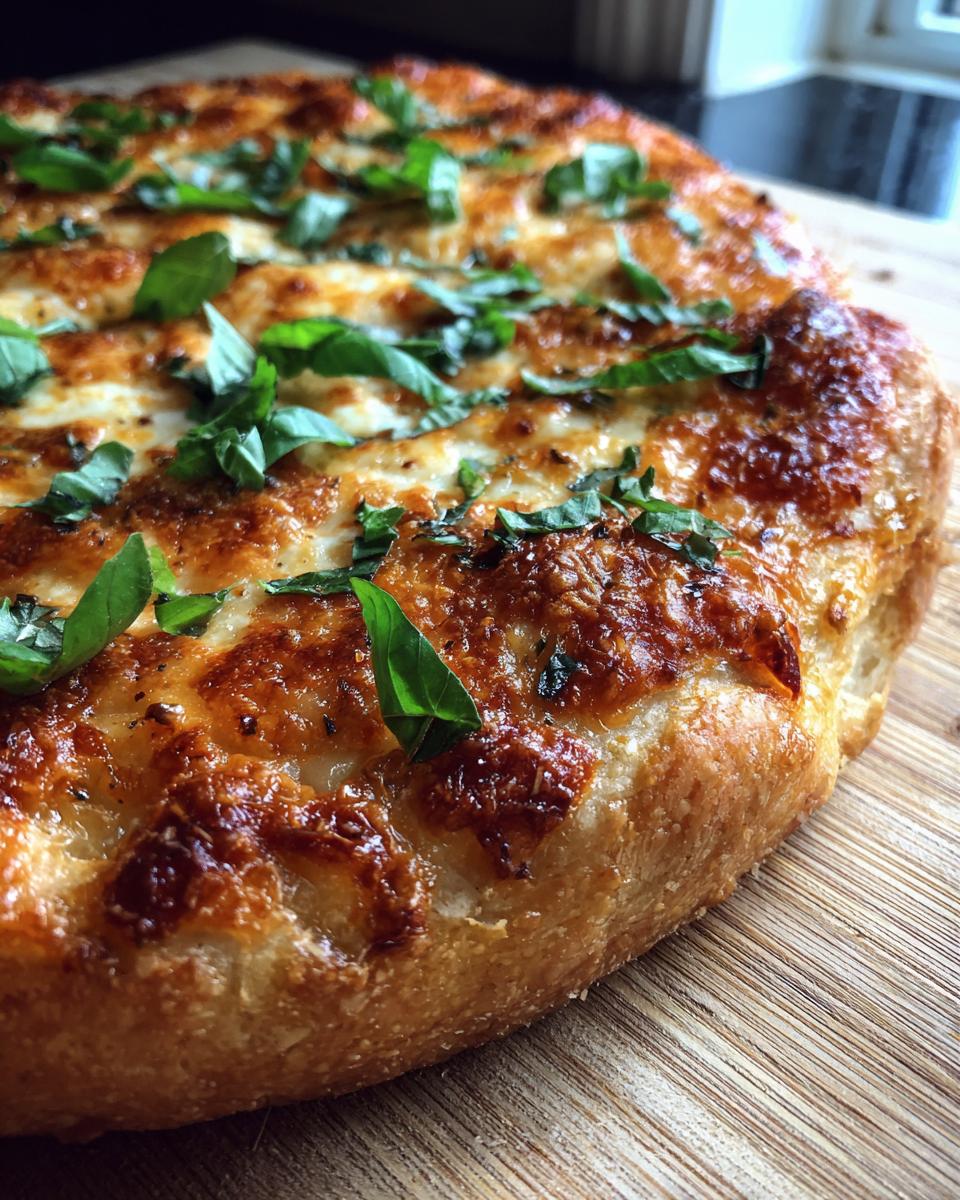
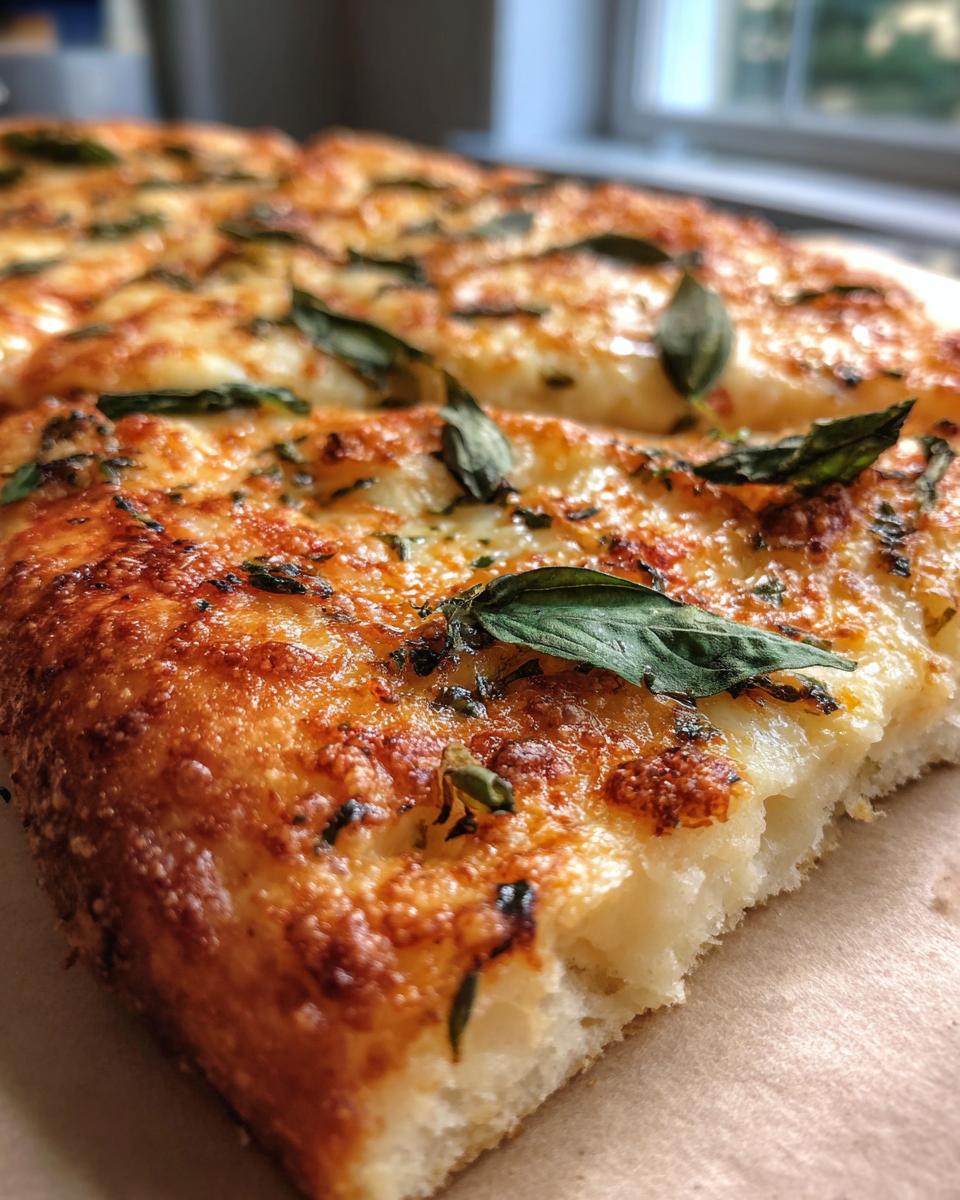
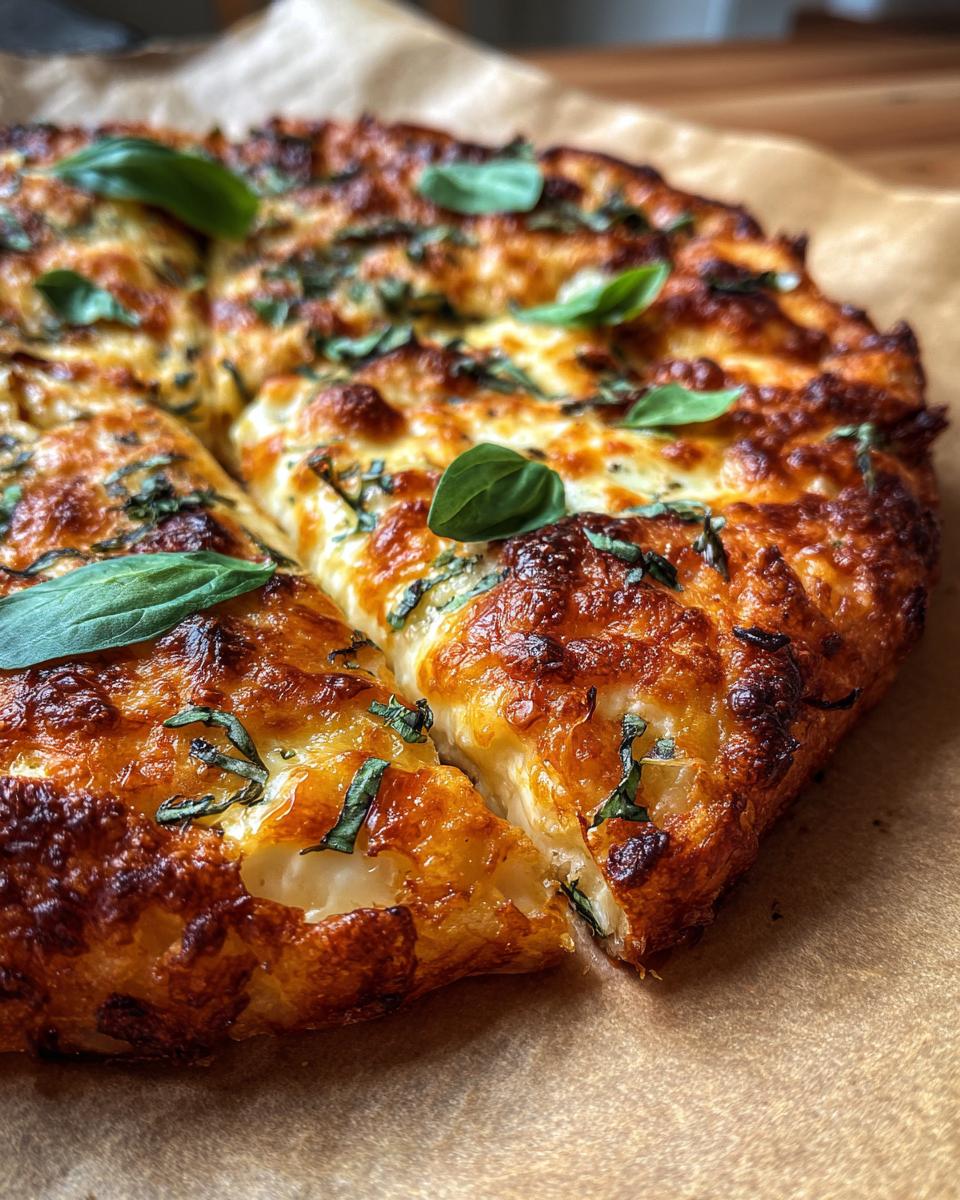
What makes this one special? That perfect crispy-on-the-outside, soft-on-the-inside texture we all crave. I learned the hard way that most gluten-free doughs either turn out rock-hard or fall apart completely. But this version? It holds toppings beautifully and has that satisfying chew you miss when going gluten-free.
My niece – who’s been gluten-free since childhood – took one bite and said “Auntie, this tastes like regular pizza!” That’s when I knew I had to share it. Whether you’re newly gluten-free or a seasoned pro, this crust will change your pizza game forever.
Why You’ll Love This Best Gluten-Free Pizza Crust
Listen, I know what you’re thinking – “Another gluten-free pizza crust recipe?” But trust me, this one’s different. After years of trial and error (and some seriously questionable pizza attempts), I’ve cracked the code for the best gluten-free pizza crust that actually delivers on all fronts. Here’s why it’s become my go-to:
- Simple ingredients – No weird specialty items, just pantry staples you probably have already
- No fancy equipment needed – Just mix by hand and press into your pan (wet fingers help!)
- Perfect texture – Crispy bottom with that satisfying chew you’ve been missing
- Incredibly versatile – Works with any toppings from classic Margherita to loaded meat lovers
The best part? Even my gluten-eating friends can’t tell the difference. That’s when you know you’ve got a winner!
Ingredients for the Best Gluten-Free Pizza Crust
Okay, let’s get down to the good stuff! Here’s everything you’ll need for the best gluten-free pizza crust that actually holds together (I promise!). Measure carefully – gluten-free baking can be finicky, but these amounts are tested to perfection:
- 2 cups gluten-free flour blend (packed – I use Bob’s Red Mill 1-to-1 blend, but Cup4Cup works great too)
- 1 tsp xanthan gum (don’t skip this – it’s our gluten replacement!)
- 1 tsp salt (I prefer fine sea salt)
- 1 tbsp sugar (this feeds the yeast – regular white sugar works best)
- 1 packet (2¼ tsp) active dry yeast (check the expiration date!)
- 1 cup warm water (110°F – test it with your wrist like baby bottle temp)
- 2 tbsp olive oil (extra virgin gives the best flavor)
- 1 large egg, beaten (room temperature blends better)
Ingredient Notes & Substitutions
Now let me share all my hard-earned gluten-free baking wisdom! First – that flour blend matters. Some blends have weird aftertastes or don’t bind well. I’ve had best results with Bob’s Red Mill 1-to-1 (blue bag) – it’s got rice flour, sorghum, and just the right starches.
Xanthan gum is our secret weapon – it replaces gluten’s stretchiness. If your blend already includes it (check the label!), just use ¼ tsp extra. No xanthan gum? Try 1 tbsp ground chia or flaxseed instead, but the texture will be denser.
For the yeast – that water temp is CRUCIAL. Too hot kills it, too cold won’t activate. I use a thermometer until you get the feel – it should be comfortably warm like bath water. See bubbles after 5 minutes? You’re golden!
Egg-free? Make a flax egg by mixing 1 tbsp ground flax with 3 tbsp water. Let it sit for 5 minutes to thicken. It won’t rise quite as much, but still makes a decent crust in a pinch!
How to Make the Best Gluten-Free Pizza Crust
Alright, let’s get our hands doughy! Making the best gluten-free pizza crust is easier than you think – just follow these steps and you’ll be amazed at the results. I’ll walk you through everything, from that first yeast bubble to that perfect golden-brown crunch.
Preparing the Dough
First, grab your biggest mixing bowl and whisk together the dry ingredients – that’s your gluten-free flour blend, xanthan gum, salt, and sugar. Make sure there’s no lumps (I sometimes sift it if my flour’s been sitting awhile).
Now for the fun part – proofing the yeast! Dissolve your yeast packet in that warm water (remember – wrist-test warm!) and let it sit for about 5 minutes. You’re looking for a frothy, bubbly top – that’s how you know your yeast is alive and kicking! Stir in the olive oil and beaten egg.
Here’s where things get sticky (literally). Pour the wet mixture into the dry ingredients and stir with a wooden spoon until combined. The dough will look shaggy at first, then suddenly come together into a sticky ball. Don’t panic! Gluten-free dough is MUCH stickier than regular pizza dough – that’s completely normal. Cover the bowl with a damp towel and let it rise in a warm spot for 30 minutes. It won’t double like wheat dough, but you’ll see some puffiness.
Shaping and Baking
Preheat your oven to 425°F (220°C) while the dough rises. Now here’s my best tip – WET HANDS ARE YOUR FRIEND! Gluten-free dough sticks like crazy, so keep a bowl of water nearby to wet your fingers as you press the dough into your pizza pan (I use a 12-inch round metal pan lined with parchment).
Press the dough out evenly, making it slightly thicker at the edges for that perfect crust ridge. No rolling pin needed – just pat it gently with damp fingers. Pop it in the oven for 15 minutes – this par-bakes the crust so it won’t get soggy under toppings later.
When that timer dings, you’ll have the most beautiful golden crust ready for your favorite toppings! Let it cool just 2-3 minutes before adding sauce and cheese – this prevents that dreaded “steamed bottom” effect. Then bake another 10-12 minutes until your toppings are bubbly and perfect.
Tips for Perfect Best Gluten-Free Pizza Crust
Alright, let me share my top tricks for nailing this crust every single time! First – parchment paper is non-negotiable. That sticky dough will cling to your pan otherwise, and nobody wants half their crust left behind. Tear off a big enough piece so it hangs over the edges – makes removal a breeze!
When working with the dough, resist the urge to over-knead. Unlike wheat dough, gluten-free versions don’t need all that elbow grease. Just mix until combined – overworking makes it tough. And here’s my secret weapon: let that baked crust cool for about 3 minutes before adding toppings. Those few minutes make all the difference for preventing soggy bottoms!
Oh! One last thing – if your edges brown too fast, tent them with foil during the final bake. Now go make some pizza magic!
Storing and Reheating Your Gluten-Free Pizza
Okay, let’s talk leftovers (because who ever finishes a whole pizza?). For maximum crispiness, wrap any uneaten slices tightly in foil – the crust dries out fast! It’ll keep in the fridge for 3 days, or freeze for up to a month (just separate slices with parchment paper first).
Here’s my reheating trick: skip the microwave unless you love soggy pizza. Instead, pop it in a 375°F oven for 5-7 minutes directly on the rack – that brings back that perfect crunch! If you’re feeling fancy, a quick minute under the broiler makes the cheese bubbly again. Trust me, it’s almost better than fresh!
Best Gluten-Free Pizza Crust Nutritional Information
Let’s chat numbers for a sec – I know some of us are watching what we eat (even when it’s pizza!). Keep in mind these are estimates since exact values can vary based on your specific ingredients. But here’s the breakdown for one slice (that’s 1/8 of the crust before toppings):
- 180 calories – Not bad for pizza that actually satisfies!
- 5g fat (1g saturated) – Thank you, heart-healthy olive oil
- 30g carbs (3g fiber) – Those complex carbs from the gluten-free flour blend
- 4g protein – The egg gives it a nice little protein boost
A quick heads-up – adding toppings will obviously change these numbers. My veggie-loaded version adds about 50 calories per slice, while my husband’s meat-lover special can tack on 100+. But at least you’re starting with a solid gluten-free base that’s kinder to your system!
FAQs About Best Gluten-Free Pizza Crust
I’ve gotten so many great questions about this recipe from friends and readers – let me answer the most common ones here! These are the things that had me scratching my head too when I first started making gluten-free pizza crust.
“Can I make this recipe vegan?”
Absolutely! Swap the egg for a flax egg (1 tbsp ground flax + 3 tbsp water, let sit 5 minutes). The texture will be slightly denser but still delicious. Just make sure your gluten-free flour blend is vegan-friendly too – some contain milk powder.
“Why is my dough so sticky? Did I do something wrong?”
Nope! Gluten-free dough is supposed to be sticky – it’s completely normal. That’s why I always say “wet hands are your friend!” The stickiness comes from the xanthan gum doing its job. Think of it like edible glue holding everything together without gluten.
“Can I freeze the dough for later?”
Yes! Here’s how I do it: After mixing, shape the dough into a disk, wrap tightly in plastic wrap, then place in a freezer bag. It’ll keep for about a month. Thaw overnight in the fridge, then let it come to room temp before shaping. I often make double batches to freeze – future me is always grateful!
“My crust turned out dense. What can I do differently?”
Ah, the dreaded dense crust! Two tips: First, make sure your yeast is fresh and properly activated (those bubbles matter!). Second, don’t overwork the dough – mix just until combined. Overmixing develops the gums too much, leading to toughness. Also, try adding 1/4 tsp baking powder for extra lift if this keeps happening.
“Can I use this dough for other things besides pizza?”
Ooh, great question! I’ve used it for flatbreads, calzones, and even soft pretzels (brush with butter and sprinkle salt!). The dough adapts well – just adjust baking times based on thickness. My kids love when I make mini pizza bites for snacks too!
Ready to Make the Best Gluten-Free Pizza Crust?
What are you waiting for? Grab those ingredients and let’s make some pizza magic happen! I can’t wait to hear how your crust turns out – leave me a comment below with your favorite topping combos. And hey, if you love it as much as we do, don’t forget to rate the recipe!
PrintBest Gluten Free Pizza Crust That Beats the Real Deal in Just 8 Steps

A delicious gluten-free pizza crust that’s crispy on the outside and soft on the inside.
- Prep Time: 40 minutes
- Cook Time: 15 minutes
- Total Time: 55 minutes
- Yield: 1 large pizza 1x
- Category: Main Dish
- Method: Baking
- Cuisine: Italian
- Diet: Gluten Free
Ingredients
- 2 cups gluten-free flour blend
- 1 tsp xanthan gum
- 1 tsp salt
- 1 tbsp sugar
- 1 packet active dry yeast
- 1 cup warm water
- 2 tbsp olive oil
- 1 egg
Instructions
- Mix dry ingredients in a bowl
- Dissolve yeast in warm water and let sit for 5 minutes
- Add yeast mixture, olive oil, and egg to dry ingredients
- Mix until smooth dough forms
- Let dough rise for 30 minutes
- Preheat oven to 425°F (220°C)
- Press dough into pizza pan
- Bake for 15 minutes before adding toppings
Notes
- Dough may be stickier than regular pizza dough
- Use wet hands to press dough into pan
- Let crust cool slightly before adding toppings
Nutrition
- Serving Size: 1 slice
- Calories: 180
- Sugar: 2g
- Sodium: 300mg
- Fat: 5g
- Saturated Fat: 1g
- Unsaturated Fat: 3g
- Trans Fat: 0g
- Carbohydrates: 30g
- Fiber: 3g
- Protein: 4g
- Cholesterol: 20mg