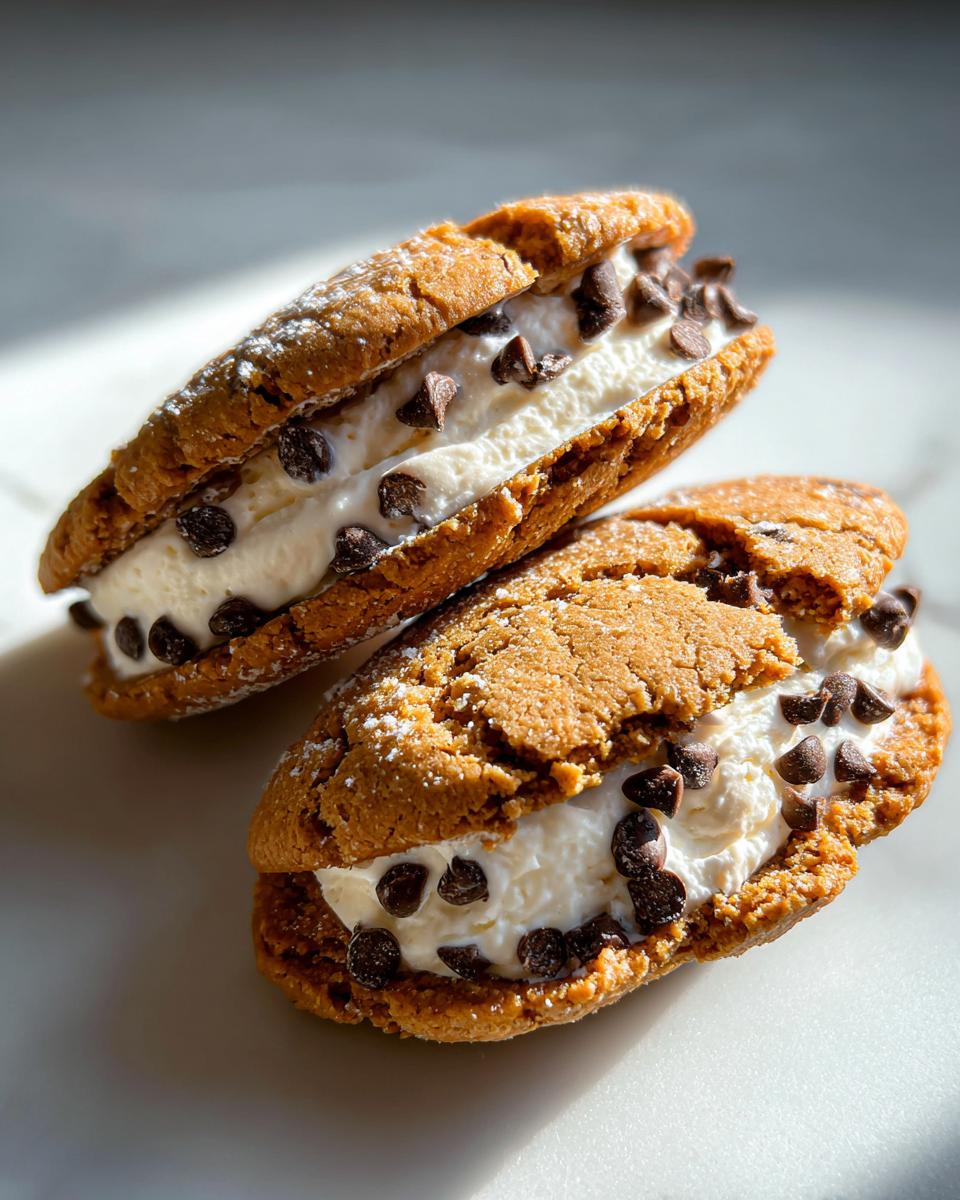
Nothing says holidays like the smell of something sweet baking in the oven, am I right? Every December, my kitchen transforms into a cookie factory, but these cannoli cookies? They’re the star of the show. I stumbled onto this twist on classic Italian cannoli years ago when I needed a fuss-free dessert for our chaotic family cookie swap. Now, they’re requested every year! The Best Cannoli Cookies Recipe for Holiday Baking gives you that perfect crispy shell and creamy ricotta filling we all love—but in adorable, shareable cookie form. Just wait till you see how quickly they disappear from the platter!
Why You’ll Love The Best Cannoli Cookies Recipe for Holiday Baking
Trust me, these aren’t your average holiday cookies—they’re little bites of magic. Here’s why they’ve become my go-to every December:
- So easy – No fancy piping or cannoli tubes needed, just simple sandwich cookies even kids can help assemble
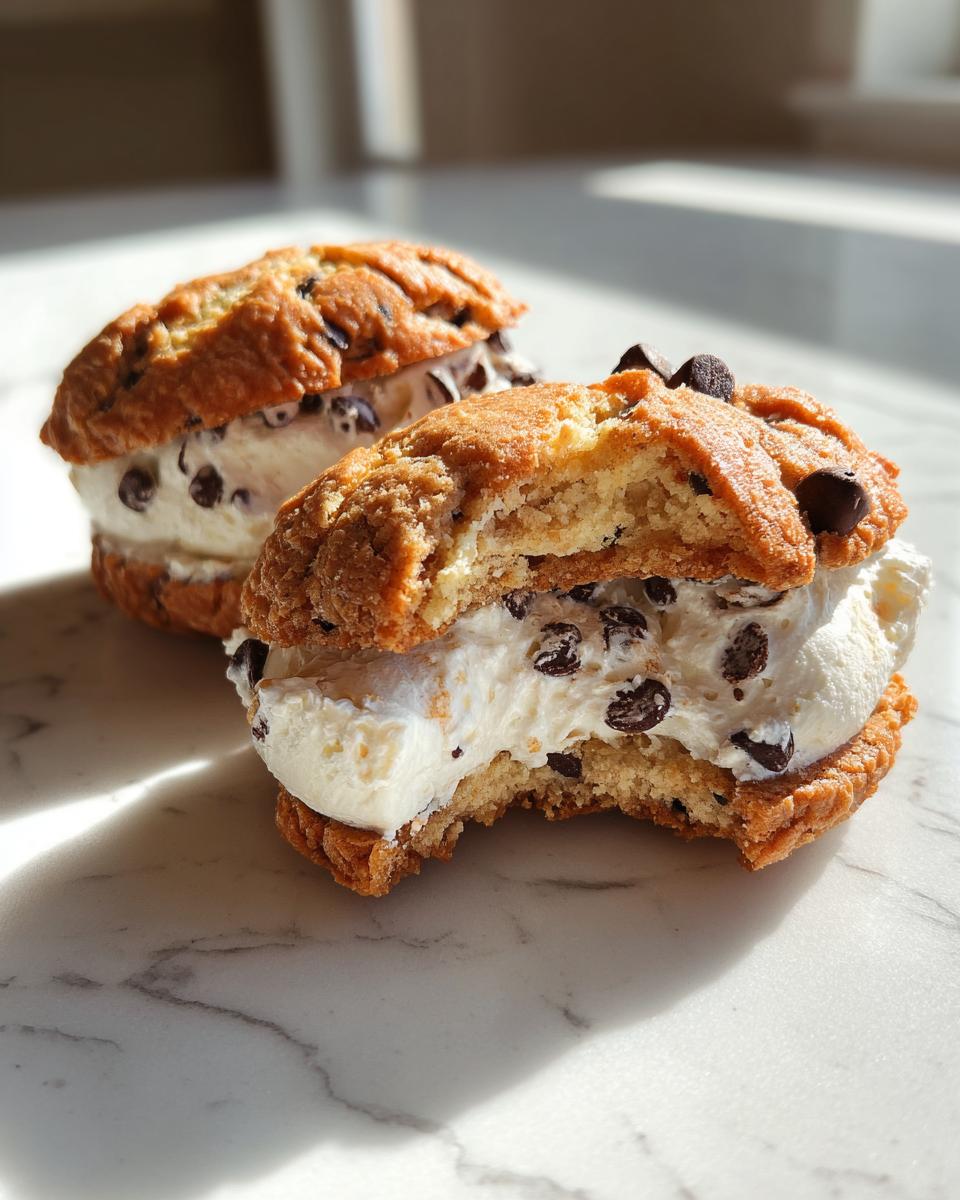
- Crowd-pleasing texture – That perfect combo of crisp shell and luscious creamy filling will have everyone reaching for seconds
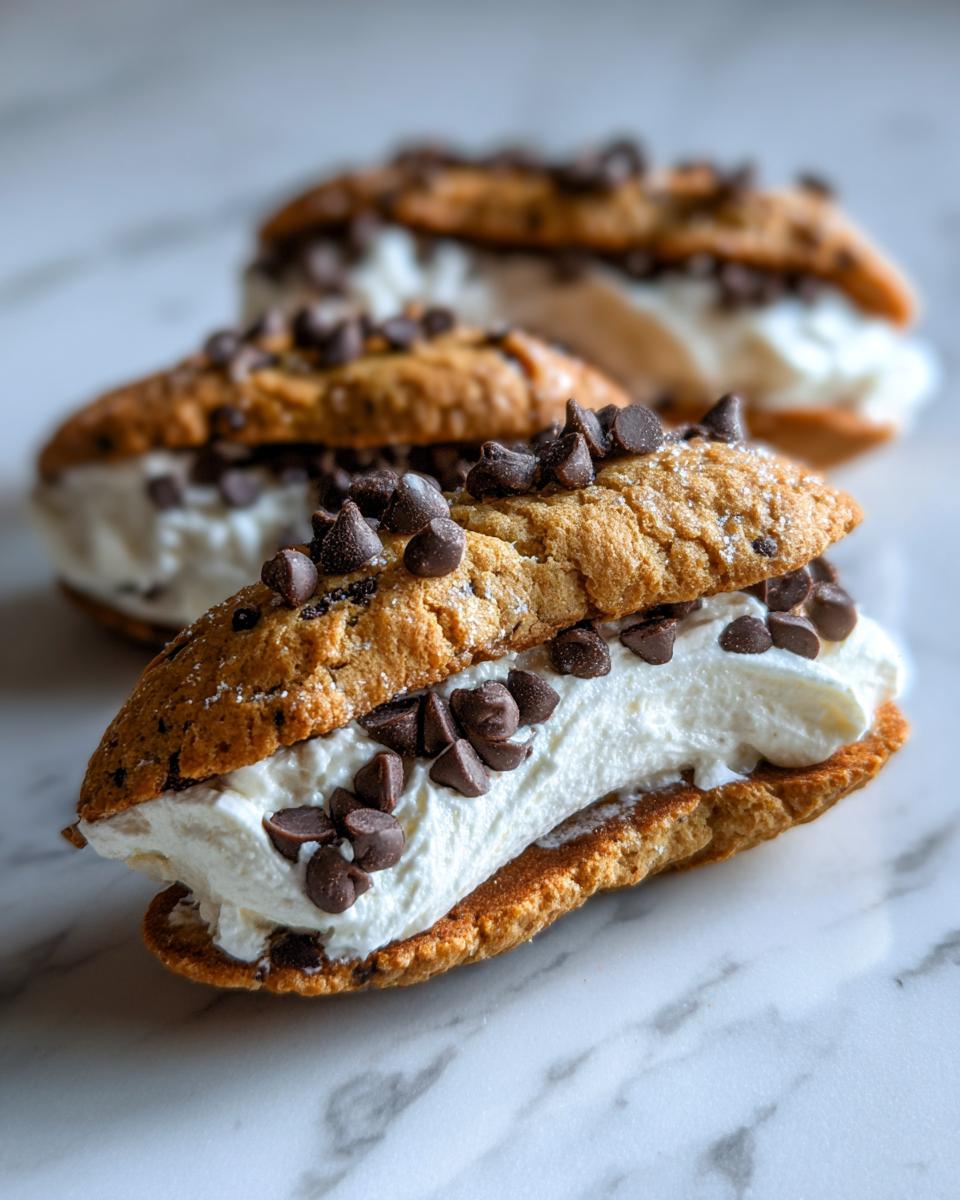
- Holiday-ready – The snowy powdered sugar dusting makes them look festive on any cookie tray
- Make-ahead friendly – Dough freezes beautifully, and assembled cookies keep well (if they last that long!)
Seriously, these disappear faster than wrapping paper on Christmas morning.
Ingredients for The Best Cannoli Cookies Recipe for Holiday Baking
Here’s the secret – the magic happens when you use just the right ingredients in just the right way. I learned the hard way that shortcuts don’t work with these cookies! Everything gets divided into two simple groups – the crispy shell and that dreamy filling we all go crazy for.
For the Cookie Shells:
- 2 cups all-purpose flour – Spoon and level it, friends! Packed flour makes tough cookies
- 1/4 cup granulated sugar – Just enough sweetness to balance the filling
- 1/4 tsp salt – My grandma always said salt makes sweets taste sweeter
- 1/2 cup unsalted butter, cold and cubed – Seriously cold – I pop mine in the freezer for 10 minutes first
- 1 large egg yolk – Save the white for breakfast – it’s all about richness here
- 2 tbsp milk – Whole milk works best for tender cookies
- 1 tsp vanilla extract – The good stuff, none of that imitation vanilla!
For the Cannoli Filling:
- 1 cup ricotta cheese, drained – This is KEY – I drain mine overnight in the fridge in a fine mesh strainer
- 1/2 cup powdered sugar – Sift it first to avoid lumps in your filling
- 1/2 cup mini chocolate chips – The tiny ones distribute perfectly in every bite
- 1/4 tsp cinnamon – Just a whisper – you’ll be surprised how much depth it adds
See? Nothing weird or hard to find. Just quality ingredients treated right. Now let’s make some cookie magic!
Equipment You’ll Need
Don’t worry – you don’t need any fancy gadgets for these cookies! I’ve made them in everything from a tiny apartment kitchen to my sister’s barely-equipped vacation rental. Here’s what you’ll grab from your cabinets:
- Large mixing bowl – For bringing that dough together (I use my favorite ceramic one that’s seen better days)
- Baking sheet – Standard half-sheet pans work perfectly – no need to grease if you use…
- Parchment paper – My cookie-saving hero! Makes cleanup a breeze and prevents sticking
- Rolling pin – Though honestly, I’ve used a wine bottle in a pinch when mine went missing!
- Cookie scoop or tablespoon – For portioning the dough evenly (but two spoons work too)
- Fine mesh strainer – Absolutely essential for draining that ricotta properly
- Rubber spatula – For gently folding the chocolate chips into the filling
See? Nothing you don’t already have. Now let’s get those hands dusty with flour!
How to Make The Best Cannoli Cookies Recipe for Holiday Baking
Alright, let’s get baking! These cannoli cookies come together in three simple parts – the dough, baking the shells, and that heavenly filling. Follow these steps closely, and you’ll be the holiday baking hero in no time.
Preparing the Dough
First things first – preheat that oven to 350°F (175°C). Trust me, you want it nice and hot before those cookies go in!
Now, grab your big mixing bowl and whisk together the flour, sugar, and salt. Here comes the important part – take your ice-cold cubed butter and work it into the flour mixture. I use my fingertips to rub it in until it looks like coarse crumbs with some pea-sized butter pieces remaining. Those little butter pockets are what give our cookies that perfect crisp-tender texture!
Make a well in the center and add your egg yolk, milk, and vanilla. Use a fork to gently incorporate the wet ingredients until shaggy dough forms. Now here’s my #1 tip – don’t overmix! Stop as soon as it comes together. Overworked dough makes tough cookies, and we want delicate shells that shatter beautifully.
Baking the Cookies
Line your baking sheets with parchment paper – no sticking worries here! Roll tablespoon-sized portions of dough into balls, then gently flatten them slightly between your palms. They don’t need to be perfect circles – rustic is charming!
Space them about 2 inches apart – these babies spread just enough to get crispy edges. Pop them in your preheated oven for 12-15 minutes. You’ll know they’re done when the edges turn golden brown but the centers still look slightly soft. They’ll firm up as they cool.
Let them rest on the baking sheet for 5 minutes before transferring to a wire rack. Resist the urge to fill them while warm – patience pays off with cookies that won’t turn soggy!
Making the Filling
While your cookies cool, let’s make that dreamy cannoli filling. Remember that ricotta you drained overnight? Now’s its time to shine!
In a medium bowl, beat the drained ricotta until smooth – no lumps allowed! Gradually sift in the powdered sugar, mixing gently until fully incorporated. Add the cinnamon and give it another quick mix.
Now for the fun part – fold in those mini chocolate chips with a rubber spatula. Be gentle here – we want those chips evenly distributed, not smashed to bits. Taste test approved? (I always sneak a spoonful!) Cover and pop it in the fridge while your cookies finish cooling.
See? Easy as can be. Now for the best part – assembling these little bites of heaven!
Tips for Perfect The Best Cannoli Cookies Recipe for Holiday Baking
After making these cookies dozens of times (okay, maybe hundreds – what can I say, they’re addictive!), I’ve picked up some foolproof tricks that’ll take yours from good to “can I have the recipe?” amazing. Here are my hard-earned secrets:
The Ricotta Drainage Situation
Listen, I learned this the messy way – don’t skip draining your ricotta! That extra liquid will turn your beautiful filling into a sad, soggy mess. Here’s my method: line a fine mesh strainer with cheesecloth or paper towels, plop in the ricotta, and let it chill in the fridge overnight. The longer the better – I’ve even done 24 hours when planning ahead. You’ll be shocked how much liquid drains out!
Taming Sticky Dough
If your dough feels more like paste than playdough when mixing, don’t panic! Just wrap it tightly in plastic and let it rest in the fridge for 30 minutes. The butter firms back up and the flour hydrates evenly. Pro tip: if you’re baking in a warm kitchen, keep a damp towel under your mixing bowl to prevent the butter from melting too fast.
Assembly Like a Pro
Want those picture-perfect cookies? Skip the knife and use a piping bag! Any plastic bag with a corner snipped off works wonders. Fill it about halfway with your ricotta mixture, then pipe generous dollops onto the flat side of half your cookies. Gently press another cookie on top – the filling should peek out just slightly at the edges. For extra pizzazz, dip the exposed filling edges in crushed pistachios or more mini chips.
The Golden Rule
Here’s my biggest tip: let filled cookies set in the fridge for at least an hour before serving or stacking. This lets the flavors meld and prevents sandwich slippage. Trust me, it’s worth the wait!
Follow these simple tricks, and your cannoli cookies will be the talk of every holiday gathering. Now go forth and bake with confidence!
Variations for The Best Cannoli Cookies Recipe for Holiday Baking
One of my favorite things about this recipe? It’s like a blank canvas ready for your creative touches! Over the years, I’ve played around with so many fun twists that keep my family guessing what version they’ll get each Christmas. Here are my absolute favorite ways to mix things up when I’m feeling adventurous:
Nutty Delights
If you’re not a chocolate fan (gasp!), try swapping those mini chips for chopped pistachios or toasted almonds. I like to toast the nuts first for extra flavor – just watch them carefully because they go from golden to burnt in seconds! For a real showstopper, press some crushed pistachios onto the filling edges after assembling – the green looks so festive against the white ricotta.
Zesty Twists
My cousin Gina once added a teaspoon of orange zest to the dough, and wow – game changer! The citrus brightens up all those warm flavors beautifully. Lemon zest works magic too, especially if you add a tiny pinch to the filling as well. Just remember – zest before you juice the fruit! I may or may not have learned that lesson the messy way.
Sweet Finishes
A simple dusting of powdered sugar makes these cookies look like they’re dusted with fresh snow – so pretty on holiday trays! For special occasions, I’ll drizzle melted chocolate in zigzags over the assembled cookies. Pro tip: let the chocolate set completely before stacking, unless you want abstract modern art cookies (which… actually sounds kinda cool).
Candy Land Version
Last Christmas, my kids begged me to mix mini M&Ms into the filling instead of chocolate chips. Colorful and delicious! For Halloween, we’ve done orange and black sprinkles in the dough. Honestly? The possibilities are endless – chopped dried cherries at Valentine’s Day, peppermint bits for winter parties… you get the idea!
The moral of the story? Once you’ve mastered the basic recipe, don’t be afraid to play! Some of our family’s favorite variations came from happy accidents in the kitchen. Just promise me one thing – no matter how you tweak them, keep that ricotta drained and those butter cubes cold. Some rules are made to be followed!
Serving and Storing The Best Cannoli Cookies Recipe for Holiday Baking
Here’s the thing about these cookies – they disappear so fast, you might not need storage tips! But just in case you somehow resist eating them all in one sitting (no judgment if you don’t), here’s how to keep them tasting fresh and fabulous.
The Perfect Serving Temperature
I know it’s tempting to dive right in when that creamy filling is calling your name, but trust me – let filled cookies sit at room temperature for about 15 minutes before serving. That ricotta filling tastes best when it’s not ice-cold straight from the fridge. The flavors really wake up, and you’ll get that perfect contrast between crisp shell and luscious creaminess.
Holiday Cookie Plate Pro Tip
Want your cannoli cookies to steal the show? Arrange them on a pretty platter dusted with powdered sugar “snow,” and maybe tuck in some fresh rosemary sprigs for a festive touch. They pair beautifully with espresso shots for adults or cold milk for kids – my niece calls them “grown-up Oreos”!
Keeping Them Fresh
Because of that delicious dairy filling, these cookies need to live in the fridge. Here’s my method: layer them gently between sheets of parchment paper in an airtight container. They’ll keep beautifully for 3-4 days this way – though I’ve never actually tested how long they last because, well… self-control isn’t my strong suit!
Can You Freeze Them?
Absolutely! Here’s what works best: freeze the baked shells and filling separately. Store shells airtight at room temperature, and keep the ricotta mixture in a sealed container in the freezer for up to a month. Thaw the filling overnight in the fridge when ready to assemble – give it a quick stir to bring back that creamy texture.
One last bit of wisdom from many holiday seasons of cookie chaos: always make extra. I’ve learned the hard way that you’ll need a “display” batch for guests and a secret stash hidden somewhere unexpected (the vegetable drawer works wonders). Because nothing’s sadder than reaching for that last cannoli cookie only to find an empty plate!
Nutritional Information
Okay, let’s be real – we’re not eating cannoli cookies for their health benefits! But since some folks like to know what they’re indulging in (looking at you, my calorie-counting sister), here’s the scoop on what’s in each delightful bite. Remember, these are estimates – actual amounts can vary based on your exact ingredients and portion sizes.
Each cookie clocks in at about:
- 120 calories – Worth every single one if you ask me!
- 6g fat (3.5g saturated) – Blame that glorious butter and ricotta
- 14g carbs – Mostly from that crisp cookie shell
- 8g sugar – A perfect balance of sweet without being cloying
- 2g protein – Surprise! That ricotta packs a little protein punch
- 30mg sodium – Just enough salt to make flavors pop
A few things to note: these numbers assume you make exactly 24 cookies from the batch (good luck stopping at one!). If you’re watching sugar, you can reduce the powdered sugar in the filling by a tablespoon or two – though I think life’s too short not to enjoy dessert properly!
My philosophy? Everything in moderation – including moderation. These cookies are meant to be savored during special occasions, not eaten by the dozen daily (though I won’t tell if you do!). Now go enjoy your homemade cannoli cookies guilt-free – you’ve earned it!
Frequently Asked Questions About The Best Cannoli Cookies Recipe for Holiday Baking
After making these cookies every holiday season for years, I’ve heard every question imaginable! Here are the answers to the ones that pop up most often – consider this your cannoli cookie cheat sheet.
Can I freeze these cannoli cookies?
Absolutely! Here’s my tried-and-true method: freeze the baked shells and filling separately. The shells stay crisp in an airtight container for up to 3 months (just layer them between parchment paper). The ricotta filling freezes beautifully in a sealed container too – thaw it overnight in the fridge and give it a good stir before using. Assemble after thawing for best texture!
How long do cannoli cookies last in the fridge?
Because of the fresh ricotta filling, these cookies need to stay chilled. They’ll keep beautifully for 3-4 days in the fridge if stored properly (that’s airtight with parchment between layers). But let’s be honest – they’ve never lasted that long in my house! The shells might soften slightly over time, but they’re still delicious.
Can I use cottage cheese instead of ricotta?
I’ve experimented with this when I was in a pinch! Drained cottage cheese blended until smooth can work, but the texture isn’t quite as luxuriously creamy. If you go this route, make sure to blend it really well and drain it even longer than ricotta – cottage cheese holds more moisture. Personally? I think good ricotta is worth seeking out for authentic cannoli flavor!
Why do my cookies spread too much?
Ah, the dreaded cookie pancake! This usually happens when your butter was too warm or your dough got overmixed. Keep that butter ice-cold, and mix just until the dough comes together. If your kitchen is warm, chill the shaped dough balls for 15 minutes before baking. And always bake on parchment-lined sheets – it helps control spread!
Can I make these gluten-free?
Yes! I’ve had great success using a 1:1 gluten-free flour blend in place of regular flour. The texture comes out slightly more delicate, so handle the baked shells gently when filling. Some folks have even used almond flour with good results, though those cookies tend to be more fragile. Either way, keep everything else the same – that filling is naturally gluten-free!
Still have questions? Drop them in the comments below – I love chatting about cookie troubleshooting almost as much as I love eating these little bites of heaven!
PrintIrresistible Best Cannoli Cookies Recipe – 5 Secret Tricks

A delightful twist on the classic Italian cannoli, these cookies are perfect for holiday baking. Crispy, creamy, and packed with flavor, they bring the essence of cannoli into a convenient cookie form.
- Prep Time: 20 minutes
- Cook Time: 15 minutes
- Total Time: 35 minutes
- Yield: 24 cookies 1x
- Category: Dessert
- Method: Baking
- Cuisine: Italian
- Diet: Vegetarian
Ingredients
- 2 cups all-purpose flour
- 1/4 cup granulated sugar
- 1/4 tsp salt
- 1/2 cup unsalted butter, cold and cubed
- 1 large egg yolk
- 2 tbsp milk
- 1 tsp vanilla extract
- 1 cup ricotta cheese, drained
- 1/2 cup powdered sugar
- 1/2 cup mini chocolate chips
- 1/4 tsp cinnamon
Instructions
- Preheat oven to 350°F (175°C). Line a baking sheet with parchment paper.
- In a bowl, mix flour, sugar, and salt. Cut in butter until the mixture resembles coarse crumbs.
- Add egg yolk, milk, and vanilla. Mix until dough forms.
- Roll dough into small balls and flatten slightly on the baking sheet.
- Bake for 12-15 minutes until golden. Let cool.
- For the filling, combine ricotta, powdered sugar, chocolate chips, and cinnamon.
- Once cookies are cool, spread filling on half and sandwich with another cookie.
Notes
- Drain ricotta well to avoid a soggy filling.
- Store cookies in the refrigerator to keep the filling fresh.
- For extra flavor, add orange zest to the dough.
Nutrition
- Serving Size: 1 cookie
- Calories: 120
- Sugar: 8g
- Sodium: 30mg
- Fat: 6g
- Saturated Fat: 3.5g
- Unsaturated Fat: 2g
- Trans Fat: 0g
- Carbohydrates: 14g
- Fiber: 0.5g
- Protein: 2g
- Cholesterol: 25mg