You know that moment when you’re craving apple pie but want something a little different? That’s exactly how these baked apple pie rice paper rolls were born! I was experimenting in my kitchen one rainy afternoon, trying to merge the cozy comfort of apple pie with the fun crunch of rice paper. Wow – what a happy accident! These little rolls give you all the warm cinnamon-apple goodness you love, wrapped in a crispy shell that’s downright addictive. My kids now beg for them instead of traditional pie, and honestly? I don’t blame them. The contrast between the soft, spiced apples and that golden, crackly exterior is pure magic.
Why You’ll Love These Baked Apple Pie Rice Paper Rolls
Trust me, once you try these, you’ll wonder why you ever stuck to regular pie crust! Here’s why these rolls are about to become your new favorite dessert:
- Quick & easy – No rolling out dough or waiting for pastry to chill. From prep to plate in under 35 minutes!
- That addictive crunch – The baked rice paper gets gloriously crisp, like the best part of a pie edge in every bite.
- Portable perfection – These are finger-food friendly (no fork required!), making them ideal for parties or lunchbox treats.
- Lighter twist – All the cozy flavors of apple pie without the heavy, buttery crust weighing you down.
- Endlessly adaptable – Swap in pears or peaches, add nuts, or drizzle with caramel – make it your own!
The first time I made these, my family devoured the whole batch before they even cooled. Consider yourself warned!
Ingredients for Baked Apple Pie Rice Paper Rolls
Here’s everything you’ll need to make these irresistible treats. I’m pretty strict about the apple varieties and rice paper quality – trust me, it makes all the difference!
- 4 rice paper sheets (the 22cm size works best)
- 2 medium apples, peeled and diced (I swear by Granny Smith for that perfect tartness)
- 1 tbsp lemon juice (freshly squeezed keeps the apples bright)
- 2 tbsp packed brown sugar (dark brown gives the deepest flavor)
- 1 tsp ground cinnamon (the good stuff – none of that stale spice jar dust!)
- ¼ tsp freshly grated nutmeg (yes, I grate mine whole – worth the effort)
- 1 tbsp melted butter, cooled slightly (real butter only, please!)
See? Simple ingredients, magical results. Now let’s get rolling!
How to Make Baked Apple Pie Rice Paper Rolls
Okay, let me walk you through my foolproof method for these addictive rolls. I’ve made every mistake possible so you don’t have to! The key is working quickly once those rice papers hit the water – they’re sneaky fast at turning from stiff to perfect to mushy.
Preparing the Apple Filling
First, dice those apples into pea-sized pieces – any bigger and they’ll poke holes in your rice paper. I toss them immediately with lemon juice to prevent browning (my grandma’s trick!). Then comes the fun part – showering them with that cinnamon-brown sugar mix. Really massage it in so every little cube gets coated. The apples should glisten like they’re wearing tiny spice coats!
Assembling the Rice Paper Rolls
Here’s where the magic happens! Fill a pie plate with warm (not hot!) water. Dip each rice paper sheet for exactly 10 seconds – count it out loud like I do! Lay it flat, plop about 2 tablespoons of filling in the center, then fold like a burrito: sides in first, then roll tightly away from you. If you see any apple pieces trying to escape, tuck them back in gently. Pro tip: Keep a damp towel nearby – dry rice paper sticks to everything!
Baking for Crispy Perfection
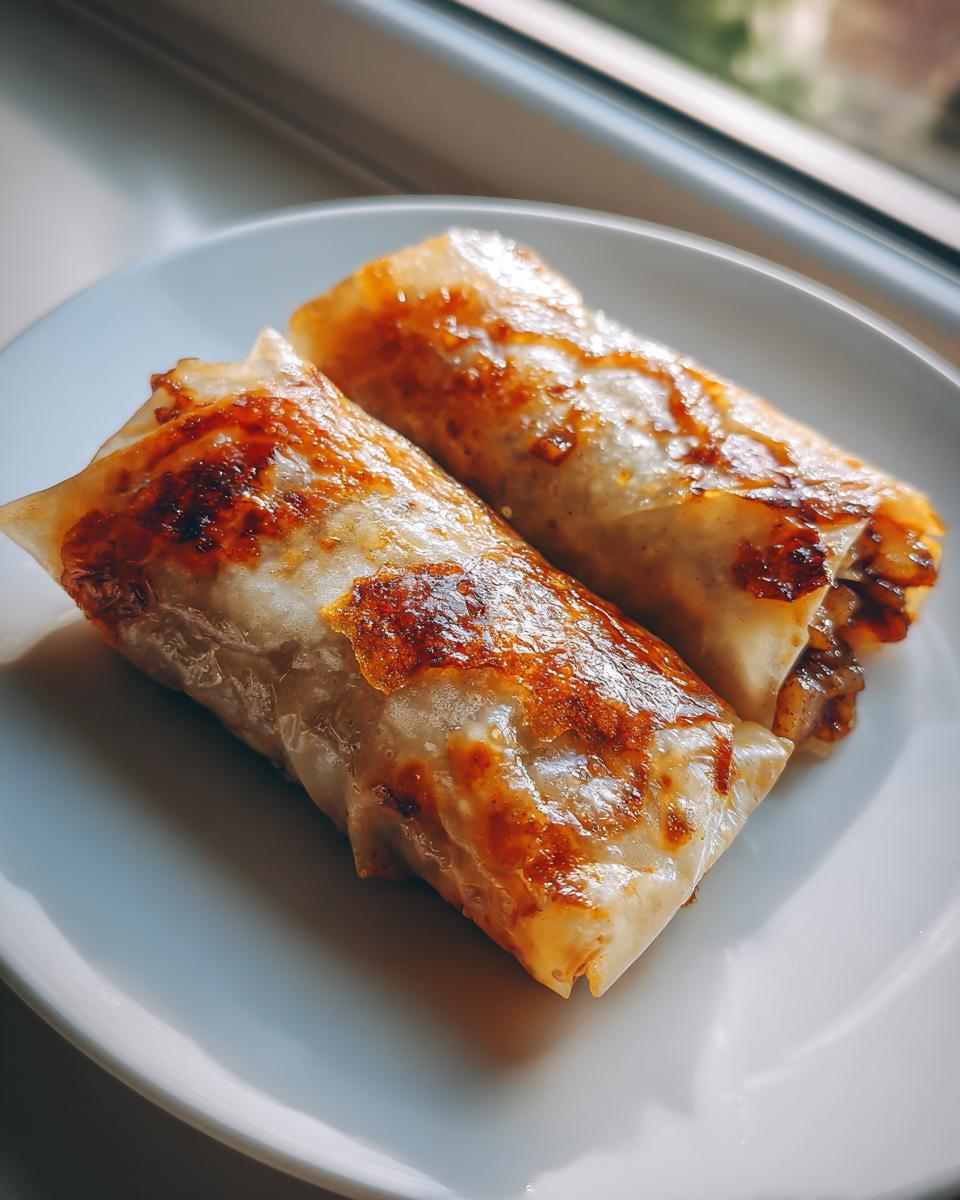
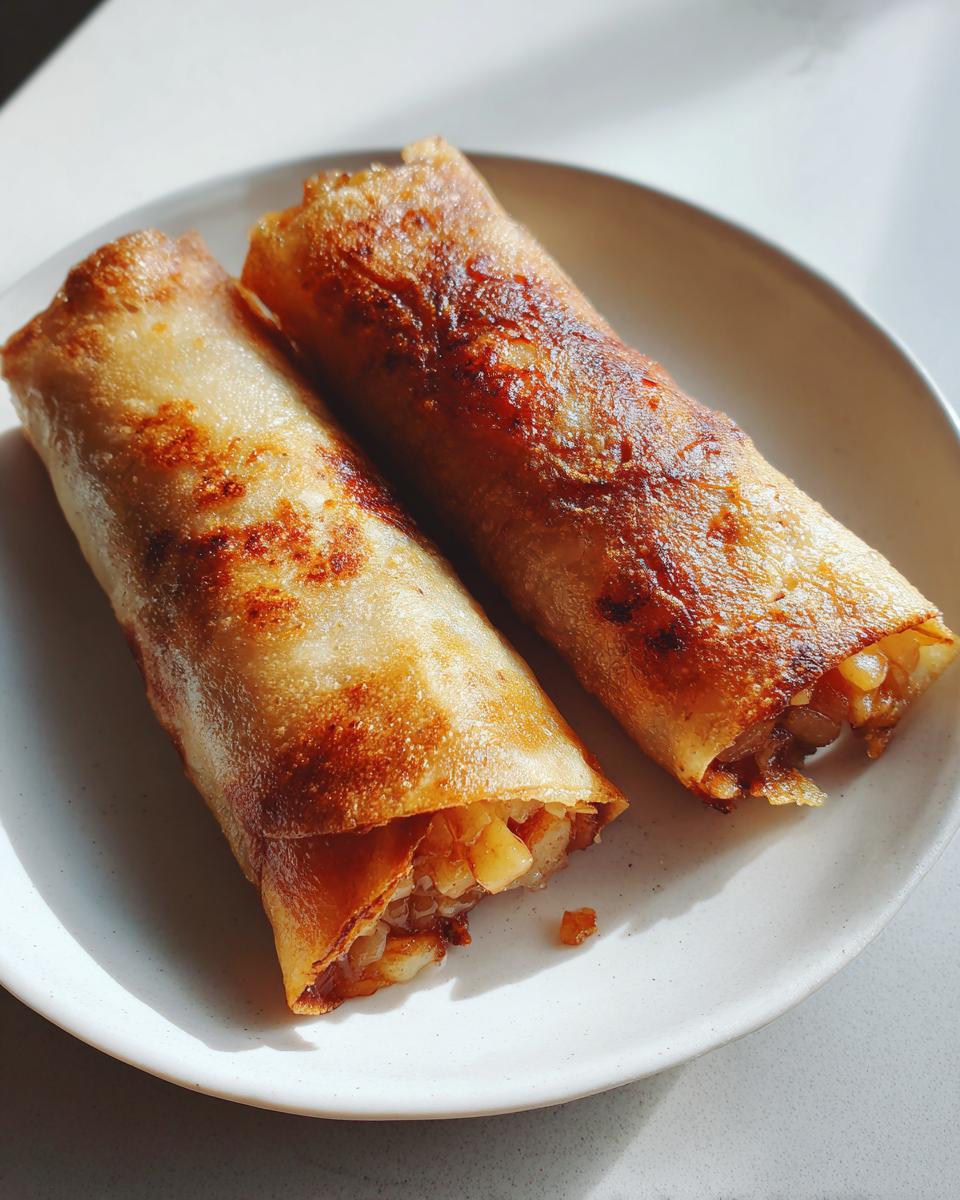
Arrange your rolls seam-side down on a parchment-lined tray. Now, take that melted butter and brush generously – this creates those gorgeous golden bubbles! Bake at 350°F for 15 minutes, then peek. They should sound hollow when tapped. Need more crisp? Give them another 3-5 minutes. Resist opening the oven too often though – we want steady heat for that perfect crackle!
Tips for the Best Baked Apple Pie Rice Paper Rolls
After dozens of test batches (and happy taste-testers!), here are my can’t-live-without secrets for flawless rolls every time:
- Serve warm – That crisp texture starts fading after about 20 minutes out of the oven. Reheat leftovers in a 300°F oven for 5 minutes to revive the crunch.
- Taste your apples first – Adjust sugar based on their natural sweetness. Tart apples might need an extra teaspoon!
- Choose rockstar apples – Granny Smith or Honeycrisp hold their shape best during baking. Mushy apples = sad, soggy rolls.
- Work in an assembly line – Prep all fillings before wetting rice papers to avoid panic-rolling.
- Don’t skimp on butter – That golden crust comes from proper butter brushing. Pretend you’re painting a masterpiece!
Follow these, and you’ll get rolls so good, they might just replace traditional pie at your next gathering!
Serving Suggestions for Baked Apple Pie Rice Paper Rolls
Oh, the possibilities! While these rolls shine on their own, here are my favorite ways to gild the lily:
- Classic combo: A scoop of vanilla ice cream melting over the warm rolls
- Drizzle with salted caramel sauce (I add a pinch of sea salt to mine)
- Dust with powdered sugar for a snowy winter look
- Serve with whipped cream flavored with a dash of bourbon
Honestly? They rarely make it past the first suggestion in my house – we’re too busy eating!
Storage and Reheating
These baked apple pie rice paper rolls are absolute best fresh from the oven, but here’s how to handle leftovers (if you miraculously have any!): Store cooled rolls in an airtight container at room temperature for up to 1 day. When ready to enjoy again, pop them in a 300°F oven for 5 minutes to bring back that glorious crispness – microwaving will just make them sad and soft. Pro tip: I sometimes make extra filling to whip up fresh rolls the next day!
Nutritional Information
Here’s the nutritional breakdown for one baked apple pie rice paper roll (because let’s be real – who stops at just one?). Keep in mind these are estimates – your actual numbers might vary slightly depending on your specific ingredients:
- Calories: 120
- Sugar: 10g
- Sodium: 50mg
- Fat: 3g (2g saturated, 1g unsaturated)
- Carbohydrates: 22g
- Fiber: 2g
- Protein: 1g
Remember, these numbers are approximate and can change based on the exact brands you use or if you tweak the recipe (like adding extra sugar or butter – no judgment here!). For precise dietary needs, I recommend using a nutrition calculator with your specific ingredients. That said, compared to traditional apple pie, these rolls are definitely the lighter option while still satisfying that sweet tooth!
FAQs About Baked Apple Pie Rice Paper Rolls
I get so many questions about these addictive little rolls – here are the answers to everything you’ve been wondering!
Can I air-fry these instead of baking?
Absolutely! My neighbor swears by the air fryer method. Just brush the rolls with butter as usual, then cook at 350°F for about 8 minutes, flipping halfway. They’ll get super crispy – maybe even more than oven-baked! Just check them often after 6 minutes since air fryers can vary.
Help! My rice paper rolls turned soggy – what did I do wrong?
Oh honey, I’ve been there! Usually it’s one of three things: over-soaking the rice paper (stick to 10 seconds max!), underbaking (they should sound hollow when tapped), or overcrowding the baking sheet. Give them space to crisp up properly! Also, make sure your apple filling isn’t too wet – drain any excess liquid before rolling.
What other fruits could I use besides apples?
Get creative! Pears work beautifully with cardamom instead of cinnamon. I’ve done peach-mango versions in summer that were to die for. Even berries (mixed with a little jam to bind them) make fantastic rolls. The possibilities are endless – just keep the pieces small and pat very juicy fruits dry first.
Can I make these ahead of time?
You can prep the filling a day ahead and store it covered in the fridge (the flavors actually deepen!). But assemble and bake right before serving – rice paper doesn’t hold well once rolled. For parties, I’ll sometimes have all my fillings prepped and rice papers ready to dip when guests arrive – makes for fun interactive dessert-making!
Are these gluten-free?
Yes! Rice paper is naturally gluten-free, making these rolls perfect for friends with dietary restrictions. Just double-check that your spices and other ingredients are certified gluten-free if that’s a concern. My gluten-sensitive niece adores these as her special treat at family gatherings!
Give These Rolls a Try and Tell Me What You Think!
I can’t wait for you to experience these crispy, apple-pie wonders in your own kitchen! Snap a pic of your golden rolls and tag me – nothing makes me happier than seeing your delicious creations. Now go bake, enjoy, and prepare for the compliments to roll in!
Print55-Minute Baked Apple Pie Rice Paper Rolls Crispy Bliss

A creative twist on classic apple pie, these rice paper rolls are baked to perfection with a crunchy texture and sweet apple filling.
- Prep Time: 15 mins
- Cook Time: 20 mins
- Total Time: 35 mins
- Yield: 4 rolls 1x
- Category: Dessert
- Method: Baking
- Cuisine: Fusion
- Diet: Vegetarian
Ingredients
- 4 rice paper sheets
- 2 apples, peeled and diced
- 1 tbsp lemon juice
- 2 tbsp brown sugar
- 1 tsp cinnamon
- 1/4 tsp nutmeg
- 1 tbsp melted butter
Instructions
- Preheat oven to 350°F (175°C).
- Toss diced apples with lemon juice, brown sugar, cinnamon, and nutmeg.
- Soak rice paper sheets in warm water for 10 seconds until pliable.
- Place a spoonful of apple filling in the center of each rice paper sheet.
- Fold sides inward and roll tightly.
- Brush rolls with melted butter.
- Bake for 15-20 minutes until crispy.
Notes
- Serve warm for best texture.
- Add a scoop of vanilla ice cream for extra indulgence.
- Adjust sugar to taste.
Nutrition
- Serving Size: 1 roll
- Calories: 120
- Sugar: 10g
- Sodium: 50mg
- Fat: 3g
- Saturated Fat: 2g
- Unsaturated Fat: 1g
- Trans Fat: 0g
- Carbohydrates: 22g
- Fiber: 2g
- Protein: 1g
- Cholesterol: 5mg