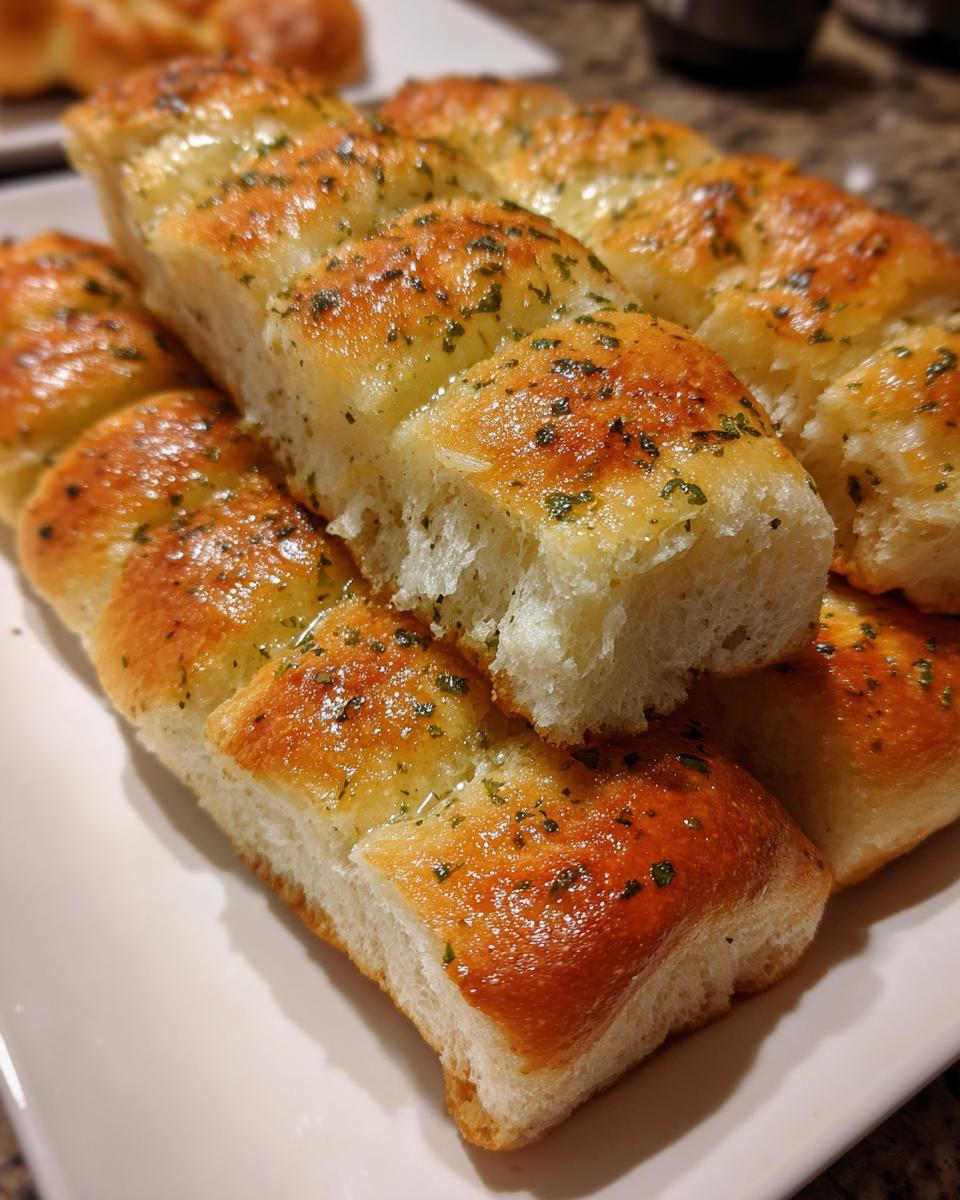
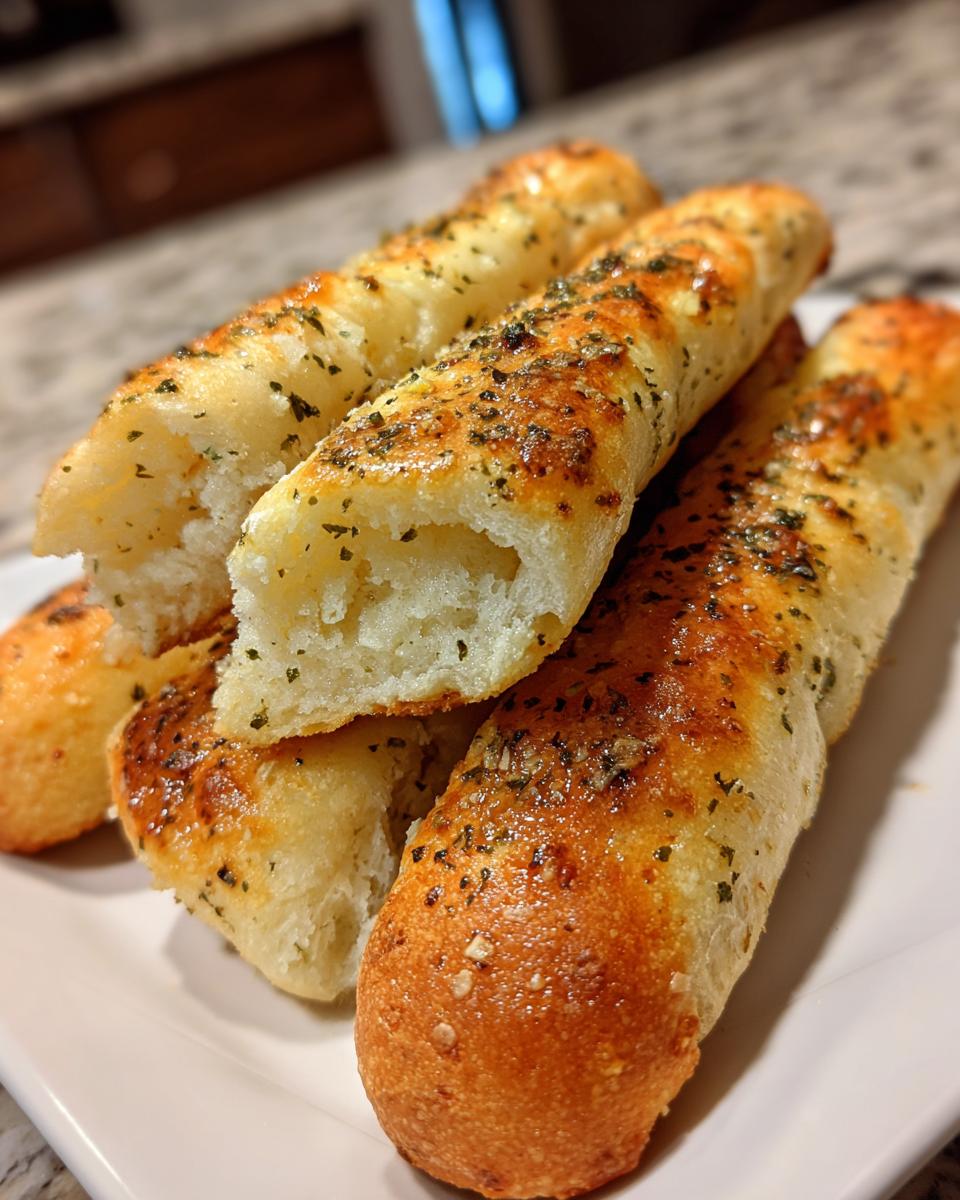
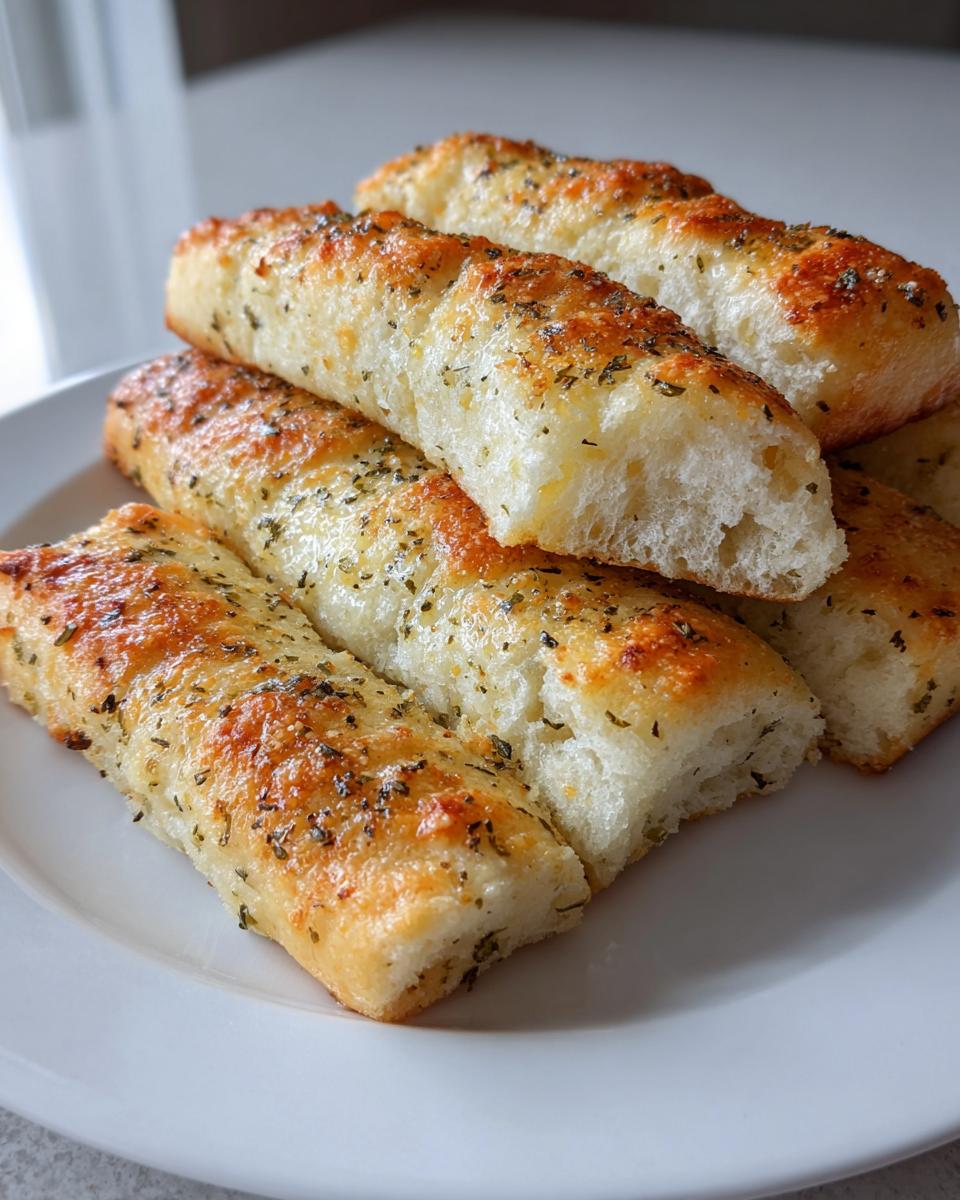
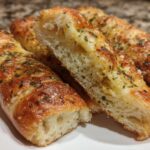
There’s something magical about Olive Garden’s warm, buttery breadsticks – that first whiff of garlic when the basket hits the table, the perfect pull-apart texture that keeps you reaching for “just one more.” For years, I thought gluten-free versions could never compare until my sister’s celiac diagnosis sent me on a kitchen mission. After more failed attempts than I’d like to admit (let’s just say some batches could’ve doubled as hockey pucks), I finally cracked the code for these gluten-free copycat Olive Garden breadsticks.
What makes these special? Unlike dense GF breads that crumble at first bite, these stay incredibly soft thanks to a few sneaky tricks I learned along the way. The secret starts with a high-quality gluten-free flour blend (I swear by Bob’s Red Mill 1-to-1) and proper kneading technique that gives them that signature stretch. My kids actually prefer these over regular breadsticks now – and between you and me, that garlic butter topping might have something to do with it.
Whether you’re gluten-free by necessity or just exploring alternatives, these breadsticks deliver all the cozy comfort of the restaurant classic without the gluten guilt. Just don’t blame me when your family starts requesting them weekly!
Why You’ll Love These Gluten-Free Copycat Olive Garden Breadsticks
Listen, I get it – gluten-free bread can be a total letdown. But these breadsticks? They’re the real deal. Here’s why they’ve become a staple in my kitchen:
- Unbelievable texture: Soft, slightly chewy, and actually hold together (no sad crumbling here!)
- Tastes like the real thing: That garlic-butter magic will fool even the pickiest eaters
- Crazy easy to make: No fancy techniques – just mix, rise, and bake
- Perfect for dietary needs: Easily made vegan with a flax egg and dairy-free butter
- Better than store-bought: Fresh from the oven beats packaged GF breadsticks any day
The best part? You probably have most ingredients already. Trust me, once you try these warm from the oven, you’ll never miss the gluten-filled version again.
Ingredients for Gluten-Free Copycat Olive Garden Breadsticks
Here’s everything you’ll need to make these irresistible breadsticks – I’ll walk you through why each ingredient matters and any special prep notes:
- 2 cups gluten-free all-purpose flour: Not all blends are created equal! Look for one with xanthan gum already added (my go-to is Bob’s Red Mill 1-to-1). This keeps them from crumbling apart.
- 1 tbsp sugar: Just enough to feed the yeast – you won’t taste the sweetness.
- 1 tsp salt: Crucial for flavor – don’t skip it!
- 1 tbsp instant yeast: No proofing needed – just mix right in with the dry ingredients.
- 1 cup warm water (110°F/45°C): Test it on your wrist – it should feel comfortably warm, not hot. Too cold and the yeast won’t activate; too hot and you’ll kill it.
- 2 tbsp olive oil: Adds moisture and helps create that tender crumb.
- 1 egg (or 1 flax egg for vegan): Whisk 1 tbsp ground flax + 3 tbsp water, let sit 5 minutes to thicken if going plant-based.
- 2 tbsp melted butter (divided): Half for brushing before baking, half for that garlicky finish.
- 1/2 tsp garlic powder + 1/2 tsp dried oregano: The signature Olive Garden flavor combo – use fresh garlic if you’re feeling fancy!
Pro tip: Measure your flour by spooning it into the cup and leveling off – packing it down can make your dough too dry!
Equipment You’ll Need
No fancy gadgets required here – just grab these basics from your kitchen:
- Large mixing bowl: Big enough for the dough to rise without overflowing
- Baking sheet: Standard half-sheet pan works perfectly
- Pastry brush: For that essential garlic butter glaze (a spoon works in a pinch!)
- Parchment paper or silicone mat: Keeps cleanup easy and prevents sticking
- Measuring cups/spoons: Accuracy matters with gluten-free baking
That’s it! If you’ve got these, you’re ready to make magic happen.
How to Make Gluten-Free Copycat Olive Garden Breadsticks
Okay, let’s get to the fun part – turning those simple ingredients into golden, buttery perfection! I’ll walk you through each step just like I’m right there in the kitchen with you (minus the floury high-fives). Follow these steps, and you’ll have warm breadsticks ready to devour in about an hour.
Preparing the Dough
First, whisk together your flour, sugar, salt, and yeast in that big mixing bowl. Make sure everything’s evenly distributed – I like to give it a few extra whisks to really combine it well.
Now, pour in your warm water and olive oil. Here’s where things get fun! Mix with a wooden spoon until it comes together into a shaggy dough. It’ll look rough at first – that’s totally normal. Gluten-free dough behaves differently than regular dough, so don’t panic if it seems sticky.
Time to knead! Turn it out onto a lightly floured surface (just a sprinkle of GF flour) and knead for about 5 minutes. You’re looking for it to become smooth and slightly springy. Don’t overdo it – gluten-free dough doesn’t need the workout that wheat dough does. When it feels like soft playdough, you’re done!
Pop it back in the bowl, cover with a clean towel, and let it rise somewhere warm for 30 minutes. It won’t double like wheat dough, but you should see some puffiness – that means your yeast is happily doing its job.
Shaping and Baking
Preheat your oven to 375°F (190°C) while the dough rests. Line that baking sheet with parchment – trust me, cleanup is so much easier!
Now, divide your dough into 12 equal pieces. I like to eyeball it, but if you want precision, weigh them at about 1.5 ounces each. Roll each piece into a 6-inch rope – don’t stress about perfection, rustic is charming!
Arrange them on the baking sheet about an inch apart. Give them a quick brush with half your melted butter (this helps the egg wash stick), then whisk that egg (or flax egg) and brush it generously over each one. This gives that gorgeous golden color.
Let them rest uncovered for 15 minutes – they’ll puff up a bit more. Then into the oven they go for 15 minutes. You’ll know they’re done when they’re lightly golden and sound hollow if tapped.
Adding the Garlic Butter Topping
This is where the magic happens! While the breadsticks bake, mix your remaining melted butter with garlic powder and oregano. The second those beauties come out of the oven, brush this heavenly mixture all over them. You’ll hear that satisfying sizzle as the butter soaks in.
Pro tip: Do this while they’re still on the baking sheet – less mess! Let them cool just enough so you don’t burn your fingers, then serve warm. That first bite of garlicky, buttery goodness? Pure bliss.
Tips for Perfect Gluten-Free Copycat Olive Garden Breadsticks
After making these breadsticks more times than I can count (my family’s obsession is real), here are my hard-earned secrets for guaranteed success every time:
- Temperature matters: That water needs to be Goldilocks-warm – around 110°F. Too cold and the yeast won’t wake up; too hot and you’ll kill it. I test it on my wrist like baby formula.
- Oven check: Gluten-free baking hates uneven heat. Grab an oven thermometer – mine was off by 25 degrees once! Those extra minutes made all the difference.
- Storage smarts: These disappear fast, but if by miracle you have leftovers, stash them in an airtight container with a paper towel to absorb moisture. They’ll stay soft for days.
- Knead gently: Unlike wheat dough, GF dough doesn’t need punishment. Just 5 minutes of gentle kneading creates the perfect texture without turning tough.
Follow these, and you’ll have breadstick perfection that’ll make Olive Garden jealous!
Variations and Substitutions
The beauty of these breadsticks is how easily you can tweak them to match your taste or pantry! Here are my favorite ways to mix things up:
- Dairy-free delight: Swap regular butter for vegan butter or coconut oil – the garlic topping still tastes amazing!
- Cheesy twist: Add 1/4 cup grated Parmesan to the dough or sprinkle on top before baking (my nephew calls these “pizza sticks”).
- Sweet swap: Replace sugar with honey or maple syrup – just warm it slightly to blend easier.
- Herb explosion: Mix in 1 tsp Italian seasoning or fresh chopped rosemary for extra flavor.
- Spice it up: Add 1/4 tsp crushed red pepper to the butter glaze if you like a little kick.
Don’t be afraid to experiment – I’ve yet to find a variation that wasn’t delicious!
Serving Suggestions
These gluten-free breadsticks are begging to be dunked in something delicious! My family loves them with warm marinara for movie nights, beside a big bowl of minestrone, or as the perfect side to Italian salads. They’re also fantastic torn into pieces for homemade croutons – just toast them up with a sprinkle of Parmesan!
Storing and Reheating
Here’s the good news – these breadsticks stay surprisingly fresh! Store any leftovers (if you have any!) in an airtight container at room temp for up to 3 days. For longer storage, freeze them in a zip-top bag for about a month. To bring back that just-baked magic, pop them in a 350°F oven for 5-7 minutes until warm and crisp again. A quick brush with melted butter when they come out makes them taste brand new. Pro tip: Skip the microwave unless you like them soft – the oven is key for that perfect texture!
Nutrition Information
While I’m no dietitian, here’s a general idea of what you’re getting in these amazing gluten-free breadsticks. Remember, these numbers can vary based on the specific brands of ingredients you use – gluten-free flours and butter substitutes can change things up:
- Serving size: 1 breadstick
- Calories: Around 120
- Carbs: 18g (with 2g fiber from the GF flour)
- Fat: 5g (mostly from that glorious butter topping)
- Protein: 3g
Compared to Olive Garden’s original breadsticks, these are actually lighter while still satisfying that carb craving! The exact nutrition will depend on your flour blend and whether you use egg or flax egg, butter or vegan alternative. My philosophy? Life’s too short to stress over every calorie when you’re enjoying homemade goodness. Just savor every garlicky bite!
Important note: This is an estimate only. For precise dietary needs, always check the nutrition labels on your specific ingredients.
FAQs About Gluten-Free Copycat Olive Garden Breadsticks
I’ve gotten so many great questions about these breadsticks over the years – here are the ones that pop up most often with my tried-and-true answers:
Can I use regular all-purpose flour instead?
You absolutely can! Just skip the xanthan gum (it’s only needed for gluten-free flours) and reduce kneading time to about 3 minutes. The texture will be slightly different – more stretchy than our GF version – but just as delicious.
Help! My dough is too sticky – what do I do?
Don’t panic! Gluten-free dough tends to be stickier than wheat dough. Sprinkle just a teaspoon of GF flour at a time onto your hands and work surface until it’s manageable. Resist the urge to add too much extra flour – it’ll make your breadsticks dry.
What’s the best yeast for this recipe?
I always use instant yeast (also called rapid-rise or bread machine yeast) because it doesn’t need proofing. If you only have active dry yeast, proof it in the warm water with a pinch of sugar first until foamy (about 5 minutes) before adding other ingredients.
How can I make these completely vegan?
Easy swaps! Use a flax egg (1 tbsp ground flax + 3 tbsp water) instead of regular egg, and choose dairy-free butter for the topping. The texture might be slightly denser but still totally delicious.
Why didn’t my breadsticks rise much?
Three likely culprits: 1) Your yeast was old (check the expiration date!), 2) The water was too hot/cold, or 3) They didn’t get enough rising time. Remember – gluten-free dough won’t double like wheat dough, but you should see some puffiness.
Did these breadsticks become your new favorite? I’d love to hear how they turned out! Rate the recipe below if they hit the spot for you.
PrintIrresistible 12-Inch Gluten-Free Copycat Olive Garden Breadsticks Recipe
Make gluten-free breadsticks that taste like Olive Garden’s famous ones. These soft, buttery sticks are perfect for any meal.
- Prep Time: 20 minutes
- Cook Time: 15 minutes
- Total Time: 1 hour 5 minutes
- Yield: 12 breadsticks 1x
- Category: Bread
- Method: Baking
- Cuisine: Italian-American
- Diet: Gluten Free
Ingredients
- 2 cups gluten-free all-purpose flour
- 1 tbsp sugar
- 1 tsp salt
- 1 tbsp instant yeast
- 1 cup warm water
- 2 tbsp olive oil
- 1 egg (or flax egg for vegan)
- 2 tbsp melted butter
- 1/2 tsp garlic powder
- 1/2 tsp dried oregano
Instructions
- Mix flour, sugar, salt, and yeast in a bowl.
- Add warm water and olive oil, then mix until a dough forms.
- Knead for 5 minutes until smooth.
- Cover and let rise for 30 minutes.
- Preheat oven to 375°F (190°C).
- Divide dough into 12 pieces and shape into sticks.
- Place on a baking sheet, cover, and let rise for 15 minutes.
- Brush with beaten egg (or flax egg) and bake for 15 minutes.
- Mix melted butter, garlic powder, and oregano.
- Brush warm breadsticks with butter mixture and serve.
Notes
- Store leftovers in an airtight container for up to 3 days.
- For crispier breadsticks, bake 2-3 minutes longer.
- Use dairy-free butter for a vegan version.
Nutrition
- Serving Size: 1 breadstick
- Calories: 120
- Sugar: 2g
- Sodium: 200mg
- Fat: 5g
- Saturated Fat: 2g
- Unsaturated Fat: 2g
- Trans Fat: 0g
- Carbohydrates: 18g
- Fiber: 2g
- Protein: 3g
- Cholesterol: 15mg